

Last Updated on May 14, 2025
To get air out of your RV water lines, start by turning off all water sources and depressurizing the system for safety. Then, connect to a municipal water supply or fill your fresh water tank.
Open all faucets to allow trapped air to escape while running the water pump to maintain pressure. Listen for sputtering and wait until water flows steadily.
Close faucets once air clears. Checking valve positions and tightening fittings prevents future air intrusion. For detailed steps and troubleshooting, keep exploring these methods.
Key Takeaways
- Open all faucets and run water to push air out until flow is steady and sputtering stops.
- Activate the RV water pump while bleeding faucets to maintain pressure and prevent spurting.
- Inspect and tighten all hose connections and clamps to stop air from entering the system.
- Start bleeding from the faucet farthest from the pump, then proceed to closer faucets.
- Check and ensure water tanks are full and valves are properly positioned before bleeding air.
Prep for Success: Understanding Air in RV Water Lines
Although air in your RV water lines may seem minor, it can greatly disrupt water flow and pressure, affecting your onboard water system’s performance. Air typically enters through loose or cracked connections on the pump’s inlet side, damaged pickup hoses, or faulty clamps.
Vibrations while driving and city water supplies can also introduce air pockets. Air can enter RV water lines through loose connections, damaged hoses, faulty clamps, vibrations, or city water sources.
You’ll notice symptoms like sputtering faucets, inconsistent pressure, and noisy water flow caused by cavitation. Both hot and cold lines may spit air simultaneously if the problem is near the pump. The water pump often runs longer or cycles irregularly when trying to stabilize pressure.
Multiple symptoms may occur simultaneously, indicating a more significant problem. Understanding these causes and symptoms helps you diagnose air intrusion effectively, ensuring you maintain a reliable and efficient water system in your RV.
Tools and Safety Precautions Needed
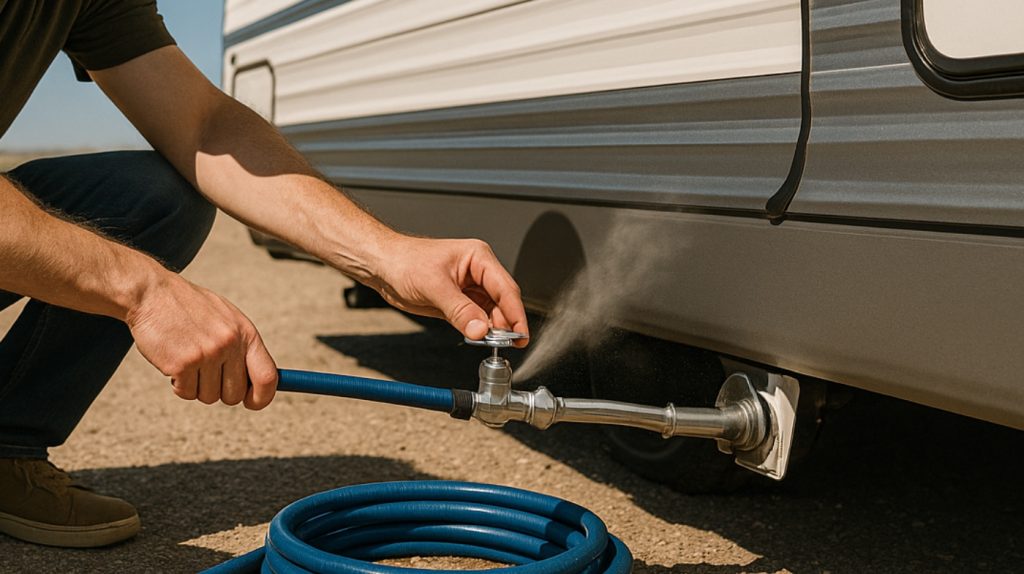
Before you begin removing air from your RV water lines, gather the essential tools and observe strict safety precautions to protect both yourself and the system. You’ll need a reliable water pressure source, an adjustable wrench, screwdrivers, pliers, PEX tubing cutter, in-line bleeder valves, flexible hoses, and connectors.
Always depressurize the system before disconnecting fittings to avoid water spray or injury. Wear gloves and eye protection, and confirm all water sources are off to prevent flooding. It is important to identify the issue by determining whether the air is in hot or cold water lines to effectively target the problem.
Use only RV-safe tools rated for potable water to maintain system integrity. Attach bleeder valves securely, open them gradually to release air, and close promptly to maintain pressure. Avoid excessive force on fittings to prevent damage, and keep all tools clean and organized for efficient, safe operation.
Removing Air Using Municipal Water System
Using a municipal water system provides a reliable, pressurized source to efficiently purge air from your RV’s water lines.
First, connect your RV to the municipal water supply, making certain all valves and the water heater’s relief valve are properly set. Open every faucet—inside and outside, including the outside shower if available.
As municipal water pressurizes the system, air will be pushed out through the faucets. Listen for sputtering; continue running water until flow stabilizes smoothly. Additionally, checking the water pump switch can prevent spurting caused by air trapped in the lines.
After bleeding air from all faucets in sequence, close them and disconnect the municipal water hose. Activate your RV’s water pump to prime the system and restore pressure.
Finally, test each faucet again to confirm consistent water flow and check for leaks or air pockets to make sure your water lines are fully purged.
Removing Air Using Fresh Water Tank
When you rely on your RV’s fresh water tank to remove air from the lines, start by filling the tank as much as possible and confirming the water pump is fully operational.
Prime the pump to guarantee it creates adequate pressure, which dislodges trapped air throughout the system. Activate the water pump and open the faucet farthest from the tank first, allowing water to flow steadily and pushing air out.
Proceed to open each faucet systematically, including outside and shower faucets, until water runs smoothly without sputtering. Monitor the fresh water level to avoid depletion during this process, especially when boondocking.
It is important to check that all valves are in the correct position, as incorrect valve settings can prevent proper suction and air removal from the tank valve positions. Regularly inspect seals, O-rings, and connections to prevent air leaks that compromise system pressurization and effectiveness.
Steps to Confirm Air Removal
After pushing air out of your RV’s water lines by systematically opening faucets and maintaining pump pressure, you need to verify that no air remains in the system. Confirming air removal confirms reliable water flow and prevents damage.
Follow these steps:
- Observe water flow carefully when you open each faucet; steady streams without sputtering indicate air is cleared.
- Listen for gurgling sounds that suggest trapped air; silence confirms proper purging.
- Use a pressure gauge to check for stable and consistent pressure across the system.
- Inspect all connections and faucets for leaks that might’ve developed during purging.
Additionally, ensure the water pump is properly cleared by running it with the winterizing hose attached, as compressed air method prevents water pump damage. Completing these checks assures that your RV water system functions efficiently and safely after air removal.
Troubleshooting Common Issues
Although air in your RV water lines can cause frustrating issues like sputtering faucets and low pressure, you can troubleshoot effectively by pinpointing its source. Air trapped in RV water lines leads to sputtering faucets and low pressure but can be resolved by identifying its source.
Start by inspecting all valves to verify correct positioning and check the water heater relief valve is closed. Examine connections and fittings for leaks, especially on the pump’s inlet side, as these commonly introduce air.
It is also useful to isolate the problem by disconnecting the water pump inlet line and backflowing with air to check for leaks on inlet side. Note symptoms such as noisy pump operation, inconsistent flow, or water heater malfunction.
Confirm the freshwater tank is full to prevent the pump from drawing air. Use a pressure gauge and open all faucets to aid bleeding. If you have access to municipal water, use it to pressurize the system quickly.
Preventing Air Buildup in Water Lines
To prevent air buildup in your RV water lines, you need to implement a combination of regular maintenance, thoughtful system design, and proper water pressure management.
Start by inspecting pressure gauges and tightening all fittings to stop air leaks. Design your system with appropriately sized pumps and piping, and consider installing air release valves at high points.
It is also important to ensure that the fresh water drain valve is properly closed to prevent air intake into the system. Maintain consistent water pressure using regulators and avoid frequent pump cycling to reduce air introduction.
Follow these key steps:
- Conduct routine checks on water filters and pump operation to detect early air presence.
- Use looped piping and flexible hoses to facilitate air escape and prevent kinks.
- Keep water tanks full and clean to minimize air pockets and bacterial growth.
- Regularly run faucets to circulate water and dislodge trapped air effectively.
Special Considerations for Boondocking and Winterization
When boondocking, managing your RV’s water supply demands careful planning to conserve resources and maintain system integrity without external hookups. Use water-efficient appliances and minimize waste to extend your supply.
Selecting an appropriate tank capacity based on your travel needs can significantly improve water management efficiency. Install a reliable filtration system to purify water from varying sources, guaranteeing safe consumption.
Store water securely in tanks and maintain proper wastewater storage to prevent contamination. For winterization, drain all water lines and circulate RV-specific antifreeze using your water pump to eliminate air and protect against freezing.
It is important to remove smoke detector batteries during winterization to prevent leaks and ensure safety. Bypass the water heater to avoid damage, and verify low point drains are clear and sealed post-winterization.
This prevents leaks and air entry. Properly executed, these steps maintain your water system’s functionality and integrity during boondocking and cold storage.
Maintaining Your RV Water System Regularly
You should regularly inspect your RV water system for air leaks to prevent pressure drops and flow interruptions. Clean and replace filters as specified to maintain ideal water quality and system efficiency.
Always monitor water pressure levels to avoid damage from excessive or fluctuating pressure. Additionally, using a water pressure regulator is essential to protect your plumbing from high campground water pressure that could cause pipe bursts.
Inspect for Air Leaks
Regularly inspecting your RV water system for air leaks is essential to maintaining consistent water pressure and preventing pump damage. Air leaks often occur at hose connections, pump attachments, valve seals, and faucet connections.
To detect leaks, apply soapy water to suspected areas and watch for bubbles indicating escaping air. Pressure testing using an air compressor and gauge can also reveal leaks by showing pressure drops.
Professional RV technicians utilize specialized testing methods that can improve leak detection accuracy. Follow these steps to inspect for air leaks:
- Visually check all hose and valve connections for looseness or damage.
- Apply soapy water to connections and observe for bubbles.
- Use a pressure gauge to monitor for abnormal pressure drops.
- Listen for noisy pumps or irregular water flow as signs of air intrusion.
Clean and Replace Filters
After inspecting and addressing air leaks in your RV water lines, maintaining clean and functional filters plays a key role in ensuring water quality and system performance. Use a 1-micron sediment filter to capture particles and microbial cysts, or consider compressed carbon block filters for improved chlorine and taste removal.
Clean filters every six months or after each trip using a water filter wrench to remove and inspect them. Rinse filters with clean water before reinserting and sanitize with a diluted bleach solution to prevent bacterial buildup.
Replace filters if they show wear or exceed their typical lifespan, which ranges from 2-6 months for sediment filters to up to 2 years for KDF units. Always follow manufacturer guidelines to maintain system integrity and extend filter life.
Regular checks and maintenance of filtration systems are recommended to ensure a reliable and enjoyable water experience while RVing, as routine maintenance helps prevent clogging and system failure.
Monitor Water Pressure Levels
A water pressure gauge provides critical insight into your RV’s plumbing health by measuring system pressure and helping you spot potential issues before they cause damage.
Since city water pressure often exceeds the RV system’s 40-45 psi limit, installing and monitoring a pressure regulator is essential. Regular checks prevent leaks, pump overworking, and component failure.
It is also recommended to perform pressure tests at 80 psi to ensure the fresh water system is sound and free from leaks. To effectively monitor water pressure:
- Use an inline pressure gauge at the city water hookup or after filters.
- Perform pressure tests by pressurizing the system to 80-100 psi for leak detection.
- Observe pump cycling; frequent restarts indicate leaks or pressure loss.
- Inspect and maintain regulators and connections for consistent pressure control.
Frequently Asked Questions
Can Air in Water Lines Cause Damage to My RV Plumbing?
Yes, air in your RV water lines can cause damage. It creates inconsistent water pressure, which strains pumps and faucets, reducing their lifespan. Air pockets may indicate leaks or cracks, leading to water damage inside your RV.
Over time, this can result in mold, structural issues, and costly repairs. You should inspect and repair any leaks promptly and maintain your plumbing system to prevent air from entering and causing damage.
How Often Should I Bleed Air From RV Water Lines?
You should bleed air from your RV water lines regularly, especially after filling the fresh water tank or detecting symptoms like low water pressure or gurgling noises.
Incorporate this into your routine maintenance schedule, increasing frequency during active travel seasons. Also, bleed the lines before and after storage to prevent airlocks and stale water.
Is It Safe to Use Compressed Air to Remove Water From Lines?
Yes, using compressed air to remove water from your RV lines is safe when done correctly. Set the pressure between 30 and 50 psi to avoid damaging the plumbing.
Attach the air supply to the city water connection, and blow out each line individually to guarantee thorough water removal.
Can Temperature Changes Cause Air to Enter Water Lines?
Yes, temperature changes can cause air to enter water lines. When pipes expand and contract due to temperature fluctuations, you risk creating micro-cracks or loosening joints that let air in. Cold weather contracts pipes, sometimes forming vacuums that draw air.
Warm temperatures can loosen fittings, increasing air infiltration. Additionally, sudden temperature shifts cause dissolved gases in water to form bubbles, further introducing air into the system.
Will Adding Antifreeze Affect Air Removal in Winterization?
Adding antifreeze during winterization helps displace water in your RV’s lines, reducing trapped air pockets. While antifreeze itself doesn’t directly remove air, it promotes thorough drainage and prevents freezing damage.
To optimize air removal, you should first blow out water with an air compressor or open drain valves, then circulate antifreeze to protect the system. This combined approach guarantees minimal air remains and safeguards plumbing during winter.
Keep It Clear: Prevent Air Intrusion in RV Water Lines
Clearing air from your RV water lines is as essential as priming a pump before a deep-sea dive skip it, and you risk disruption. By following these precise steps and routine maintenance, you guarantee smooth water flow and avoid frustrating interruptions.
Whether hooked to municipal water or relying on your fresh tank, staying vigilant keeps your system reliable. Treat your RV’s plumbing like clockwork, and it’ll serve you flawlessly on every adventure, no matter where the road leads.

