
Last Updated on July 9, 2025
To install an inverter in your motorhome, first choose a unit rated above your total power needs and place it near your battery bank for minimal voltage drop. Mount it securely in a dry, ventilated area, then wire it with properly gauged cables, including inline fuses or breakers for safety.
Connect positive and negative terminals correctly, ground the chassis to the RV frame, and test the system under load to ensure reliable operation. Following these steps ensures safe, efficient power conversion, but there’s more to optimize your setup.
Key Takeaways
- Assess your power needs and select an inverter with sufficient continuous and surge wattage capacity for your motorhome appliances.
- Choose a well-ventilated, dry, and secure location near the battery bank for mounting the inverter to reduce voltage drop.
- Use appropriately gauged wiring and install inline fuses or circuit breakers close to the battery, ensuring correct polarity and secure connections.
- Mount the inverter firmly on a vibration-free surface, then test its operation with appliances and verify proper voltage and safety features.
- Perform regular maintenance by inspecting wiring, ventilation, and connections, and follow manufacturer guidelines for ongoing safety and compliance.
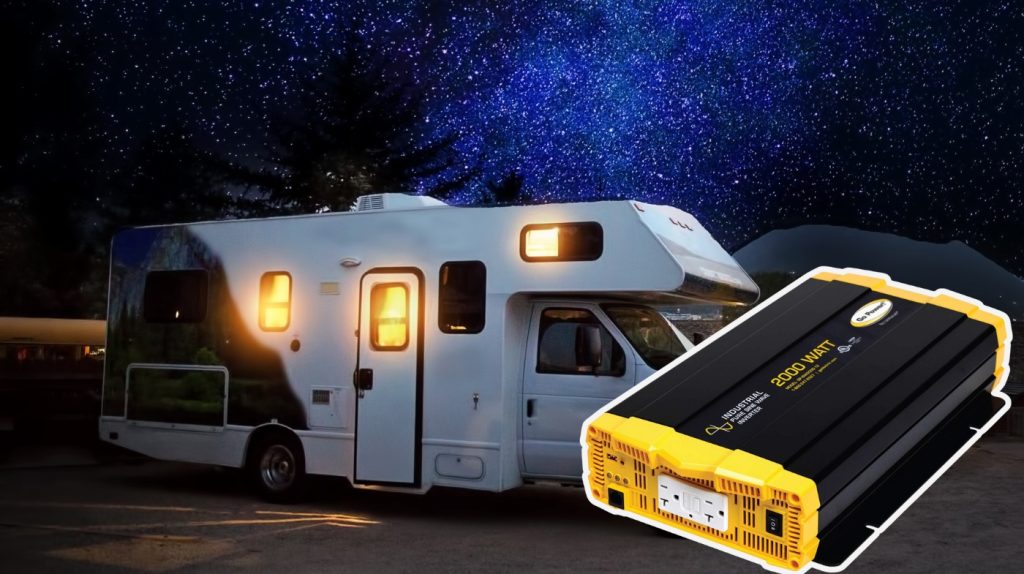
Selecting the Right Inverter and Location
Before installing an inverter in your motorhome, you need to carefully select the appropriate inverter size and location based on your power demands and system compatibility.
First, calculate the total continuous wattage of all appliances you intend to power, adding surge capacity for devices with high startup currents like compressors. Choose an inverter with a continuous rating that exceeds this total, factoring in future power needs.
Also consider the battery bank capacity to prevent rapid drain and maintain efficiency. Decide between pure sine wave and modified sine wave types, considering appliance sensitivity and budget.
Locate the inverter close to the battery bank to reduce voltage drop, ensuring the site is well-ventilated and away from moisture or combustibles. Position it for easy wiring access and maintenance, while avoiding noise-sensitive areas.
Confirm compatibility with your motorhome’s voltage and battery system to ensure suitable performance.
Preparing for Installation and Ensuring Safety
Although selecting the right inverter and location is essential, preparing your installation area properly is equally important to guarantee safety and system reliability.
First, disconnect all power sources—shore power, solar panels, and batteries to eliminate shock risk. Choose a dry, ventilated space with adequate clearance per manufacturer guidelines to ensure heat dissipation and prevent overheating.
Avoid flammable gas exposure, especially near flooded lead acid batteries. Clear clutter and secure loose wires to reduce wear. Using durable materials for mounting can also enhance the longevity of your installation.
Remember that installing the inverter close to the batteries helps minimize voltage drop and improves efficiency. Wear insulated gloves and safety glasses while working. Use correctly sized cables and install an inline fuse or circuit breaker rated for your inverter’s wattage.
Guarantee proper grounding compliant with local codes and provide a manual disconnection device isolating live and neutral conductors. Finally, gather all tools and components, inspect wiring for damage, and plan cable routing to avoid mechanical stress.
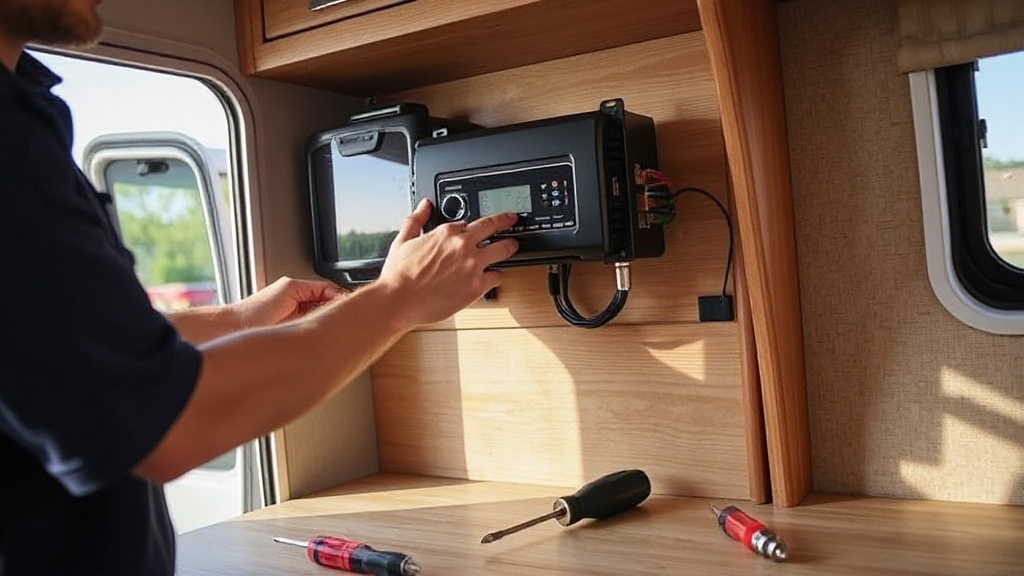
Mounting the Inverter Securely
When mounting the inverter securely, you’ll want to select a location close to the battery bank to minimize voltage drop and guarantee ideal performance.
Choose a sturdy, level surface with good ventilation to allow heat dissipation and prevent overheating. It is also important to properly ground the inverter to the RV’s common ground point to ensure safety and system stability.
Avoid areas near flammable materials or moisture. Clean and prepare the surface, marking exact mounting hole positions using the inverter as a template. Drill holes with the correct bit size and use manufacturer-provided brackets or heavy-duty corrosion-resistant screws to firmly secure the inverter.
Ensuring the inverter is mounted on a vibration-free surface can significantly extend the lifespan of the unit. Position the unit for optimal heat emission, typically with the DC side facing downward. Leave sufficient clearance around the inverter for airflow, ensuring vents remain unobstructed.
Finally, verify the mounting area is free of vibrations to prevent loosening during travel.
Wiring the Inverter to the Battery Bank
Since proper wiring guarantees both safety and ideal inverter performance, you’ll need to carefully select the correct cable gauge and length based on your inverter’s current requirements and distance from the battery bank.
Use the inverter manufacturer’s recommended cable gauge, typically thicker cables for higher wattage and longer runs, and keep cable length as short as possible to minimize voltage drop.
Connect the inverter’s positive terminal to the battery positive bus bar or terminal through an appropriately sized fuse or circuit breaker installed within 12 inches of the battery, which is crucial to ensure safety. Proper protection devices help prevent damage and potential hazards related to electrical faults.
Likewise, connect the negative terminal to the battery negative bus bar or terminal, ensuring correct polarity.
Use high-quality, stranded copper wire with proper RV-rated insulation and secure all connections with insulated terminals to prevent shorts and ensure reliable, low-resistance contacts. This attention to detail supports long-term system reliability and prevents electrical issues.
Properly Grounding the Inverter
Properly grounding the inverter is essential to guarantee both safety and reliable operation within your motorhome’s electrical system.
Connect the inverter chassis grounding lug to a common ground point, typically the motorhome frame or a dedicated ground bus bar, using a corrosion-resistant, appropriately sized wire. Separate AC and DC grounds to prevent interference.
Ensure a low impedance, continuous path compliant with NEC codes for fault current conduction. Secure connections firmly to resist vibrations. Proper grounding also helps prevent electrical fires and equipment failures by stabilizing the system.
Connect the inverter case lug directly to the RV chassis ground to establish a proper grounding path for safety and system integrity.
Testing and Finalizing the Setup
Before finalizing your inverter installation, you’ll need to conduct thorough testing and inspections to guarantee all components function correctly and safely.
Begin with a detailed visual and physical inspection, confirming secure, correctly polarized wiring, stable mounting, unobstructed cooling, and proper fuse ratings. It is also important to verify proper inverter operation by checking the inverter’s status light and ensuring the battery voltage is within the recommended range.
Additionally, ensure that all wiring and connectors meet the required load capacity to prevent overheating or failure during operation. Ensure secure wiring, stable mounting, proper cooling, and correct fuse ratings before completing your inverter installation.
Next, measure DC voltage at battery terminals and verify AC voltage output at inverter receptacles aligns with specifications. Perform load testing using resistive appliances, monitoring voltage, current, and inverter response under normal and surge conditions.
Test AC breaker panel integration with shore power, ensuring seamless pass-thru and inverter takeover modes without interruptions. Finally, check that the inverter shuts down properly, safety alarms function, and cooling activates under load.
Frequently Asked Questions
Can I Connect Multiple Inverters for Higher Power Output?
Yes, you can connect multiple inverters in parallel to increase total power output, provided you guarantee compatibility and proper configuration.
You’ll need to connect DC inputs in parallel with correct polarity and merge AC outputs using a combiner box or approved kit. Synchronize inverter settings to avoid phase conflicts.
Also, verify your battery bank can handle the combined load, use correct wiring gauge, and follow manufacturer guidelines carefully to maintain safety and system integrity.
How Do I Maintain the Inverter for Long-Term Use?
Think of your inverter as a watchful guardian you need to keep its connections tight, clean its vents, and guarantee its battery stays charged and healthy. Regularly inspect for corrosion, overheating, and test protections.
Clean dust biannually, avoid heat exposure, and handle batteries safely with insulated tools. Monitor output closely and never exceed limits. When faults arise, call a professional, because your guardian deserves expert care to work flawlessly long-term.
What Are the Common Inverter Troubleshooting Tips?
You should first check the inverter’s status light and battery voltage; no light or low voltage signals problems. Inspect all wiring for secure, corrosion-free connections and verify fuses aren’t blown.
Make certain the inverter isn’t overloaded and cooling vents are clear to prevent overheating. Reset the inverter to clear faults, consult error codes if available, and use a multimeter to test DC and AC voltages.
Can I Install the Inverter Myself Without Professional Help?
You can install the inverter yourself if you have intermediate electrical skills and a solid understanding of DC and AC systems. Make sure you know wiring, fusing, and grounding principles, and follow the manufacturer’s instructions exactly.
Always disconnect all power sources before starting. If you’re unfamiliar with high-current wiring or complex systems, or local codes require it, consider professional help to guarantee safety.
How Do Inverters Affect Motorhome Battery Life?
Inverters typically draw about 1% of their rated power continuously, meaning a 1500W inverter uses around 15 watts even without load. This steady drain on your motorhome battery can lead to faster battery depletion.
This constant draw accelerates battery discharge cycles, reducing lead-acid battery lifespan due to sulfation and capacity loss. Lithium batteries handle this better but still degrade faster with unnecessary use. To preserve battery life, you should minimize inverter runtime and switch it off when not powering AC devices.
Choose the Right Inverter for Your Power Needs
Now that you’ve installed your inverter with precision, you’ve fundamentally transformed your motorhome into a mobile power fortress. Without this setup, you’d be lost in a sea of dead batteries and powerless gadgets.
By following these exact steps selecting the right inverter, mounting securely, wiring correctly, and grounding properly, you’ve guaranteed flawless energy flow. Your motorhome’s electrical system will run so smoothly, it’ll feel like you’ve wired it with pure genius.

