

Last Updated on July 11, 2025
To install an RV skylight, first remove the old one by unscrewing and prying off the dome carefully. Measure and mark the roof opening using the new skylight as a template, then cut precisely with a jigsaw.
Apply butyl tape and corrosion-resistant screws to secure the frame firmly, ensuring a flush fit. Finally, seal all seams and screw heads with high-quality roof sealant and waterproof tape to prevent leaks.
Follow these steps to master a watertight and secure skylight installation.
Key Takeaways
- Remove the old skylight by scraping sealant, unscrewing fasteners, and gently prying the dome away without damaging the roof membrane.
- Measure and mark the roof opening accurately, then cut the opening using a jigsaw, ensuring to support and protect the roof surface.
- Apply butyl sealant and putty tape around the skylight flange and screw holes before securing the new skylight with corrosion-resistant screws.
- Fasten the skylight frame evenly, drill guide holes for precise cuts, and secure the inner dome aligning with the exterior frame.
- Thoroughly seal all screw heads and perimeter with RV roof sealant and waterproof tape, ensuring no air bubbles remain for lasting waterproofing.
Tools and Materials Needed for Skylight Installation
To install an RV skylight effectively, you’ll need specific tools and materials designed for durability and precision. Use stainless steel or zinc-plated screws (#8 x 1″), preferably self-drilling or pan head, to resist corrosion. The screws should ideally have a quad drive design compatible with #2 square or #2 Phillips bits for versatile installation.
Choose corrosion-resistant stainless steel or zinc-plated #8 x 1″ screws for a durable RV skylight installation. Butyl sealant like SureBond SB140 and putty tape (about 88″ length) ensure waterproof sealing.
For cutting, a jigsaw, ruler or tape measure, and a marker are essential. Use the manufacturer’s template to mark the roof accurately. A putty knife helps remove old sealant, while a drill with appropriate bits pre-drills screw holes to prevent damage.
Apply sealant smoothly with a caulking gun and drive screws efficiently using a power screwdriver. Gloves protect your hands from chemicals, and clean the skylight dome and roof with plastic cleaner or liquid wax before installation.
Removing the Existing Skylight
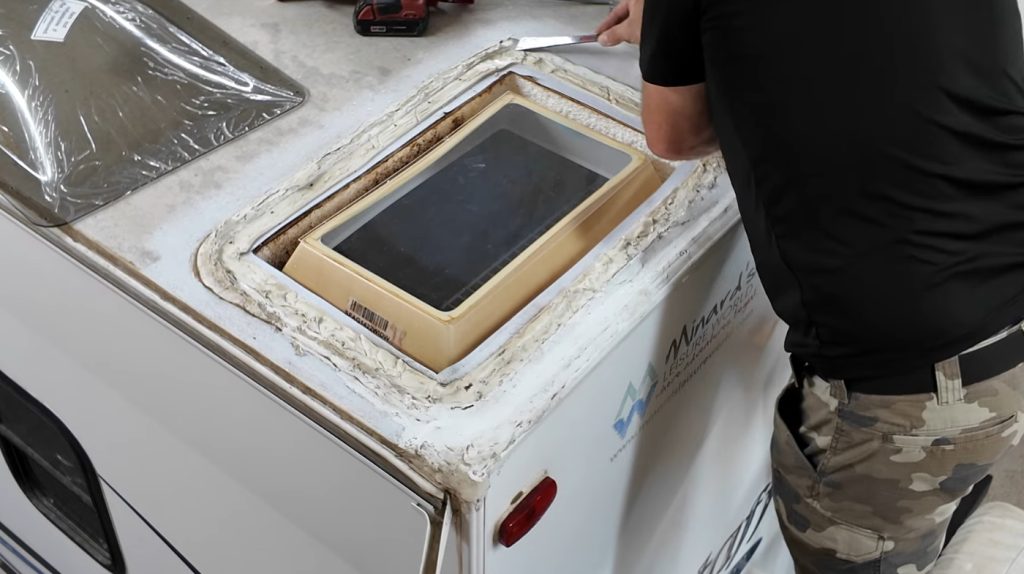
Before removing the existing skylight, carefully scrape off all old sealant around the screws using a plastic or metal putty knife. Avoid damaging the roofing membrane. Use mineral spirits sparingly to soften stubborn sealant.
It is important to recognize two types of sealants commonly used, black and white, to select the appropriate cleaner and sealant for the job. Proper maintenance and the use of eco-friendly sealants can help prevent future leaks and damage.
Next, locate and remove all screws securing the skylight shell with an appropriate screwdriver or power tool. Discard old screws and prepare new ones for installation. Then, gently pry the skylight dome away from the roof flange using putty knives, working gradually to prevent membrane tears.
Remove all pieces carefully if the dome is broken.
| Step | Tool Needed | Tip |
|---|---|---|
| Remove Sealant | Putty knife | Use mineral spirits cautiously |
| Unscrew Skylight | Screwdriver/power tool | Discard old screws |
| Pry Off Dome | Putty knives | Work gradually around perimeter |
Preparing and Cutting the Roof Opening
After removing the old skylight and clearing away sealant residue, focus on accurately preparing the roof for the new opening. Measure your new skylight’s dimensions, and mark the roof surface with a pencil, adding manufacturer-allowed tolerances.
Use a square to ensure the outline is symmetrical, and confirm no wiring or fixtures block the area. It is important to consider installation compatibility to avoid incorrect fitting and ensure a secure seal.
Remove any old sealant carefully, clean the surface with solvent, and inspect for damage. This step is crucial because proper installation prevents leaks that could damage your RV’s interior.
Equip a cordless jigsaw with a fine-toothed blade, wear gloves and eye protection, and use a straightedge to guide your cuts. Cut slowly along the marked lines, supporting the roof panel to prevent bending.
Remove the cut section gently, clean edges, and apply primer and flashing tape as per instructions, ensuring the opening matches the skylight flange precisely.
Installing and Securing the New Skylight
Since precise placement is essential, confirm the skylight location avoids internal roof components like wiring, vents, and frames to prevent damage or interference. Use manufacturer guides to mark and cut the opening accurately.
Selecting a location that minimizes exposure to wind forces will enhance the skylight’s durability. Ensure skylight placement avoids wiring and vents, using guides to mark and cut openings precisely.
When positioning the skylight frame, apply butyl tape beneath screw points to prevent water intrusion. Fasten the frame with corrosion-resistant screws, ensuring even spacing and a flush fit.
It is important to verify roof structure compatibility before installation to ensure proper fit and insulation.
- Drill guide holes at interior corners, then connect with straight lines for precise cuts.
- Protect the roof perimeter with tape to shield against excess sealant.
- Clean screw holes before fastening to improve sealant adhesion.
- Secure the inner dome aligning with the exterior frame, using screws or clips without obstructing operation.
Following these steps ensures a secure, structurally sound skylight installation ready for sealing.
Sealing and Waterproofing the Skylight Installation
Securing the skylight frame sets the foundation for effective sealing and waterproofing. First, clean the roof and skylight surfaces thoroughly using a solvent compatible with your RV roof material, removing all dirt, oils, and old sealant. Allow surfaces to dry completely before applying sealant or tape.
Apply a continuous bead of high-quality RV roof sealant around the skylight cutout perimeter before installation. After securing the skylight, seal all screw heads to prevent water ingress.
Use engineered waterproofing tape like 4EvaSeal over sealant, pressing out air bubbles for a smooth, durable bond. Ensure sealant and tape extend beyond the flange, promoting runoff and preventing water pooling.
Regularly inspect and maintain sealants and tapes, promptly addressing cracks or gaps to sustain waterproof integrity. For enhanced durability in outdoor conditions, consider materials with weather resistance that protect against moisture and environmental exposure.
Frequently Asked Questions
How Do I Choose the Right Size Skylight for My RV?
To choose the right RV skylight size, first measure your existing roof opening precisely. Match the size to your room’s function—smaller for bathrooms, larger for living areas. Consider roof curvature and clearance, ensuring compatibility with insulation and waterproofing.
Factor in ventilation needs and local climate; bigger skylights admit more light but may increase heat gain. Finally, select materials and styles that suit your RV’s structure and environment to maintain durability and comfort.
Can I Install an RV Skylight Myself Without Professional Help?
About 60% of RV owners successfully install skylights themselves, but you’ll need basic power tool skills and careful planning. You can cut the roof with a jigsaw and seal edges properly using RV-specific sealant if you follow instructions closely.
However, if you’re unsure about roof structure, wiring, or waterproofing, it’s safer to hire a pro. Proper sealing and placement prevent leaks and damage, so don’t rush this technical job.
What Is the Average Lifespan of an RV Skylight?
You can expect the average lifespan of an RV skylight to be 8 to 15 years, depending on quality and environmental conditions. Higher-end models, like VELUX, often last beyond 15 years if you maintain them properly.
Exposure to UV rays and extreme weather shortens lifespan, especially for shower skylights, which may crack after about 4 years. Regular cleaning, resealing, and inspections help extend your skylight’s durability considerably.
How Do I Maintain and Clean My RV Skylight?
You should inspect your RV skylight twice a year for cracks, sealant wear, and loose screws. Clean it gently with lukewarm water and mild soap using a soft cloth, avoiding abrasive cleaners. Remove dirt and debris to maintain clarity and prevent damage.
Reseal edges and screw holes every 1-2 years to guarantee waterproofing. For venting skylights, lubricate moving parts regularly. Keep sun tunnel tubing clean for peak light transmission.
Are There Energy-Efficient or Tinted Skylights Available for RV’s?
Think of energy-efficient or tinted RV skylights as your RV’s climate guardians. You can find models with insulated acrylic or polycarbonate domes that reduce heat transfer and UV-coated layers to protect interiors.
Tinted skylights in smoke, bronze, or gray hues cut glare and heat while preserving visibility. Choose ventilation options for airflow without extra power. Just guarantee proper sealing and structural support during installation to maintain their efficiency and durability.
Master the Art of Watertight Skylight Installation in Simple Steps
Installing your RV skylight isn’t just about letting light in, it’s about transforming your space, much like a lighthouse guiding ships through the night. With the right tools, careful removal, precise cutting, secure installation, and thorough sealing, you guarantee durability and comfort.
Follow each step methodically, and your new skylight will shine bright, weatherproof and strong. Remember, a well-installed skylight is the beacon that keeps your RV safe and illuminated on every journey.

