

Your RV air conditioner drips water inside mainly because the condensate drain line or pan is clogged, damaged, or improperly sealed, causing water to back up rather than exit outside. Frozen evaporator coils from restricted airflow or low refrigerant also lead to dripping as they thaw.
Worn gaskets, over-tightened mounts, or roof gasket issues can let condensation leak indoors. Consistent leaks despite maintenance often indicate internal component problems. Understanding these causes helps you keep your RV dry and comfortable.
Key Takeaways
- Blocked or clogged condensate drain lines cause water to back up and drip inside the RV air conditioner unit.
- Damaged or worn mounting gaskets and seals allow condensation to leak into the RV interior.
- Frozen evaporator coils due to restricted airflow or low refrigerant thaw and drip water inside the AC.
- Dirty air filters and debris buildup reduce airflow, causing coil freezing and subsequent water dripping indoors.
- Improper mounting, overtightened bolts, or damaged drain pans trap water inside, leading to leaks within the RV.
Common Causes of Water Dripping From RV Air Conditioners
When your RV air conditioner starts dripping water inside, it’s usually due to issues like improper sealing, frozen evaporator coils, faulty drain components, condensation from humidity, or mechanical failures.
Improper sealing occurs when the unit is mounted too tightly or the gasket sealing it to the roof is worn, trapping condensation and causing leaks. Sealing the A/C unit to the roof with silicone or other sealants can block water runoff, which aggravates indoor dripping. Using materials with proper waterproof ratings can help prevent these issues.
Frozen evaporator coils, triggered by low refrigerant or restricted airflow from dirty filters, thaw and drip water indoors. Faulty drain holes or pans, if misaligned or damaged, prevent proper condensation drainage, leading to pooling inside.
High humidity combined with temperature differences increases internal condensation. Small amounts of water dripping outside the roof are normal as the system collects moisture in a drain pan. Mechanical failures such as worn fan blades or broken drain tubes redirect water inside.
How a Clogged Drain Line or Drain Pan Leads to Indoor Water Leaks?
If debris accumulates in your RV air conditioner’s drain line or pan, it can block water from exiting properly and cause indoor leaks. Dirt, dust, and environmental particles gradually obstruct the drain line, causing water to back up into the drain pan.
Regular inspection and maintenance of the drain line and pan are essential to prevent blockages and subsequent leaks. Using a generator with clean power output can help maintain other electrical components in your RV while performing maintenance. When the pan overflows due to this blockage, water leaks inside the RV.
Additionally, damage or improper sealing of the drain pan can trap condensation, preventing proper drainage and causing pooling. A clogged or covered drain hole worsens this effect, leading to indoor dripping.
To prevent leaks, you should regularly inspect and clear the drain line and pan by flushing with water or blowing air through the system. Repair or replace damaged drain pans and ensure sealants follow manufacturer guidelines to maintain effective drainage.
Impact of Frozen Evaporator Coils on Water Dripping
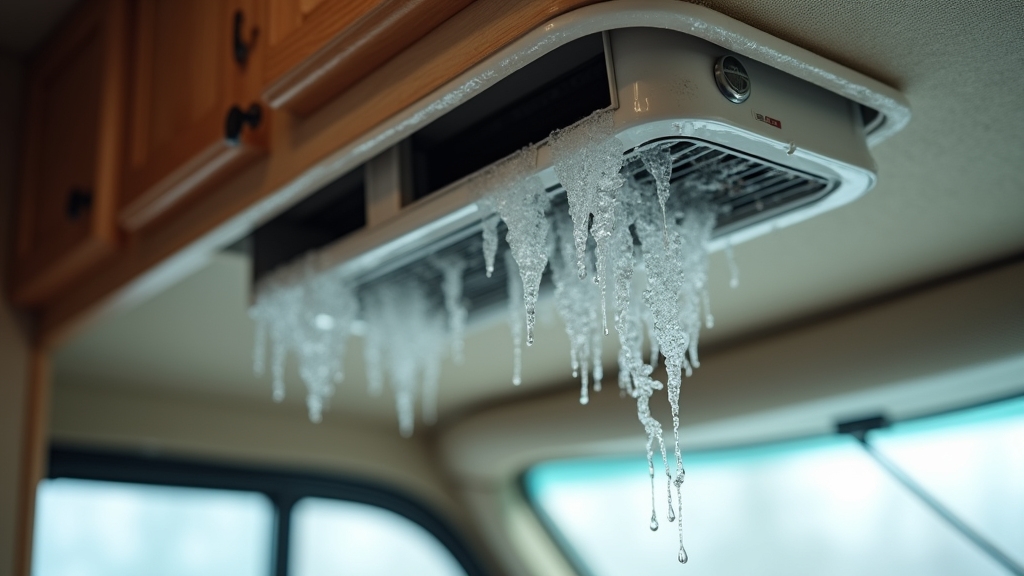
Although frozen evaporator coils might seem like a minor issue, they directly cause excess water dripping inside your RV by disrupting normal condensation drainage. When the coils freeze due to low airflow, dirty surfaces, refrigerant problems, or high humidity, ice accumulates on the coils.
A common cause of low airflow is a dirty air filter, which restricts the amount of air passing over the coils and contributes to freezing. Proper maintenance of your RV, including ensuring your license plates are visible and secure, helps avoid additional complications during inspections.
Once the AC cycles off, this ice melts rapidly, overwhelming the drain pan’s capacity and leading to water overflow inside. Additionally, frozen coils impair effective heat exchange, reducing cooling performance and increasing indoor moisture buildup, which worsens dripping. You may notice water pooling near vents or the drain pan flooding.
To prevent this, maintaining adequate airflow, cleaning coils, monitoring refrigerant levels, and controlling humidity are essential. Addressing coil freeze promptly guarantees proper condensation drainage and prevents indoor water damage from meltwater overflow.
Identifying and Repairing Damaged or Worn-Out Seals
Start by inspecting seals around the blower housing and drip pan for cracks, brittleness, or gaps using a flashlight and water spray test. Ensuring proper sealing is crucial to prevent moisture buildup, similar to how maintaining low ash content in pellet grills reduces cleanup and operational issues.
Look for signs like damp insulation, water stains, or loose-fitting covers that indicate seal failure. When replacing, clean surfaces thoroughly and use manufacturer-approved seal kits and sealants to restore proper watertight integrity. Additionally, ensure the AC unit is disconnected from both 110V and 12V power sources before performing any seal inspections or repairs to avoid electrical hazards.
Seal Inspection Techniques
Because the integrity of seals directly affects your RV AC unit’s performance and prevents water intrusion, conducting thorough inspections is essential. Start by using a flashlight to examine the rubber gasket for uneven compression, cracks, or brittleness.
Feel around the seal to detect any gaps or hollows that could compromise the barrier against moisture. Also, verify that the AC unit is securely mounted to prevent seal damage from shifting. Using a quality rubber seal conditioner can help maintain the flexibility and durability of the seals.
Regular maintenance every six months, including cleaning and checking all components, supports the longevity and effectiveness of the seals and the entire AC system routine maintenance. Key inspection techniques include:
- Checking gasket compression, aiming for about 50% uniform compression around the perimeter.
- Sealing visible gaps with HVAC aluminum foil tape to maintain airflow efficiency.
- Removing the unit carefully for a full seal replacement when damage is extensive.
Common Seal Damage Signs
When you notice visible cracks, brittleness, or loss of compression in your RV AC unit’s seals, these are clear indicators that the seals have deteriorated and need attention. Look for flattened or deformed rubber, discoloration, or surface chalking, which often precede structural failure. Regularly inspecting and replacing worn seals can prevent water leaks caused by damaged gaskets.
Using materials with UV stabilization can help extend seal life by reducing damage from sun exposure. Reduced gasket compression below 50% compromises sealing, allowing water ingress. Water puddles, musty odors, or stains near the AC signal compromised seals.
Long-term damage can cause warped walls, flaking paint, or rust, threatening structural integrity. Exposure to UV rays, temperature changes, and physical stress accelerates seal degradation. Early detection of minor gaps, moisture inside the unit, or cooling inefficiency helps prevent leaks.
Seal Replacement Tips
Although identifying damaged or worn-out seals requires careful inspection, replacing them promptly is essential to prevent water intrusion and maintain your RV air conditioner’s efficiency.
First, select a high-quality, single-piece gasket designed specifically for rooftop AC units, ensuring it matches your model’s size and shape. Choosing a sealant with high elongation properties helps maintain flexibility and durability under temperature changes.
Next, prepare the surface by thoroughly cleaning and drying it, removing all old adhesive and debris to secure a proper seal. It is also important to turn off the AC breaker before starting to avoid any electrical hazards.
During installation, peel the adhesive backing gradually, pressing firmly to avoid wrinkles or gaps, and tighten mounting bolts carefully without overtightening. Key tips include:
- Use continuous gaskets with pressure-sensitive adhesive for durability and ease.
- Clean and repaint exposed metal surfaces to prevent corrosion.
- Work with a partner to safely align the AC unit on the new seal.
Installation Mistakes That Cause Water to Leak Inside the RV
If you want to prevent water from leaking inside your RV, you must avoid common installation mistakes with the air conditioner unit. Improper sealing, such as fully sealing the AC to the roof with silicone, traps condensation and forces water inside.
Use a proper rubber gasket that allows drainage space and avoid over-tightening screws to prevent seal damage. Incorrect gasket installation, like loose or pinched gaskets, lets rain or condensation infiltrate around edges. Routinely check and replace deteriorated gaskets. Choosing durable materials for these gaskets can improve longevity and sealing effectiveness.
Also, ensure the AC unit has adequate clearance from the roof for condensate drainage; tight mounting blocks water flow, causing overflow inside. It is important to inspect the seal around the unit regularly to maintain integrity.
Finally, improper leveling of the RV or AC disrupts drain hole alignment, leading to water pooling and leaks. Use adjustable mounts or shims to maintain proper unit angle and prevent indoor dripping.
Role of Blocked Condensate Drains in Indoor Dripping Issues
You’ll often find indoor dripping caused by blocked condensate drains, where dust, lint, and debris obstruct water flow from the drip pan. When these narrow drain holes clog, water backs up and overflows inside your RV. Clearing the drains regularly with water flushes, compressed air, or small tools keeps your AC running efficiently and prevents leaks.
A simple and effective method to clear blockages involves using an external water source, such as a garden hose, to flush out the condensation tray without needing to access the roof or disassemble the unit alternative DIY solution. Regular maintenance of these systems is essential, as it helps avoid issues related to low-maintenance requirements often highlighted in RV equipment care.
Drain Blockage Causes
When condensate drain lines become blocked, water can’t flow away from the evaporator coil as designed, causing it to back up and overflow inside your RV. This blockage often results from debris accumulation that restricts normal drainage, leading to indoor dripping issues.
During a recent inspection, it was found that the drain holes on each side of the pan were clogged with lint, dirt, and debris, which directly caused the water to overflow inside the camper drainage blockage. Using durable repair tape can help seal any minor leaks caused by overflow to prevent further water damage.
The main causes include:
- Dust and dirt trapped in moisture on the evaporator coil, carried into the drain line.
- Algae or mold growth inside the drain pipe due to warm, humid conditions.
- Physical obstructions like insects or debris causing partial or complete clogs.
These blockages cause water to pool in the drip pan, overflow, and damage interior surfaces or electrical components. Recognizing these causes helps you understand why your RV’s AC might be dripping and emphasizes the importance of proper drain line maintenance.
Clearing Condensate Drains
Although blocked condensate drains often go unnoticed, they play a critical role in causing indoor dripping issues in your RV’s air conditioning system. Condensate drains channel humidity-derived water from evaporator coils outside the RV.
Model ACM135B, for example, is designed with a drainage port that allows condensation to drip directly onto the roof, preventing water buildup inside the unit. When clogged by dirt, debris, or mold, water accumulates in drip trays, overflowing and causing interior leaks.
To clear these drains, spray water into drain holes to flush obstructions, and use small tools like hex keys to unblock weep holes. Removing and cleaning drip trays and condensate pans helps restore normal flow. Installing drain kits with tubing improves drainage efficiency and reduces indoor leak risks.
Regular inspection and maintenance of condensate drains prevent blockages, stop water damage, and maintain interior comfort by controlling moisture levels effectively.
Roof Gasket and Mounting Problems Contributing to Water Intrusion
Since the roof gasket acts as the primary seal between your RV’s air conditioner and the roof, any deterioration or mounting issues can directly cause water intrusion. A degraded gasket loses elasticity, forming cracks or gaps, especially at corners, which allows rainwater to seep inside.
The roof gasket seals your RV’s AC to the roof; deterioration or mounting flaws lead to water leaks. Improper mounting, such as unevenly tightened bolts or over-torquing, can deform the gasket and compromise the seal. Additionally, failing to clean surfaces before gasket installation reduces adhesion and sealing effectiveness.
Regular inspection every 6 months is recommended to detect early signs of gasket wear and prevent leaks. Key gasket and mounting issues include:
- Weather-induced gasket deterioration causing cracks and seal failure
- Loose or uneven mounting bolts creating gaps for water penetration
- Use of low-quality or glued foam gaskets that fail prematurely
Preventative Maintenance Tips to Avoid Water Leaks From RV AC Units
To prevent water leaks from your RV air conditioner, you need to follow a consistent maintenance routine targeting critical components. Regularly clean and replace air filters every 3-4 months or after trips to avoid restricted airflow that causes evaporator coil freezing and subsequent dripping.
Periodically clean and straighten evaporator coils and cooling fins using appropriate cleaners to maintain heat exchange efficiency. Make certain unobstructed airflow by keeping vents clear and avoiding overtightening mounting bolts that damage seals.
Inspect and clear condensate drain pans and lines to prevent water backup inside the unit. Damaged mounting gaskets are a common cause of internal leaks, so always check their condition during inspections to maintain the proper seal. Finally, biannually check rubber gaskets and seals around the AC, maintaining proper compression and replacing worn parts to ensure a watertight barrier.
When to Seek Professional Help for Persistent RV AC Water Leaks?
When water continues to drip inside your RV despite thorough cleaning of the drain pan and coils, it’s time to consult a professional. Persistent leaks often indicate underlying issues that require advanced diagnostics and repairs beyond routine maintenance.
You should seek expert help if you notice:
- Unusual noises or damage to internal components like evaporator coils or air handlers
- Continuous leaks after replacing filters and tightening gaskets
- Signs of coil freezing, defrost failure, or deteriorated AC unit parts
Sometimes, refrigerant leaks can be a hidden cause of persistent dripping, significantly reducing cooling efficiency and necessitating professional repair. Professionals use specialized tools such as ultrasonic leak detectors, pressure tests, airflow diagnostics, and perform roof seal inspections to pinpoint leaks accurately.
Delaying repairs risks water damage, mold growth, and electrical hazards. When DIY troubleshooting fails, professional intervention guarantees thorough repair, preserving your RV’s structural integrity and air conditioning efficiency.
Frequently Asked Questions
Can Using a Dehumidifier Reduce Water Dripping Inside My RV AC?
Yes, using a dehumidifier can reduce water dripping inside your RV AC by lowering interior humidity levels. This decreases condensation on the evaporator coil, reducing water accumulation in the drain pan and the risk of overflow.
However, it won’t fix mechanical issues like clogged drains or damaged pans. You should combine dehumidifier use with regular AC maintenance and inspections to effectively prevent dripping problems.
Does the Type of Refrigerant Affect Water Dripping Issues in RV AC’s?
When it comes to refrigerants, the proof is in the pudding. Yes, the type you use does impact water dripping in your RV AC. Different refrigerants have unique pressure and temperature profiles, influencing how much condensation forms on the evaporator coil.
Using the wrong type or an improper charge can cause coil freezing or excess moisture, leading to dripping. Keeping the correct refrigerant guarantees efficient cooling and proper condensate drainage, reducing indoor water issues.
How Does Altitude Impact My RV Air Conditioner’s Condensation and Dripping?
Altitude decreases air density and pressure, reducing your RV AC’s cooling efficiency and condensate evaporation rate. This causes the unit to run longer, generating excess condensation. The thinner air alters humidity and dew point, increasing moisture buildup.
Additionally, your drainage system may struggle with reduced airflow, leading to water dripping inside. To counter this, you need regular maintenance, proper system calibration, and possibly high-altitude adjustments to optimize condensate management and prevent leaks.
Can Running the RV AC With Open Windows Cause Water Dripping Inside?
Yes, running your RV AC with open windows can cause water to drip inside. The open windows disrupt the unit’s designed airflow and pressure balance, increasing indoor humidity and condensation on the evaporator coil.
This excess moisture can overwhelm the drain pan and drainage system, leading to overflow and leaks. To prevent this, keep windows closed during operation and regularly maintain the drain components to ensure proper condensate removal.
Are There Specific RV AC Brands Less Prone to Indoor Water Leaks?
You’ll notice brands like Dometic and Coleman-Mach stand out, their units sealed tight like a ship’s hull, expertly channeling condensation away with well-designed drain pans and gaskets. Pioneer’s under-bench AC reduces roof penetration, lowering leak risks.
While budget options like ASA Electronics perform adequately, they may need more upkeep. Choosing premium, RV-specific brands guarantees reliable drainage, fewer indoor drips, and easier maintenance access to keep water flowing outside, not inside.
Simple Maintenance to Keep Water Damage Away
So, your RV air conditioner is dripping water inside—just what you wanted, right? Ironically, this common issue often stems from simple problems like clogged drains or worn seals that you can fix yourself. Ignoring these can turn your cool escape into a soggy mess.
Stay ahead with regular maintenance, or you might find yourself calling a pro when water damage turns your RV into an unintended indoor pool. Prevention really is the best fix.

