
If your RV window fogs up due to moisture between panes, you likely have seal failure or humidity issues. Start by inspecting seals for cracks or gaps and check weep holes for blockage. Control interior humidity using ventilation and dehumidifiers.
For DIY fixes, carefully remove old sealant and apply RV-grade silicone, adding silica gel packs if needed. Persistent fogging or damage means professional repair is best to preserve clarity and durability.
You can find more detailed strategies to prevent and fix these issues effectively.
Key Takeaways
- Inspect window seals for cracks or gaps, as damaged seals are the primary cause of fogged RV windows.
- Remove interior trim to access and reseal or replace the window’s insulating glass unit to eliminate moisture between panes.
- Use silica gel packs inside the window frame to absorb trapped moisture and reduce fogging temporarily.
- Maintain proper ventilation and control indoor humidity with fans, dehumidifiers, and air conditioning to prevent future fogging.
- Seek professional help if fogging persists after DIY attempts or if there is structural damage or broken window hardware.
Common Causes of RV Window Fogging
Although RV window fogging might seem like a minor inconvenience, it often signals underlying issues you should address promptly.
Temperature differences between warm interior air and cold window surfaces cause condensation, especially during rapid climate changes or cooler nights.
High indoor humidity from cooking, showering, and breathing raises moisture levels, intensifying fogging on cold glass. To help manage this, you can utilize portable dehumidifiers to reduce moisture buildup inside your RV.
Poor or broken window seals allow external moisture to enter double-pane units, causing persistent internal fogging and reducing insulation efficiency. Applying a sealant for wood can help prevent moisture infiltration in related components.
Physical damage or aging weakens seals and adhesives, increasing moisture infiltration and permanent fog buildup.
Ultimately, external environmental factors such as sun exposure, extreme weather shifts, and road vibrations accelerate seal degradation and condensation risk.
How to Inspect Fogged RV Windows?
First things first, take a close look at the window seals. You’re checking for any cracks, gaps, or signs of wear and tear that might let moisture sneak in. Remember, worn out window seals are a common cause of RV window leaks and fogging. Once you’ve done that, shift your focus to the glass itself.
Look at both the inside and outside surfaces for any condensation or fogging patterns. These can be pretty telling and might indicate that the seals are failing. Proper maintenance of RV components, including windows and license plate regulations, ensures overall vehicle compliance and safety.
Now, keep an eye out for any moisture build-up. Figure out whether that moisture is trapped between the panes or just sitting on the surface. This can really help you pinpoint where the fogging is coming from.
Seal Condition Check
When inspecting fogged RV windows, you should carefully examine the condition of the seal to identify any signs of wear or damage that could allow moisture intrusion.
Start by inspecting the rubber glazing for cracks, brittleness, or separation from the frame, paying close attention to corners and edges where seals degrade first. Maintaining proper tire pressure in your trailer tires is similarly crucial to prevent damage from vibration and road hazards.
Use a flashlight to detect hidden gaps or dried, cracked sealant beads. Run your finger along the seal to find uneven or soft spots. Check the clamp ring for proper fit and corrosion. Look for discoloration or water stains indicating past leaks.
Address any missing or damaged seals promptly. Performing these precise steps helps you pinpoint compromised seals that let moisture enter, enabling targeted repairs and preventing further fogging or water damage.
In addition, inspecting the window latch and knob for proper operation is important, as latch malfunction can also cause leaks and contribute to seal failure.
Glass Surface Inspection
Since fogged RV windows often indicate moisture trapped between panes, you need to conduct a thorough glass surface inspection to identify the exact cause.
Begin by examining the glass for condensation, cracks, etching, or dirt that could affect clarity. Check pane alignment within the frame, ensuring spacers and mounting hardware are intact and correctly positioned.
Assess optical clarity under natural light from multiple angles to detect fogging extent. Use diagnostic tools such as flashlights or magnifiers to reveal hidden damage or moisture.
Monitoring temperature and humidity effects can also aid in understanding the issue. Proper maintenance and timely replacement of components, similar to regular tire maintenance practices, can help prolong the lifespan of RV windows.
| Inspection Area | Key Focus |
|---|---|
| Visual Surface | Condensation, cracks, scratches |
| Frame & Pane Alignment | Spacer fit, frame contact, mounting hardware |
| Optical Clarity | Transparency, haziness, glare |
| Temperature & Humidity | Condensation patterns, environmental impact |
| Diagnostic Tools | Flashlight, magnifier, moisture meter |
Moisture Pattern Observation
Although fogging between the panes of your RV window indicates seal failure, careful moisture pattern observation can pinpoint the extent and location of the breach.
Inspect the window under different lighting angles, using a flashlight to backlight and reveal fog concentration areas. Note whether the haze is uniform or localized, often near edges or corners where seals degrade first.
Persistent fogging after temperature or humidity shifts confirms internal moisture intrusion. Proper maintenance, including regular inspections, can significantly extend window life.
Look for water droplets or streaks inside the unit, which signal advanced seal compromise. Examine window edges for cracks, gaps, or dampness, and verify weep holes aren’t clogged since these small openings serve as drainage channels for water.
Document fog locations and severity to monitor progression. Regular observation helps you detect early seal failures, enabling timely repairs and preventing further damage to your RV windows.
Preventative Measures to Reduce Window Fogging
To reduce window fogging, keep an eye on indoor humidity. One effective way to do this is by using dehumidifiers and regularly checking moisture levels. Trust me, it’ll make a difference! Choosing materials and fixtures that resist moisture buildup can also improve overall indoor conditions and reduce fogging.
Also, let’s not forget about ventilation systems. Operating vent fans and making sure there’s good airflow can really help get rid of that pesky excess humidity. Managing interior moisture during activities like cooking or showering is essential to prevent buildup.
Oh, and another tip? Keep up with your window seals! Regular inspections and timely repairs can prevent moisture from sneaking in and causing condensation. It’s all about staying proactive! Regular maintenance is similar to how routine cleaning of other RV components helps maintain efficiency and comfort.
Control Indoor Humidity
When you control indoor humidity effectively, you markedly reduce window fogging in your RV. Managing moisture levels prevents condensation on glass surfaces, safeguarding your windows from damage and improving visibility.
To maintain ideal indoor humidity (40-60%), focus on these key strategies:
- Use your RV’s air conditioner wisely by running it on auto fan mode to condense and expel water vapor, lowering humidity without pulling in moist outside air. Regularly checking and maintaining seals and gaskets ensures that moisture does not enter the RV, helping to keep humidity levels stable. Additionally, ensuring proper ventilation can significantly reduce excess indoor moisture.
- Prefer electric or space heaters over propane furnaces, as propane increases indoor moisture, while electric models emit dry heat that reduces humidity.
- Deploy portable dehumidifiers equipped with sensors to automatically regulate moisture, especially during activities like cooking or showering that elevate humidity. Additionally, using desiccants in storage areas can absorb excess moisture and support overall moisture control.
Enhance Ventilation Systems
Since proper ventilation directly impacts moisture control, enhancing your RV’s ventilation system is crucial for preventing window fogging.
You should maximize natural airflow by parking in shaded areas and aligning windows with prevailing winds to promote cross-ventilation. Installing electric dump valves can also help manage humidity by efficiently removing wastewater that might contribute to moisture buildup.
Open windows on opposite sides and use vent visors to maintain airflow during rain.
Maintain roof vents and ceiling fans by cleaning screens and inspecting seals. Also, regularly clean filters and coils during maintenance to sustain optimal airflow and system efficiency.
Consider installing 12-volt powered fans for consistent air exchange.
Optimize vent placement to avoid obstructions and guarantee fresh air intake while expelling moist air.
Regularly service your AC unit by cleaning filters and coils to sustain airflow and reduce humidity.
Additionally, ventilation upgrades like electronic roof fans and vent covers improve continuous moisture control, considerably reducing window condensation risks.
Maintain Window Seals
How often do you inspect your RV window seals to prevent fogging and water intrusion?
Regular maintenance is vital to preserving seal integrity and avoiding costly repairs. Utilizing weather-resistant materials can enhance the durability of your seals in various conditions.
Start by scheduling inspections at least every 90 days, focusing on cracks, gaps, and rubber glazing separation.
Proper cleaning with mild soap and water removes contaminants that accelerate deterioration.
Don’t forget to clear weep holes to prevent water buildup. Regular inspections also prevent leaks and water damage by catching issues early.
Maintain your seals effectively by following these three key steps:
- Inspect seals biannually, documenting wear patterns to catch recurring issues early.
- Clean seals gently, avoiding harsh chemicals to preserve rubber elasticity.
- Repair or replace damaged sealant promptly with RV-grade caulk, ensuring a consistent bead for airtight sealing.
Consistent care keeps your windows fog-free and your RV protected.
DIY Repair Methods for Fogged Windows
Although fogged RV windows can obscure your view and reduce insulation efficiency, you can restore them effectively using specialized DIY repair methods.
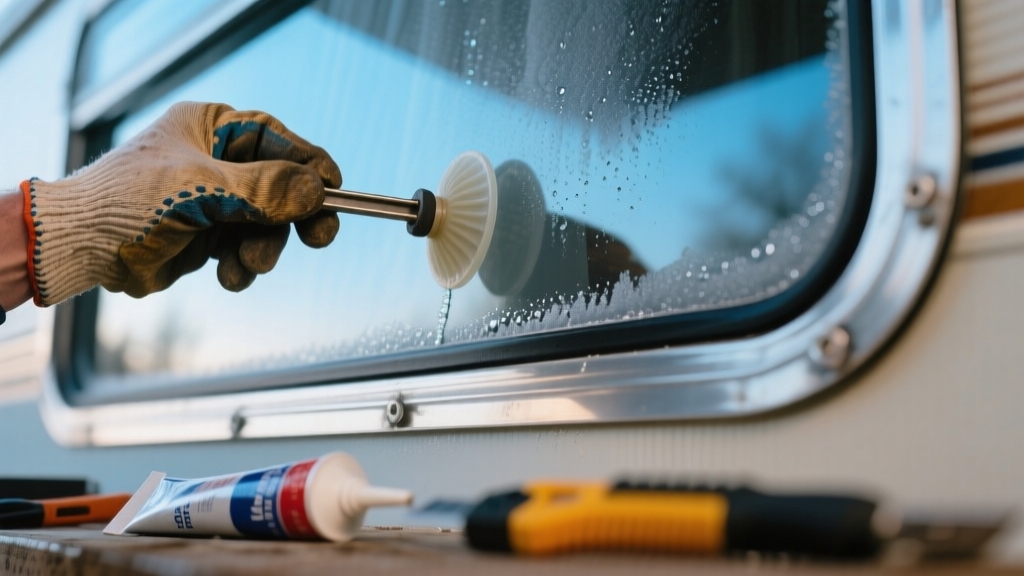
Start by carefully removing interior valances and unscrewing mounting brackets to access the window. The window is typically held in place by a clamp ring and sealed with foam or beetle sealant, so removing these components carefully prevents damage to the frame and glass window clamp ring.
Using a sealant with excellent adhesion to various materials ensures a better long-term seal. Separate the glass panes if possible, clean off old sealant thoroughly, and apply fresh sealant designed for insulated glass units.
Use silica gel packs inside the window unit to absorb moisture and consider argon gas injection to restore insulation. Finish by polishing the glass with cerium oxide for clarity.
| Step | Essential Tools & Materials |
|---|---|
| Remove window carefully | Window removal tools, gloves |
| Clean and reseal edges | Scrapers, insulated glass sealant |
| Moisture control | Silica gel desiccants, argon kit |
Follow these precise steps to ensure a durable, fog-free window.
When to Seek Professional Window Repair Services?
DIY methods can restore many fogged RV windows, but there are clear signs when professional repair is necessary. If you notice persistent fogging between panes, visible seal bubbling, or water leaks around frames, it’s time to call an expert.
Attempting further DIY fixes risks insulation loss and interior damage. Here are three key indicators you shouldn’t ignore:
- Structural damage such as cracks or chips larger than minor blemishes demands certified repair to maintain safety.
- Repeated seal failures after DIY attempts suggest underlying issues needing professional tools and materials.
- Broken hardware or alignment problems that impair window operation require skilled adjustment to preserve function.
Trusting professionals ensures durable repairs, warranties, and compliance with safety standards, safeguarding your RV’s comfort and value. RV Glass Guru offers mobile on-site RV glass services, providing convenient and expert repairs right at your location.
Seasonal Tips for Managing Window Condensation
Since condensation can compromise your RV’s window integrity and indoor comfort, managing moisture levels throughout the seasons is essential.
You should monitor indoor humidity with sensors, aiming for 30–50% to prevent fogging. Enhance ventilation by running vent fans during moisture-generating activities and opening windows when feasible. Regularly using roof vents and ceiling fans helps expel humid air and improve airflow.
Upgrade window insulation using films or Reflectix covers to reduce temperature differentials. Adjust cooking and heating methods to minimize indoor steam.
| Season | Key Actions |
|---|---|
| Winter | Use insulated curtains, run fans |
| Spring | Increase ventilation, check seals |
| Summer | Use dehumidifiers, avoid indoor drying |
| Fall | Apply window films, wipe condensation |
Adopting these targeted practices helps maintain clear windows and extends their lifespan.
Maintaining Window Seals and Preventing Future Fogging
When you maintain your RV window seals regularly, you prevent moisture intrusion that leads to fogging and deterioration.
Begin by inspecting seals biannually, focusing on cracks, gaps, or rubber shrinkage. Clean seals every 90 days using mild soap and water, avoiding harsh chemicals that damage the rubber.
To prevent future fogging, follow these steps:
- Apply RV-grade silicone sealant promptly to minor cracks or gaps, ensuring a clean finish with masking tape and a plastic scraper.
- Install vent shades or window covers to reduce UV exposure and slow seal aging.
- Check seals after storms for leaks and maintain proper window fitment to avoid stress on seals.
Consistent care prolongs seal life and keeps your windows fog-free.
Frequently Asked Questions
Can Tinted RV Windows Reduce Fogging Inside the Vehicle?
Tinted RV windows don’t directly reduce fogging inside your vehicle.
They mainly block UV rays and reduce solar heat gain, which can help keep your interior cooler and lower temperature differences that cause condensation.
However, fogging usually results from moisture trapped between panes or high indoor humidity, issues tinting doesn’t address.
To effectively reduce fog, focus on ventilation, dehumidifiers, and maintaining window seals instead of relying solely on tinting.
Does RV Window Fogging Affect Insulation Efficiency?
Yes, fogging in your RV windows substantially reduces insulation efficiency.
When the seal fails and moisture enters the air gap between panes, the insulating air barrier breaks down.
This causes the window’s R-value to drop from about R-2 to near R-1, increasing heat transfer.
As a result, you’ll notice drafts, cold spots, and higher energy use.
To restore proper insulation, you’ll need to replace the fogged window unit entirely.
Are There Specific RV Brands More Prone to Window Fogging?
You won’t find any RV brands inherently more prone to window fogging, much like a Victorian clock isn’t more likely to lose time based on its maker.
Window fogging depends largely on window type, especially dual-pane designs, and seal quality rather than brand.
Aging seals, environmental stress, and usage conditions are the real culprits.
Can Using Silica Gel Packs Inside the RV Help Prevent Fogging?
Yes, using silica gel packs inside your RV can help reduce window fogging by absorbing excess moisture and lowering humidity levels.
However, their effectiveness is limited; the packs saturate quickly and need periodic drying or replacement to maintain absorption.
To maximize results, combine silica gel with proper ventilation and humidity control methods like exhaust fans or dehumidifiers.
This integrated approach provides a more reliable way to prevent condensation on your RV windows.
How Does Altitude Impact RV Window Condensation Issues?
Altitude affects RV window condensation by lowering atmospheric pressure and temperature. This cools window surfaces below your interior dew point.
As a result, moisture inside your RV condenses on colder glass, even if the air feels dry. You’ll notice this especially at higher altitudes where colder exterior temperatures increase the temperature difference between inside and outside.
This promotes condensation. Managing indoor humidity, improving insulation, and enhancing ventilation are key to minimizing these altitude-related condensation issues.
Combine Prevention and Repairs for Long-Lasting Clarity
Now that you understand what causes RV window fogging and how to inspect and repair it, you might wonder if simply replacing the window seals solves the problem completely. The truth is, while fresh seals help, managing interior humidity and regular maintenance play vital roles.
By combining preventative measures with timely repairs, you’ll keep your windows clear and extend their lifespan. This ensures your RV stays comfortable and damage-free on every adventure.

