
To remove rotten meat smell from your RV freezer, start by emptying it and discarding spoiled items. Defrost fully, then clean all surfaces, including seals and shelves, with a white vinegar and water solution to neutralize odors.
Follow with baking soda inside to absorb lingering smells. Disinfect using a mild bleach solution if needed, and make certain good ventilation by leaving the door open in a well-ventilated spot. Keeping your freezer fresh requires consistent cleaning and airflow; more thorough methods can help eliminate stubborn odors.
Key Takeaways
- Empty the freezer, discard spoiled items, unplug, and allow ice to melt naturally for thorough cleaning access.
- Clean all surfaces, seals, and drawers with a white vinegar and water solution to neutralize odors effectively.
- Place open baking soda or activated charcoal containers inside to absorb lingering smells, replacing them every 1–3 months.
- Air out the freezer door open in a ventilated area, using bowls of vinegar and a fan to circulate fresh air.
- Regularly inspect door seals, maintain proper ventilation, and perform monthly cleanings to prevent future odor buildup.
Identifying the Source of the Odor in Your RV Freezer
Before you can effectively eliminate the rotten meat smell from your RV freezer, you need to pinpoint its source accurately. Start by checking for spoiled food or forgotten items left too long. Look for leaks or spills in packaging that may have seeped into walls or drawers.
Inspect the door seal carefully; poor sealing lets warm air in, accelerating spoilage. Note any discoloration, stains, or mold growth in corners and seams, as these indicate persistent odor sources. Also, observe frost buildup or inconsistent temperatures that hint at mechanical issues that could affect freezer performance.
Consider environmental factors inside your RV, like high humidity or frequent door openings, which worsen odors. Using newspaper absorbs moisture can help manage humidity and reduce odor intensity. Identifying these specific causes guarantees you tackle the root problem, preventing recurrence and preserving your RV’s hygiene and safety.
Preparing Your RV Freezer for Deep Cleaning
Hey there! To kick off the deep cleaning of your RV freezer, let’s start by emptying it. Go ahead and remove all the food items and make sure to toss out anything spoiled. This step is super important to avoid any lingering odors later on. Proper maintenance and regular cleaning can help prevent issues related to battery capacity drain when your RV appliances run less efficiently.
Once that’s done, unplug the freezer and leave the door open. This will help the ice melt naturally, and you can grab some towels to soak up the water as it drips. While you wait for the ice to melt, it’s a good idea to gather all your cleaning supplies.
You’ll want things like microfiber cloths, mild detergent, baking soda, and maybe some gloves too. Having everything ready will make the cleaning process go a lot smoother and more efficiently! Remember, using mild detergents or RV-specific cleaning products helps protect your freezer’s finish while effectively removing odors.
Empty and Defrost Freezer
Once you remove all the food items from your RV freezer, you’ll want to power it down and clear out any shelves and drawers to gain full access. This step is vital for an effective defrost and thorough cleaning. Keep perishable foods cold by storing them in a cooler with ice.
If your freezer has a water line for an ice maker or dispenser, disconnect it to avoid leaks. It is also important to inspect the door seals for any gaps or cracks to ensure a tight closure during defrosting, preventing warm air from entering and causing additional frost buildup.
Door seal inspection helps maintain the freezer’s efficiency during this process. Using space-saving designs in your RV can also help maximize the available area for cleaning and organization.
Follow these steps to defrost properly:
- Leave the freezer door open and place towels or a shallow tray underneath to catch melting water.
- Allow ice to melt naturally for several hours, avoiding sharp tools to prevent damage.
- Use gentle methods like a plastic scraper or warm steam to remove stubborn ice gradually.
Gather Cleaning Supplies
Although gathering cleaning supplies might seem straightforward, assembling the right tools and protective gear is vital for a thorough and safe deep cleaning of your RV freezer. ou’ll need specific cleaning agents, protective items, and specialized tools to tackle odors and grime effectively.
Selecting materials that are safe for all-season use can help maintain the freezer’s condition across varying weather conditions.
| Cleaning Tools | Protective Gear | Cleaning Agents |
|---|---|---|
| Vacuum with brush | Rubber gloves | White vinegar |
| Coil brush | Safety glasses | Baking soda |
| Sponge | Face mask | Lemon juice |
| Flashlight | Apron | All-purpose cleaner |
| Microfiber cloths | Disposable gloves | Disinfectant wipes |
Prepare additional items like buckets, funnels, and paper towels. Ensuring the RV is level when parked helps prevent moisture-related odors during maintenance. This methodical setup guarantees you clean safely and eliminate foul smells efficiently.
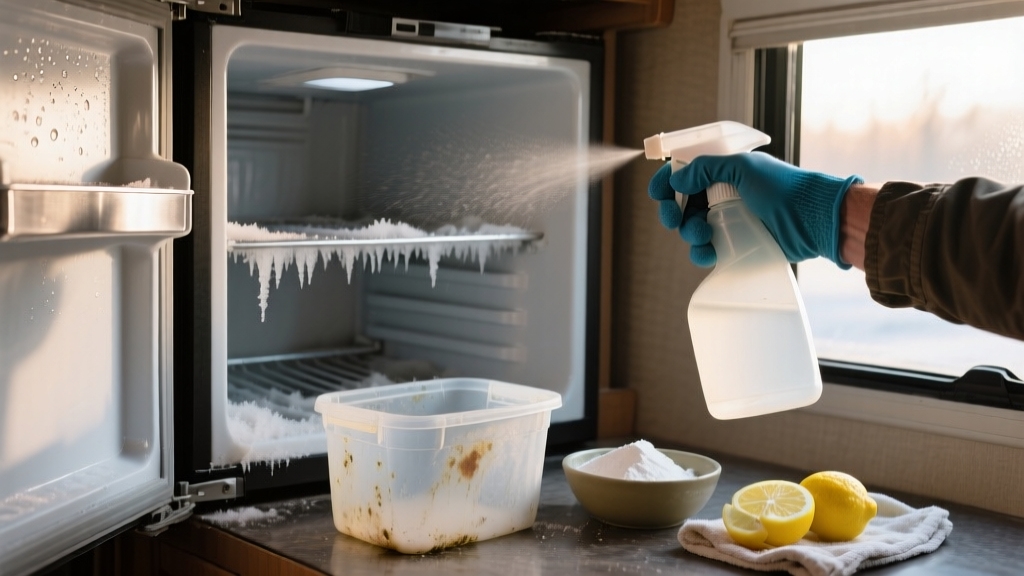
Using White Vinegar to Neutralize Rotten Meat Smell
To tackle that pesky rotten meat smell, you’ll want to start by mixing equal parts of white vinegar and water. This combination creates a safe and effective cleaning solution.
Now, grab a cloth and use this mixture to wipe down all the surfaces in your freezer. Don’t forget to pay special attention to the corners and door seals—those areas can really hold on to odors. Using a waterproof sealant on door seals after cleaning can help prevent future odor absorption.
Once you’ve given everything a good wipe, it’s time to let the freezer breathe. Leave the door open for a while so that it can air out completely. The vinegar’s vapor will help neutralize any lingering smells, making your freezer fresh again! Vinegar works by altering chemical composition of odor molecules, which reduces their intensity temporarily.
Vinegar and Water Mix
When you need to tackle the stubborn rotten meat smell in your RV freezer, using a vinegar and water mix offers a practical and effective solution.
White distilled vinegar’s acetic acid chemically alters odor-causing compounds, neutralizing malodors without toxic residues. This method is safe and aligns with using certified food-grade materials to maintain a healthy environment.
To apply this method effectively:
- Mix equal parts white vinegar and water in a spray bottle for easy application.
- Place bowls with the mixture inside the freezer and let them sit for several hours or overnight to absorb odors.
- Replace the mixture if the smell persists, ensuring continuous neutralization.
For best results, always dispose of rotten food properly before deodorizing to prevent the smell from lingering.
Effective Surface Wiping
Since rotten meat odors often penetrate freezer surfaces deeply, effective surface wiping with white vinegar becomes essential to fully neutralize these smells.
Use undiluted white vinegar, applying it directly with a microfiber cloth soaked and pressed firmly against affected areas for 5-10 minutes. Repeat wiping multiple times to break down odor molecules thoroughly, focusing on rubber seals and gaskets where bacteria accumulate.
Be cautious with surface materials: use diluted vinegar for plastic panels and gentle wiping on painted areas, while stainless steel and silicone tolerate direct application well. After wiping, dry surfaces promptly with a dry cloth to prevent moisture buildup.
This method chemically neutralizes odors by converting volatile compounds into less offensive substances, providing a reliable, deep clean that targets bacteria embedded in crevices rather than merely masking the smell.
For enhanced maintenance, regularly inspecting and maintaining the tire pressure of your RV tires can prevent additional odors caused by rubber degradation.
Airing Out Freezer
After thoroughly wiping down your freezer surfaces with white vinegar to break down odor molecules, you’ll want to focus on airing out the interior to remove lingering smells. Proper ventilation accelerates odor neutralization by dispersing airborne compounds and allowing vinegar’s acetic acid to work effectively.
Follow these steps to air out your freezer:
- Leave the freezer door open for several hours in a well-ventilated area, avoiding direct sunlight to protect plastic components, as exposure to UV-resistant materials helps maintain durability.
- Place a bowl of undiluted white vinegar inside and use a fan to circulate air, enhancing odor absorption.
- Replace vinegar every 24 hours and repeat airing for up to three days if the smell persists.
To prevent future odors, it is important to promptly clean spills or leaks as soon as they occur to avoid buildup and odor retention.
This method guarantees thorough odor elimination while maintaining safety and preventing corrosion.
Applying Bleach Solution for Disinfection
To disinfect your RV’s water system effectively, you’ll need to prepare a precise bleach solution using one-quarter cup of unscented household bleach per 15 gallons of water.
Mix the bleach thoroughly with water before adding it to your fresh water tank to ensure even distribution.
Run the solution through all faucets, showers, and water outlets until you detect the bleach odor, ensuring every line is sanitized. Regular maintenance, including disinfection, is vital to prevent bacterial growth and odors.
Let the solution sit in the system for at least four hours or overnight, but don’t use the water during this period. It is important to allow the bleach mixture to sit for 12-24 hours to ensure complete sanitization without damaging the system.
After soaking, drain the solution completely, refill with clean water, and flush until no bleach smell remains.
Always wear gloves and ensure proper ventilation during this process to maintain safety and prevent corrosion by adhering strictly to recommended bleach ratios. Proper maintenance and safety practices help extend the lifespan of your RV systems.
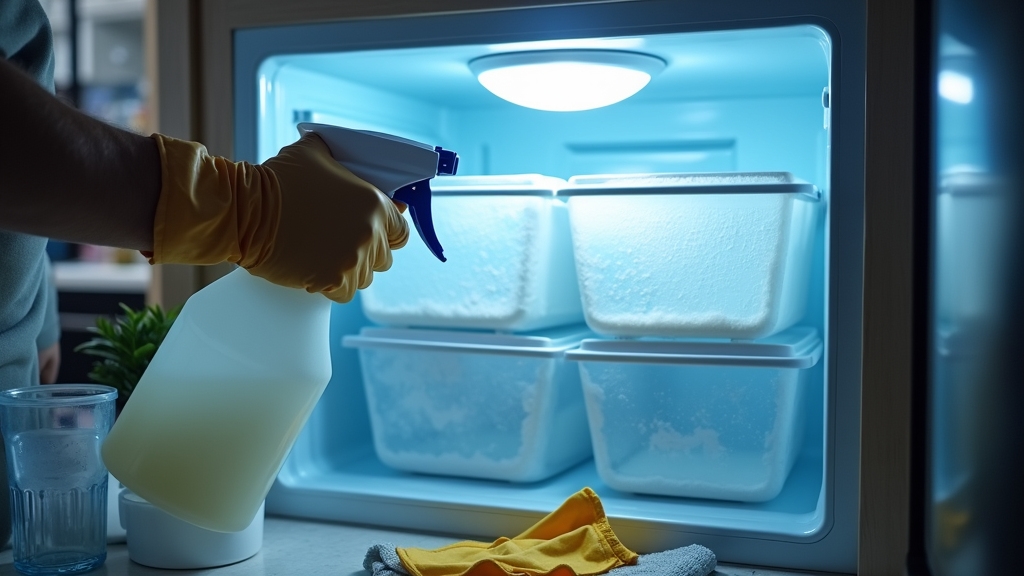
Absorbing Odors With Baking Soda
Once you’ve disinfected your RV freezer to eliminate bacteria and pathogens, addressing lingering odors becomes the next priority. Baking soda neutralizes acidic and basic odor molecules by converting volatile fatty acids from rotten meat into odorless salts, releasing harmless carbon dioxide and water. It is widely used in household and industrial settings for its ability to neutralize bad odors, including in environments like libraries and paper conservation, demonstrating its versatile odor-neutralizing properties.
To maximize its effectiveness:
- Spread baking soda in multiple open containers placed throughout the freezer to increase surface area and airflow.
- Replace the baking soda every 2–3 days to maintain its absorption capacity, as saturation reduces effectiveness.
- Avoid placing containers in corners or behind objects where airflow is restricted, ensuring even odor neutralization.
Utilizing Ground Coffee and Charcoal for Odor Removal
Although baking soda is a popular choice for neutralizing odors, you can markedly enhance odor removal in your RV freezer by utilizing ground coffee and activated charcoal together.
Ground coffee’s nitrogen compounds boost the adsorption capacity of charcoal’s porous matrix, targeting sulfur-based odors like hydrogen sulfide.
To apply, place dry coffee grounds in a shallow bowl or breathable container and activated charcoal in small porous sachets around the freezer. Using materials that are waterproof and vibration-proof ensures durability even in cooler, moisture-prone environments.
This combination adsorbs odor molecules on their surfaces, effectively trapping volatile compounds and moisture. The nitrogen-rich surface of the activated carbon, derived from coffee grounds, improves adsorption of toxic gases like hydrogen sulfide.
Use about one kilogram of the mixture for ideal results, expecting significant odor reduction within hours. Replace or reactivate the materials every few weeks to maintain effectiveness.
Employing Enzymatic Cleaners for Tough Odors
When rotten meat odors persist despite thorough cleaning, enzymatic cleaners offer a powerful solution by breaking down the organic compounds at their source. These cleaners contain enzymes that specifically target proteins, fats, and carbohydrates, accelerating decomposition and neutralizing odors permanently.
Enzymatic cleaners break down proteins, fats, and carbs to permanently neutralize odors at their source. To use enzymatic cleaners effectively in your RV freezer:
- Fully clean and dry the freezer to remove visible residue before application.
- Apply the enzymatic cleaner evenly on all affected surfaces and allow it to dwell for 10–30 minutes.
- Wipe or rinse the interior with a damp cloth, repeating treatment if odors remain.
Using biodegradable, RV-safe products ensures lasting odor elimination without harming your freezer’s components. Avoid using hot water or mixing with bleach, as these can deactivate enzymes.
Ventilating and Airing Out the RV Freezer
After applying enzymatic cleaners to neutralize stubborn odors, you’ll need to promote airflow to fully clear out lingering rotten meat smells from your RV freezer.
Start by inspecting and clearing the vents, both roof and lower side, to ensure no debris blocks natural ventilation. Proper vent clearance supports the essential cool air intake and hot air exhaust that dissipate odors.
If possible, install 12V ventilation fans near compressor vents to actively pull stale air out. Favor multiple quiet fans over a single noisy one for better airflow.
Keep the freezer away from walls or tight spaces to allow natural convection, as good ventilation enhances fridge performance and prevents heat buildup.
Finally, leave the freezer door open during cool parts of the day, letting fresh air flow through and out the vents. This completes the airing-out process effectively.
Additional Tips to Mask and Eliminate Residual Odors
To effectively mask and eliminate residual odors in your RV freezer, you’ll want to combine targeted natural absorbents with thorough cleaning and odor-masking agents.
Start by placing open containers of baking soda or activated charcoal inside to actively absorb lingering smells. These items should be replaced every 1-3 months to maintain ongoing odor control.
Then, clean all interior surfaces with a vinegar-water solution to neutralize odor-causing residues, rinsing and drying thoroughly. Finally, introduce subtle scent enhancers like vanilla extract on a cloth or fresh lemon slices to mask any remaining odors without overpowering.
- Use baking soda or activated charcoal as natural absorbents to capture odors.
- Deep clean the freezer interior with equal parts white vinegar and water.
- Apply vanilla extract or place lemon slices inside to gently mask residual smells.
This method ensures odors are methodically reduced and effectively hidden.
Maintaining a Fresh Smell in Your RV Freezer Over Time
To keep your RV freezer smelling fresh over time, it’s a good idea to set up a regular cleaning routine. Using natural solutions can really help eliminate any residue and bacteria that might be lingering around. Have you tried using baking soda or charcoal packs? They work wonders as odor absorbers and can really neutralize those stubborn smells.
Another tip is to make sure your freezer has proper ventilation. It’s super important to check that the vents are clear, allowing for good air circulation. This can help prevent moisture buildup and keep those stale odors at bay. Keeping things fresh is easier than you might think!
Additionally, managing humidity levels between 35–55% inside your RV can significantly reduce mold and mildew growth that contributes to unpleasant freezer odors.
Regular Cleaning Routine
Although it might seem tedious, establishing a regular cleaning routine is essential for keeping your RV freezer smelling fresh and preventing the buildup of unpleasant odors.
You should clean your freezer at least once a month and always after trips, especially if food has been stored for long periods. Regular cleaning also helps you inspect door seals and latches for damage, ensuring they maintain a proper seal and prevent odor leaks.
Before cleaning, defrost the freezer completely to make the process more effective. Follow this methodical approach:
- Remove all shelves and racks, wash them with warm water and mild detergent, rinse thoroughly, and dry.
- Wipe down the interior walls and crevices with a baking soda-water solution to tackle stains and odors.
- Inspect and clean door seals carefully, drying them fully to prevent mold and ensure a tight seal.
Maintain this routine consistently to avoid odor recurrence.
Effective Odor Absorbers
When you want to maintain a fresh smell in your RV freezer over time, choosing the right odor absorbers plays a crucial role.
Activated carbon filters, made from coconut shell carbon, absorb odors up to 50 times faster than baking soda and last about three months. Their peel-and-stick design lets you position them precisely.
Charcoal briquettes physically trap odor molecules continuously, especially when paired with moisture absorbers.
For stubborn smells, chlorine dioxide technology targets odor molecules directly, eliminating them within 24 hours safely and without toxic residues.
Baking soda remains a reliable, affordable option, absorbing odors passively when placed openly or applied as a paste, replaced quarterly.
You can also supplement with natural options like unscented cat litter, coffee grounds, or vanilla-soaked cotton balls to enhance odor control without chemicals.
Proper Freezer Ventilation
Since odors in your RV freezer often stem from trapped moisture and stagnant air, ensuring proper ventilation is essential for maintaining freshness over time. Proper airflow prevents heat buildup and moisture accumulation, both of which foster odor-causing bacteria and spoilage.
To maintain effective ventilation:
- Clean Exterior Vents Monthly: Remove dust, debris, and insect nests using a soft brush or vacuum to preserve unobstructed airflow.
- Maintain Interior Airflow: Avoid overpacking and regularly check for ice buildup that blocks vents. Arrange shelves to maximize circulation. It is also important to clear debris from behind the refrigerator and around airflow pathways to ensure unrestricted ventilation.
- Inspect and Clean Condenser Coils: Every 3–6 months, clear dust from coils and fins to sustain cooling efficiency and reduce odor retention.
Frequently Asked Questions
Can Rotten Meat Odors Affect Food Safety in My RV Freezer?
Yes, rotten meat odors can affect food safety in your RV freezer. They indicate spoilage and potential bacterial contamination, which may spread to other foods.
Even if your freezer is cold, some pathogens survive freezing and can reactivate when thawed. You should discard any items exposed to the odor or juices.
Thoroughly clean the freezer and inspect remaining foods carefully to prevent foodborne illness risks.
How Long Should I Wait Before Storing Food After Cleaning the Freezer?
Don’t rush to put the cart before the horse. You should wait at least 24 hours after cleaning and deodorizing your RV freezer before storing food.
This gives time for all odors and cleaning agents to dissipate and guarantees the freezer returns to a safe temperature of 0°F or below.
If any smell lingers, extend the wait and repeat odor neutralization. Only then can you confidently restock without risking food safety.
What Should I Do if the Freezer Gasket Smells Bad?
Even if the gasket looks clean, you should clean it thoroughly.
Start by scrubbing it with mild detergent and water, focusing on crevices using a toothbrush.
Then, apply a baking soda paste to tackle stubborn odors, followed by wiping it down with a vinegar-water solution to kill bacteria.
Dry it completely.
If the smell lingers, place baking soda or activated charcoal inside the freezer to absorb odors.
Replace them regularly until the smell disappears.
Can Freezing Temperatures Alone Eliminate Rotten Meat Odors?
No, freezing temperatures alone can’t eliminate rotten meat odors. While freezing slows microbial activity, it doesn’t neutralize the volatile sulfur compounds or ammonia that cause the smell.
Odor molecules remain stable and can persist in porous surfaces and insulation.
You’ll find that once thawed, the odors often return or worsen.
To truly remove the smell, you need to clean, sanitize, and possibly replace contaminated materials. Freezing just masks the problem temporarily.
Make Freshness the Norm Every Time You Open the Door
By following these steps, you’ll banish that rotten meat smell from your RV freezer like a gust of fresh mountain air. Tackling the source, using vinegar, bleach, and baking soda methodically, ensures no odor hides in the shadows.
Remember, consistent ventilation and enzymatic cleaners keep your freezer smelling clean and crisp. With careful maintenance, you’ll turn your freezer from a lingering nuisance into a fresh, inviting space every time you open it.

