

To install carpet in your RV, first choose durable, water-resistant material like polypropylene. Thoroughly clean and dry the floor, removing old carpet, staples, and debris. Measure and cut the new carpet precisely, using old pieces as templates.
Then, test fit it to avoid wrinkles. Secure it with metal snaps or perimeter adhesive for a tight hold, trimming edges neatly. Proper prep and installation guarantee lasting results. Explore further to master each detailed step.
Key Takeaways
- Remove old carpet carefully using utility knives and pliers, then clean and dry the subfloor thoroughly to prevent mold and damage.
- Repair any floor imperfections and ensure the surface is smooth, level, and free of adhesives before installation.
- Measure and cut new carpet accurately, using old carpet sections as templates for proper fit around fixtures and vents.
- Test-fit the carpet inside the RV, applying tension to avoid wrinkles and use a carpet tuck tool for tight corners.
- Secure carpet with metal snaps on the floor, use perimeter adhesive selectively, and trim edges with molding for a polished finish.
Selecting the Right Carpet Material for Your RV
When selecting carpet material for your RV, you’ll want to prioritize durability, water resistance, and UV stability to withstand the unique conditions inside a mobile environment.
- Polypropylene stands out for its water and stain resistance, UV stability, and wear durability, making it ideal for RVs exposed to moisture and sunlight.
- Nylon offers strong abrasion resistance but typically requires additional stain treatments to manage moisture.
- Polyester provides softness and affordability, suitable for low-traffic areas, though it lacks the durability of nylon or polypropylene.
- Wool and wool blends deliver natural insulation and durability but require careful maintenance to prevent mildew in humid conditions.
- Commercial-grade rubber-backed polyester carpets with short piles combine resilience, moisture resistance, and ease of cleaning, making them excellent for high-use living sections in motorhomes.
Additionally, most RV floors are constructed with plywood decking that supports a variety of carpet options, allowing for flexible customization of your RV interior to suit your needs and style preferences plywood decking base.
For optimal comfort and safety, consider pairing your carpet choice with a suitable RV power system that supports deep cycle batteries to maintain consistent energy for climate control and lighting.
Preparing the RV Floor Before Carpet Installation
Selecting the right carpet material sets the foundation, but properly preparing your RV floor guarantees the new carpet adheres correctly and lasts.
Start by removing all staples, nails, and debris using pliers or a staple remover to prevent damage. Old carpet staples are usually small and not heavy-duty, so using T50 staples for reinstallation ensures better fastening.
Begin by clearing out all staples, nails, and debris to protect your RV floor from damage. Sweep and vacuum thoroughly, especially corners, then wipe down with isopropyl alcohol to eliminate adhesives or residues.
Use durable materials to ensure the longevity of your installation. Inspect the subfloor carefully, repairing cracks, holes, or soft spots by patching or sanding to ensure a smooth, level surface.
Avoid moisture; confirm the floor is dry to prevent mold. Remove any old adhesive buildup. Finally, clean the floor surface with non-water-based agents to remove grease and fine particles.
Removing Old Carpet and Cleaning the Floor
Although removing old carpet from an RV can be labor-intensive due to tight spaces and secure fastenings, using the right tools such as a sharp utility knife, needle-nose pliers, and a pry bar will help you efficiently cut, lift, and pull up the carpet and its staples without damaging the subfloor or surrounding fixtures.
Be prepared for potential water damage beneath the carpet, which may require extra care during removal. Ensuring the subfloor is properly maintained is crucial, especially when installing new materials that must be supported by tires with the correct load capacity.
Cut carpet near cabinets to avoid heavy fixture removal. Separate padding for thorough inspection. After removal, sweep and vacuum the floor to eliminate debris and adhesive residues. Use a damp cloth to clean the subfloor, ensuring it dries completely before proceeding.
| Step | Action |
|---|---|
| 1. Cut Carpet | Use utility knife around edges |
| 2. Remove Staples | Pull with needle-nose pliers |
| 3. Dispose Properly | Cut into sections, collect debris |
| 4. Clean Subfloor | Sweep, vacuum, mop, and dry |
Cutting and Fitting the New Carpet to Your RV Floor
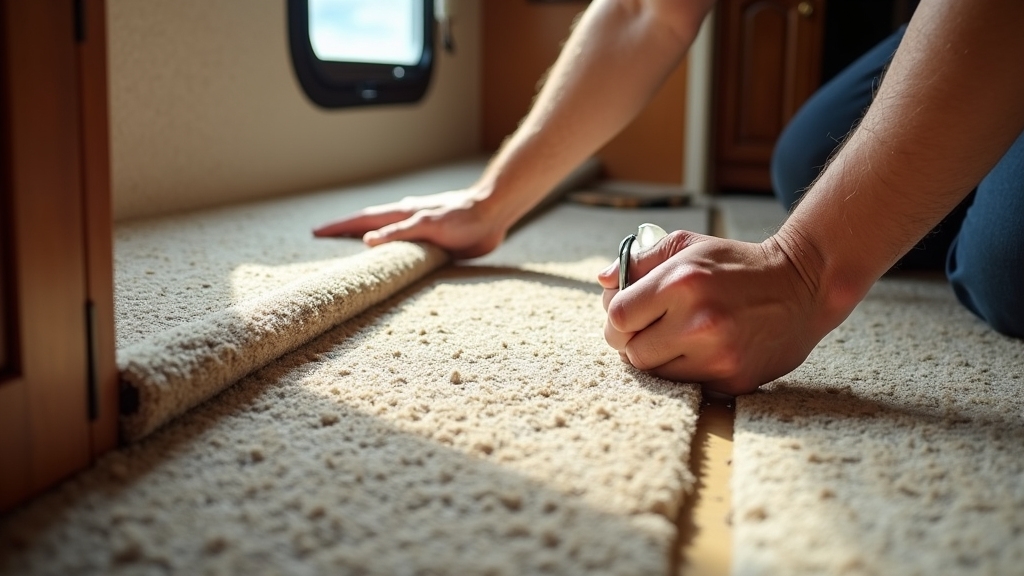
How do you guarantee your new RV carpet fits perfectly without wrinkles or gaps? Start by accurately measuring every section of your RV floor, noting obstacles like vents and seat mounts. Make sure to clean surfaces thoroughly before fitting to ensure the adhesive bonds well.
Use old carpet pieces as templates to mark cutting lines precisely on the new carpet. Cut the carpet outside the RV with a sharp utility knife, working in manageable sections.
Follow these steps:
- Measure and mark the carpet using a straightedge for clean lines.
- Cut carefully, preserving excess carpet for future repairs.
- Test-fit the carpet, applying tension to avoid wrinkles.
- Adjust and tuck the carpet into tight spaces with a carpet tuck tool.
Securing and Finishing Your Carpet Installation
Once you’ve cut and fitted your carpet to snugly follow your RV’s contours, the next step is securing it firmly to prevent shifting or wrinkling.
Use metal snaps for durable attachment, placing male parts on the floor and female parts under the carpet. Avoid full-surface adhesive; instead, glue only the perimeter to allow carpet flexibility over slide-out floors.
Finish edges with vinyl trim or quarter-round molding to protect and conceal. Consider the load rating of your RV tires when traveling to ensure safety during your journey.
| Securing Method | Best Use Case | Notes |
|---|---|---|
| Metal Snaps | High durability | Allows easy removal |
| Double-sided Tape | Temporary holds | Simple but less durable |
| Perimeter Adhesive | Flexible edges | Prevents full-floor wrinkling |
| Staples | Quick perimeter fix | May damage subfloor |
Frequently Asked Questions
How Often Should RV Carpet Be Replaced for Optimal Hygiene?
You should replace your RV carpet every 3 to 5 years, or sooner if you spot stains, odors, or wear like wrinkles and fraying.
Water damage, especially from contaminated sources, demands immediate replacement to prevent mold and health risks.
Regular cleaning and inspections help extend its life, but persistent pet allergens or musty smells signal it’s time.
Staying proactive keeps your RV hygienic and safe for travel.
Can RV Carpet Installation Affect Resale Value?
Yes, your RV carpet installation can influence resale value, but it won’t directly boost your price.
If you install carpet professionally with neutral, durable materials that match your RV’s style, you’ll maintain or slightly enhance appeal.
Poor installation or damaged carpet, however, lowers buyer confidence and invites lower offers.
Regular maintenance alongside tasteful upgrades helps preserve value and facilitates quicker sales by presenting a clean, well-cared-for interior.
What Are the Best Cleaning Methods for RV Carpet Stains?
The best cleaning methods for RV carpet stains include promptly blotting spills with a white microfiber towel without rubbing. Then apply a mild DIY solution—one teaspoon dish soap mixed with two cups water—to lift stains.
Use carpet cleaners with dry-only modes for embedded dirt, ensuring you test on a hidden area first.
For tough stains, schedule professional cleaning to preserve carpet integrity and prevent damage while extending its lifespan.
Is Professional Installation Recommended for RV Carpet Replacement?
You shouldn’t underestimate the complexity. Installing RV carpet isn’t just a walk in the park.
Professional installation is highly recommended because it guarantees exact cutting and fitting around RV contours and slide-outs.
Experts use specialized tools and adhesives designed for RV vibrations, preventing premature wear or damage.
This precision boosts carpet longevity, maintains moisture barriers, and enhances aesthetics.
Ultimately, this saves you time, reduces risks, and increases your RV’s resale value considerably.
How to Prevent Mold Growth Under RV Carpet in Humid Climates?
To prevent mold under RV carpet in humid climates, you should first install a waterproof barrier and use breathable padding to allow moisture to escape.
Seal all leaks and maintain proper ventilation with fans or vents.
Monitor humidity with a hygrometer, keeping levels under 50%.
Regularly inspect beneath the carpet for moisture.
Using dehumidifiers and ensuring tight carpet installation without wrinkles will also inhibit mold growth effectively.
Quality Materials Matter: Choose the Right Carpet Makes All the Difference
Installing carpet in your RV is like tailoring a custom suit. It demands precision and the right materials for a perfect fit. By carefully selecting durable carpet, thoroughly preparing and cleaning the floor, and accurately cutting and securing the carpet, you guarantee both comfort and longevity.
Follow each step methodically, and your RV will not only look great but also withstand the rigors of the road. This makes every journey feel like home.

