
To put antifreeze in your RV, first drain all water from the system by opening every faucet and drain valve. Next, install bypass valves to reroute antifreeze around the water heater, preventing damage.
Attach a bypass hose from the water pump suction port to a container of food-grade RV antifreeze. Then run the pump to circulate antifreeze through every line and fixture, opening faucets one by one until pink fluid appears.
Finally, pour antifreeze into drains and toilets, secure all valves, and clean any spills. For detailed steps and tips, keep exploring the process carefully.
Key Takeaways
- Drain all water from the RV’s plumbing system by opening all faucets, valves, and using drain valves before adding antifreeze.
- Bypass the water heater using the bypass valves to prevent antifreeze from filling the tank and causing damage.
- Connect a hand pump or bypass hose to the water pump suction port and draw pink RV antifreeze directly from the container.
- Circulate antifreeze through all cold and hot water lines and fixtures by running the water pump and opening faucets until antifreeze appears.
- Pour antifreeze into all drains, P-traps, and the toilet bowl to protect against freezing, then tightly close all valves and caps.
Get the RV Antifreeze and Tools You Need
Before you begin winterizing your RV, make sure you gather the correct antifreeze and necessary tools.
Gather the right antifreeze and tools before starting your RV winterization to protect your plumbing system.
You’ll need two gallons of pink, food-grade RV antifreeze. Don’t use automotive antifreeze.
Consult your RV manual to confirm the exact antifreeze volume for your model.
Prepare a socket or flat wrench to remove the water heater drain plug.
Have a winterizing kit or bypass hose ready for connecting to the water pump.
A hand pump or siphon line is essential for transferring antifreeze efficiently.
Organize these items beforehand to streamline the process and avoid interruptions.
Ensuring you have the correct materials and tools guarantees a thorough winterization, protecting your plumbing system from freeze damage.
For best results, choose a product with freeze protection rated to -50°F or lower to safeguard your plumbing during extreme cold.
Drain Your RV’s Water System Completely
Start by flushing out and draining your RV’s entire plumbing system, including all tanks. Open every faucet, hot and cold, along with the shower, exterior hose bib, and toilet flush to evacuate water from the lines.
Next, drain the freshwater tank via its designated drain valve, ensuring complete emptying. Remove or open all low point drain valves to release residual water. Use an air compressor to blow out any remaining moisture from the water lines, preventing freeze damage.
Once drained, reinstall all drain caps securely to maintain system integrity. Finally, close every faucet, valve, and tank cap to seal the system. Fully draining your RV’s water system this way prepares it ideally for antifreeze introduction and helps safeguard plumbing components during winter storage.
Be sure to turn off the water heater and remove its drain plug or anode rod to drain any remaining water from the tank, as part of proper water system drainage.
Bypass the Water Heater to Prevent Damage
Alright, let’s talk about how to bypass your water heater to prevent any damage.
First, you’ll want to locate those bypass valves on the water lines that are entering the heater. If you can’t see them right away, don’t hesitate to remove the access panel—it’s usually pretty straightforward.
Once you’ve found the valves, go ahead and turn them to the bypass position. This step is crucial because it stops antifreeze from making its way into the tank, which can save you a lot of trouble later on.
Next up, you’ll need to install the bypass hose on the water pump’s suction side. Just connect it directly to your antifreeze container. This setup will help ensure an efficient flow, making the whole process a breeze!
Using a winterizing blow out adapter can also help remove water from your lines before adding antifreeze, reducing the amount needed and protecting your system more effectively.
Locate Bypass Valves
To bypass the water heater and prevent damage during winterizing, you’ll need to identify and adjust the bypass valves on your RV’s water lines.
First, locate the access panel on the exterior or interior near the water heater.
Remove the panel to expose the plumbing lines entering the heater.
You’ll find two valves: one on the cold water inlet and one on the hot water outlet.
Turn these valves to the bypass position, typically perpendicular to the pipe or as indicated by your RV manual.
This reroutes antifreeze around the water heater tank, preventing it from filling and freezing.
Confirm the valves are fully engaged in bypass mode before proceeding with antifreeze introduction to protect your water heater from damage during freezing conditions.
Using flexible sealants on the bypass valves can help ensure a secure, waterproof connection that withstands temperature fluctuations during winter.
Install Bypass Hose
You’ll need to connect the bypass hose securely to the water pump’s suction side to reroute antifreeze around the water heater.
First, make certain the water heater bypass valves are set to the bypass position to prevent antifreeze from entering the tank.
Attach one end of the bypass hose to the water pump’s suction port, tightening it firmly to avoid leaks.
Connect the other end directly into the antifreeze container to allow the pump to draw antifreeze efficiently.
Double-check all hose clamps and fittings for a snug fit.
This setup prevents damage by keeping antifreeze from filling the water heater, which isn’t designed to hold antifreeze.
Once installed, you’re ready to start pumping antifreeze through the system safely and effectively.
Choosing compatible sealants for any connections ensures leak-free performance during and after the antifreeze process.
Install a Bypass Hose for Antifreeze Delivery
Before introducing antifreeze into your RV’s plumbing system, set up the bypass hose to reroute water flow around the water heater.
Locate the water heater bypass valves at the back of the unit; turn them to the bypass position to avoid filling the tank with antifreeze.
Next, remove the access panel if necessary for valve and hose access. Detach the water pump’s suction line and connect the bypass hose directly to the pump inlet, securing a secure, leak-free fit.
Position the other end of the bypass hose into the antifreeze container to allow direct antifreeze delivery. Confirm all connections are tight and correctly oriented to prevent antifreeze backflow.
This setup guarantees antifreeze circulates through the plumbing lines only, protecting your water heater from unnecessary antifreeze exposure.
For best results, ensure your RV’s water tank is made of NSF-approved polyethylene to maintain durability and safety during winterization.
Introduce RV Antifreeze Through the Water Pump
With the bypass hose securely connected to the water pump and positioned in the antifreeze container, you can now begin introducing the antifreeze into the plumbing system.
Turn on the water pump to start drawing antifreeze through the bypass hose. Monitor the flow to guarantee consistent suction without air gaps.
Keep the pump running steadily to push antifreeze into all water lines. Avoid opening any faucets at this stage to maintain pressure within the system.
If your RV has a hot water tank valve, open it now to allow antifreeze circulation inside the tank. Observe the antifreeze level in the container and replenish if necessary to prevent the pump from running dry.
This method guarantees antifreeze reaches all internal plumbing without contaminating the freshwater tank.
For optimal protection during cold weather, ensure the antifreeze used is specifically formulated for RV plumbing systems to prevent damage to water heater components.
Run Antifreeze Through All Faucets and Fixtures
Start by turning on the water pump switch to push antifreeze throughout your RV’s plumbing system. Next, open each faucet systematically to make certain antifreeze circulates fully.
Follow this process:
- Begin with the cold water faucets, starting at the fixture farthest from the pump to avoid airlocks.
- Repeat the procedure for all hot water faucets, including the outdoor shower if equipped.
- Flush the toilet until antifreeze appears in the bowl. Run antifreeze through washer hookups, cold then hot, if present.
This method guarantees antifreeze penetrates every water line and fixture, preventing freeze damage. Monitor flow to confirm pink antifreeze replaces water at each outlet before moving on.
Once complete, close all faucets and switch off the pump to prepare for the next winterizing steps. Using environmentally safe antifreeze helps protect your RV’s plumbing and surrounding nature during winterization.
Add Antifreeze to Drains, Toilets, and Appliances
After circulating antifreeze through all faucets and fixtures, focus on protecting areas where water can collect and freeze.
Pour one quart of RV antifreeze into each drain and P-trap to prevent residual water from freezing and damaging pipes.
Add antifreeze to the toilet bowl and tank, guaranteeing it covers seals to maintain their integrity during winter.
Don’t forget appliance drains; carefully pour antifreeze into shower drains, dishwasher drains, and ice maker lines if equipped.
This step makes certain all potential water pockets are safeguarded.
Use pink, non-toxic RV antifreeze exclusively, and measure quantities precisely to avoid waste or insufficient protection.
After adding antifreeze, close all drain valves and caps tightly to secure the system.
This targeted application completes the internal freeze protection for your RV’s plumbing and appliances.
For optimal maintenance, consider using enzyme-based treatments to keep your black water tank clean and odor-free during storage.
Seal and Secure Your Plumbing System After Winterizing
To make certain your RV’s plumbing remains protected throughout winter, you’ll need to securely seal all faucets, valves, and drain caps after adding antifreeze. This prevents air and contaminants from entering the system while maintaining antifreeze coverage.
Follow these essential steps:
- Close each faucet and valve tightly, ensuring no leaks or drips remain.
- Replace all drain caps and low point drain plugs, verifying they’re fully seated and sealed.
- Double-check bypass valves and water heater access panels, confirming they’re closed and secure.
- For added protection, consider using a heated RV hose to prevent freezing and maintain water flow in extremely cold conditions.
Remove Pink Antifreeze Stains From Surfaces
Hey there! If you happen to spill some pink antifreeze, it’s really important to tackle those stains right away. Otherwise, you might end up with permanent discoloration, especially on white or light-colored surfaces.
So, here’s what you can do: mix a mild detergent with warm water, grab a soft cloth, and gently scrub the stained area. It’s pretty straightforward!
Oh, and to prevent future mishaps, make sure to clean up any spills as soon as they happen. You might also want to think about applying a protective sealant to surfaces that are more vulnerable to staining. It’s a smart move!
Effective Cleaning Solutions
Combat pink antifreeze stains on white surfaces promptly by using a mixture of mild detergent and warm water.
This approach prevents stains from setting and damaging finishes.
Follow these steps for effective cleaning:
- Prepare Cleaning Solution: Mix a teaspoon of mild detergent into one quart of warm water.
- Apply and Scrub: Dip a soft cloth or sponge into the solution and gently scrub the stained area in circular motions until the stain lightens.
- Rinse and Dry: Wipe the surface with clean water to remove detergent residue, then dry with a microfiber cloth to avoid water marks.
Avoid abrasive cleaners or harsh chemicals that may damage surfaces.
For stubborn stains, repeat the process or use a specialized RV surface cleaner designed for antifreeze residues.
Preventing Antifreeze Stains
Frequently, pink RV antifreeze can leave stubborn stains on white surfaces if not handled carefully during winterizing.
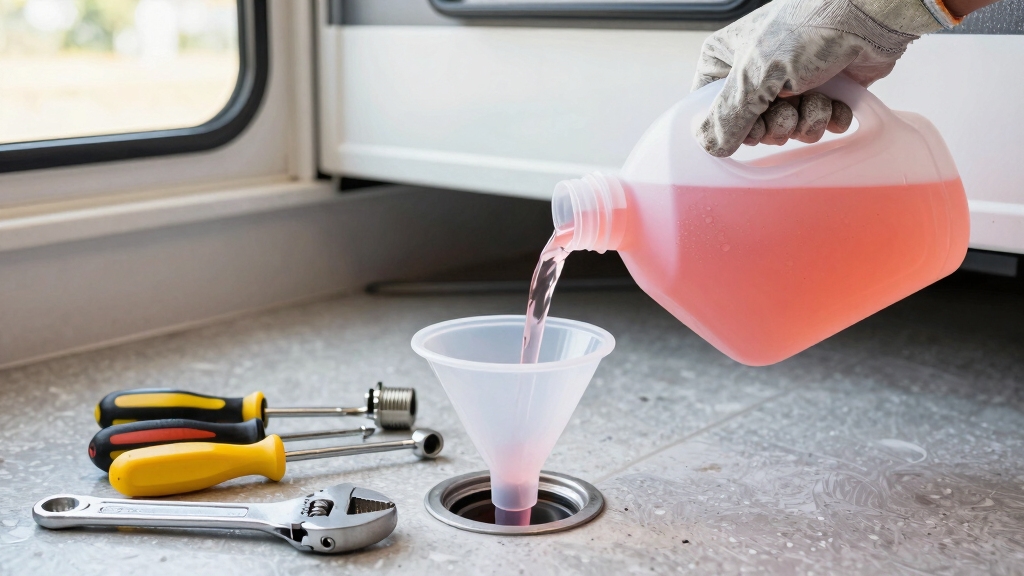
To prevent this, always use a dedicated funnel or siphon line to control spills when transferring antifreeze.
Wear protective gloves and immediately wipe any drips with a damp cloth before they dry.
If a spill occurs, apply a mild detergent solution promptly and scrub gently using a non-abrasive sponge.
Avoid harsh chemicals that may damage surfaces.
For persistent stains, dilute a small amount of white vinegar with water and test on an inconspicuous area before applying.
Rinse thoroughly with clean water and dry the area completely.
Maintaining careful handling and immediate cleaning will effectively minimize pink antifreeze stains and preserve your RV’s surfaces during winter preparation.
Frequently Asked Questions
Can I Use Automotive Antifreeze in My RV Plumbing System?
You shouldn’t use automotive antifreeze in your RV plumbing system.
Automotive antifreeze contains toxic chemicals harmful if ingested and can damage your RV’s water lines and fixtures.
Instead, always use pink, non-toxic RV antifreeze specifically designed for potable water systems.
This antifreeze guarantees safe winterization without risking contamination or damage.
Using the correct RV antifreeze protects your plumbing and prevents health hazards during storage or freezing conditions.
How Often Should I Winterize My RV With Antifreeze?
You should winterize your RV with antifreeze at least once every year before the first freeze, as 40% of RV plumbing damage occurs from improper winter preparation.
Perform this process annually to prevent freezing and cracking in pipes. If you store your RV in freezing conditions longer, winterize it immediately.
Regularly inspect seals and antifreeze levels, and follow manufacturer guidelines to maintain system integrity and avoid costly repairs.
Is It Safe to Drink Water After Winterizing With RV Antifreeze?
No, you shouldn’t drink water directly after winterizing with RV antifreeze. The antifreeze used is non-toxic but not safe for consumption.
Before using your water system again, flush all lines thoroughly with fresh water until no antifreeze taste or smell remains.
Run water through every faucet, toilet, and appliance multiple times to ensure complete removal.
This prevents ingestion of antifreeze residue and keeps your water safe.
What Temperature Range Requires RV Antifreeze Winterization?
Think of RV antifreeze as your rig’s shield against the icy breath of winter.
You need to winterize your RV when temperatures dip below 32°F (0°C), as freezing water expands and can crack pipes and tanks.
For added safety, apply antifreeze if you expect sustained temperatures near freezing or below 20°F (-6°C).
Always check your RV manual for specific recommendations to make sure your plumbing system remains protected throughout the cold season.
Can I Winterize My RV Without a Water Heater Bypass Kit?
Yes, you can winterize your RV without a water heater bypass kit, but it’s less efficient and uses more antifreeze.
Without the bypass, antifreeze must fill the entire water heater tank, requiring more antifreeze and longer pump run time.
To avoid damage, drain the water heater completely before antifreeze introduction.
Consider installing a bypass kit later for easier, cost-effective winterizing and to prevent antifreeze waste.
Protect Your RV Now with Proper Antifreeze Use
Congrats, you’ve just turned your RV’s plumbing into a winter fortress. No frozen pipes, no surprise leaks, just sweet antifreeze protection.
Remember, this isn’t just pouring pink juice; it’s a meticulous ritual that saves you from a costly spring meltdown.
So, grab that bypass hose like a hero’s sword, pump that antifreeze like the pro you are, and keep your RV’s insides chill-free.
Because nothing says “I’m prepared” like a system filled with toxic, yet life-saving, pink potion.

