
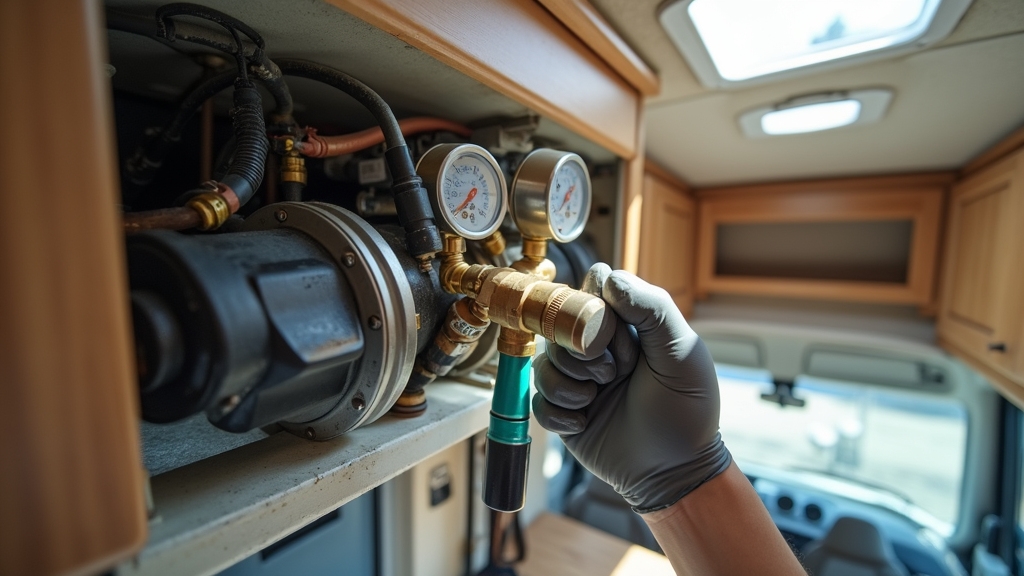
To recharge your RV air conditioner, first verify low refrigerant signs like weak cooling or ice on coils. Gather tools: manifold gauges, vacuum pump, R-134a refrigerant, and leak detectors.
Inspect and repair leaks thoroughly before evacuation with the vacuum pump. Connect gauges, then recharge with the exact refrigerant amount using scales. Confirm electrical components and airflow are essential.
After recharge, test temperature drops and electrical function to guarantee proper performance. Proper procedures and safety measures are vital; continued guidance covers detailed diagnostics and maintenance.
Key Takeaways
- Inspect for refrigerant leaks using soap bubbles, UV dye, or electronic detectors before recharging the RV air conditioner system.
- Evacuate the system with a vacuum pump to remove air and moisture after repairing leaks.
- Recharge with the specified refrigerant type and amount using manifold gauges, refrigerant scales, and proper hoses.
- Verify electrical connections, breakers, and compressor operation with a multimeter before and after recharging.
- Test cooling performance by measuring temperature drop and airflow, ensuring the system runs efficiently post-recharge.
Understanding the RV Air Conditioner System
Before you recharge your RV air conditioner, you need to understand how its system works.
The core component is the compressor, which pressurizes and circulates refrigerant through a closed-loop cycle.
Inside, evaporator coils absorb heat and moisture from the RV’s interior air, cooling and dehumidifying it. These coils require regular cleaning to maintain efficiency. Ensuring proper airflow is important to avoid reduced cooling performance.
Evaporator coils cool and remove moisture from the RV’s interior air, enhancing comfort and air quality.
Outside, condenser coils release the absorbed heat into the environment.
Fans and blowers circulate air over these coils and through ducts, distributing cooled air inside and expelling heat externally.
The system draws warm air through return ducts, cools it via the evaporator, then pushes conditioned air back through supply ducts.
Electrical controls, including the thermostat and control boards, regulate operation.
Proper function depends on clean air filters, intact coils, and continuous refrigerant flow within this closed refrigeration cycle.
Identifying Signs of Low Refrigerant
How can you tell if your RV air conditioner is running low on refrigerant? You’ll notice longer cooling times, warm airflow, and increased energy use. AGM batteries provide fast charging capabilities which help maintain power for appliances like air conditioners.
Physical signs like oily residue or frost on coils also indicate leaks. These symptoms mean your AC is struggling to maintain set temperatures and may strain electrical components.
Another common symptom is ice formation on the refrigerant lines, which signals a drop in refrigerant pressure and temperature, often caused by leaks or insufficient refrigerant levels. Ice formation on lines can cause further damage if not addressed promptly.
| Symptom | Indicator Detail |
|---|---|
| Extended Cooling | Longer run times; indoor temperature stays high |
| Air Temperature | Vents emit warm or lukewarm air |
| Energy Consumption | Higher electricity bills; increased compressor load |
| Physical Evidence | Oily stains, frost on coils, water drips |
If these signs appear, avoid DIY recharge. Professional diagnosis ensures proper leak repair and compliance with regulations.
Essential Tools and Equipment for Recharge
To effectively recharge your RV air conditioner, you’ll need a specific set of tools and equipment designed for HVAC systems.
Start with basic hand tools like screwdrivers, a ratchet set, and needle-nose pliers to access and manipulate components. Having a well-organized toolbox/kit ensures that all essential tools are readily available during the process.
Diagnostic instruments such as a digital multimeter, HVAC manifold gauge set, amp clamp meter, and leak detector help evaluate electrical and refrigerant conditions. Using devices that support dual-band WiFi can help maintain connectivity during service if referencing digital guides or remote support.
A vacuum pump is essential to evacuate air and moisture before adding refrigerant.
For recharge, use R-134a refrigerant with a recharge kit including hoses, gauges, and Schrader valve tools.
A refrigerant scale ensures precise charging per specifications.
Protect ports with valve covers after service.
Additionally, coil cleaners, protective gear, tapes, and a tool container facilitate safe, efficient, and thorough recharging of your RV’s AC system.
Diagnosing Electrical and Component Issues
When diagnosing electrical and component issues in your RV air conditioner, start by verifying the integrity of the power supply and control circuits. Proper electrical connections are crucial to prevent failures similar to those caused by improper trailer tire maintenance.
Check shore power connections, breakers, and 12V DC supply for consistency. Inspect wiring harnesses for continuity, damage, or shorts. Power issues often stem from improper shore power connection or faults in the electrical system.
Test relays and the control board for proper operation and signs of failure. Confirm compressor motor windings and capacitor condition to ensure mechanical and electrical health. Maintaining the correct load capacity in electrical components helps avoid overloads and failure.
| Checkpoint | Tool Needed | What to Verify |
|---|---|---|
| Power Supply | Multimeter | Voltage, breaker status, shore power |
| Wiring & Relays | Ohmmeter/Test Light | Continuity, coil energization, relay contacts |
| Compressor & Motor | Multimeter/Audio | Resistance, capacitor, operational sounds |
Locating and Inspecting for Refrigerant Leaks
Although refrigerant leaks can be subtle, detecting them early is essential to maintaining your RV air conditioner’s efficiency and preventing damage.
Start by visually inspecting line joints, coil fittings, compressor seals, and refrigerant access valves for oil stains or moisture. Using non-toxic ingredients in maintenance products can reduce health risks during inspection.
Listen for hissing near coils and lines, and note if the system runs continuously or cools inadequately.
Use a soap-bubble solution to apply on suspected areas; bubbles indicate leaks. Early detection is critical to prevent system damage and environmental harm.
Alternatively, employ electronic leak detectors or UV dye tests with UV light for precise identification.
Always wear protective gear, ensure proper ventilation, and disconnect power before inspection.
Address small leaks temporarily with Teflon tape or sealants, but plan for professional repair.
Early, accurate detection avoids costly compressor damage and maintains ideal cooling performance.
Preparing the RV AC for Refrigerant Recharge
Before you begin recharging your RV’s AC, it’s crucial to conduct a thorough inspection for any refrigerant leaks. You can use an electronic detector for this – it’ll help you catch any issues that might lead to loss or damage down the line. Using a unit with a built-in Battery Management System can also enhance safety during maintenance.
Once you’ve checked for leaks, don’t forget to verify that all your electrical connections are secure and intact. This step is crucial for ensuring safe operation while you’re servicing the unit.
And hey, while you’re at it, make sure to clean or replace those air filters! This will help maintain ideal airflow and ensure you get accurate system pressure readings. Proper airflow (around 400 CFM per ton) is essential for the system’s efficiency and accurate diagnostics.
Inspect for Refrigerant Leaks
Since refrigerant leaks directly impact your RV AC’s performance and environmental safety, you must thoroughly inspect the system before recharging.
Begin with a visual and auditory inspection. Listen for hissing or gurgling sounds and look for ice buildup or oil residue on coils and fittings.
Use these methods to detect leaks accurately:
- Apply a soap solution to connections; bubbles indicate leakage points.
- Inject UV dye into the system and inspect with a black light for fluorescent leaks.
- Employ an electronic refrigerant leak detector to sense escaping gases.
- Monitor system pressure with manifold gauges to identify drops signaling leaks.
Each detection method has its own advantages and limitations, so using a combination of methods can provide the most reliable diagnosis.
It is also crucial to ensure the sealant used around components is resistant to automotive fluids to prevent leaks and maintain system integrity.
Address any identified leaks before recharging to ensure ideal cooling efficiency and prevent environmental harm.
Verify Electrical Connections
To guarantee your RV air conditioner functions properly after recharging the refrigerant, you need to verify all electrical connections meticulously.
Start by obtaining the correct wiring diagram specific to your RV AC model from the manufacturer or trusted sources like SoftStartRV. Selecting the correct A/C manufacturer is essential to ensure you have the compatible wiring diagrams for your unit.
Inspect the 120 VAC power supply, ensuring secure, grounded connections and correct breaker ratings. Also, consider the battery type and capacity powering your system to ensure stable power delivery during operation.
Examine wiring from the breaker panel to the unit for damage or corrosion.
Check low voltage control wiring against the diagram, confirming proper seating of sensor plugs and thermostat leads without damage.
Inspect multi-wire connectors for bent or corroded pins and test continuity through harness wires with a multimeter.
Secure wiring harnesses to prevent vibration wear, apply dielectric grease where exposed, and verify installation of relays, fuses, and any aftermarket devices per manufacturer instructions. Using a Battery Management System can enhance electrical safety and reliability in your RV setup.
Clean Air Filters
When you clean your RV air conditioner’s filters, you prepare the system for an effective refrigerant recharge by ensuring unobstructed airflow and reducing contamination risks.
Start by turning off the AC and removing the filter carefully to avoid damage. Remove loose dust with a vacuum or gentle shaking. This initial step helps extend the filter’s effective life. Then soak the filter in warm, soapy water. Rinse thoroughly to eliminate residues and dry completely, ideally in sunlight, to prevent mold growth. Proper maintenance also enhances the overall system durability.
Before reassembly, inspect for damage and fit the filter securely to avoid air leaks.
Use mild detergent and avoid harsh scrubbing to maintain filter integrity.
Dry filters fully before reinsertion to inhibit bacterial growth.
Clean surrounding components like coil fins for maximum airflow.
Replace filters if clogged or damaged despite cleaning.
Step-by-Step Process for Recharging Refrigerant
Although most RV rooftop air conditioners aren’t designed for routine refrigerant recharging, understanding the step-by-step process can help you recognize why this task requires specialized skills and equipment.
First, diagnose the system using pressure gauges and temperature measurements to confirm low refrigerant levels. It is important to note that closed systems lack refill ports, so proper diagnostic procedures are necessary before attempting any recharge. Ensuring the correct pressure ranges during diagnosis is crucial for accurate assessment.
Begin by diagnosing with pressure and temperature checks to verify low refrigerant levels.
Next, identify and repair any leaks; adding refrigerant without leak repair is ineffective.
If your unit has been retrofitted with service ports by an EPA-certified technician, connect a recovery machine to evacuate remaining refrigerant.
Then vacuum the system to remove moisture and air.
Finally, recharge the system with the exact refrigerant type and quantity specified by the manufacturer, using precise charging scales and gauges.
Safety Precautions and Legal Considerations
Hey there! When it comes to handling refrigerants, it’s super important to stick to those strict regulations out there. You definitely want to use EPA-approved materials to steer clear of any legal issues.
And, don’t forget to gear up with the right personal protective equipment! Keeping yourself safe from harmful chemicals and any potential pressurized releases is key.
Also, let’s talk about the environment for a sec. It’s crucial to never vent refrigerants. Always make sure you’re properly recovering or recycling them when you’re servicing.
It’s not just about following the rules; it’s about being responsible too! Remember, only EPA-certified technicians should add refrigerant to your RV’s air conditioner to ensure safety and legal compliance.
Refrigerant Handling Regulations
Because refrigerants pose significant environmental and health risks, strict regulations govern their handling in RV air conditioners. You must adhere to EPA rules under the Clean Air Act, ensuring no refrigerant venting occurs during maintenance.
Only certified technicians with EPA-approved equipment can legally recharge or recover refrigerants. When handling refrigerants, remember:
Never intentionally release refrigerants; use EPA-certified recovery systems.
Identify and repair leaks before adding refrigerant; adding refrigerant alone is illegal. Additionally, A2L refrigerants such as R-32 and R-454B require special safety measures and equipment redesign due to their lower flammability classification.
Use only EPA-approved refrigerants and follow SNAP program guidelines.
Ensure all servicing equipment is certified to prevent contamination and environmental harm.
Compliance protects the environment, safeguards your health, and keeps your RV air conditioner functioning efficiently and legally.
Personal Protective Equipment
Handling refrigerants safely requires more than just following regulatory guidelines; it demands the proper use of personal protective equipment (PPE) to minimize exposure risks.
You must wear heavy-duty rubber gloves and thick aprons to protect your skin from chemical burns. Always use goggles or safety glasses to shield your eyes from refrigerant splashes.
In confined spaces, hard hats provide essential head protection, while steel-toed boots protect your feet from heavy tools. When dealing with hazardous fumes, employ respirators to avoid inhalation risks. Additionally, it is crucial to diagnose and repair any leaks before recharging to prevent system damage.
Legally, ensure you hold the necessary EPA certification before recharging your RV air conditioner.
Compliance with local laws and professional training reduces liability and insurance complications.
Prioritize PPE use to mitigate toxicity, fire, and explosion hazards, ensuring a safe and lawful recharging process.
Environmental Impact Awareness
Although recharging your RV air conditioner might seem straightforward, understanding the environmental impact and legal restrictions is essential.
Refrigerants like R22 harm the ozone layer, while modern alternatives such as R410A reduce this risk. Handling refrigerants without certification is illegal and unsafe.
To minimize environmental and health hazards, follow these key points:
Always use certified HVAC professionals for recharge and maintenance. Regular inspection helps prevent unnoticed leaks and dangerous chemical buildup.
Detect and repair leaks promptly to prevent toxic vapor buildup.
Avoid attempting recharge on sealed systems lacking service ports.
Choose RV units with modern refrigerants that have lower ozone depletion and global warming potential.
Adhering to these guidelines ensures compliance with regulations and protects both the environment and your health during RV air conditioner servicing.
Post-Recharge Testing and Performance Checks
How can you be sure your RV air conditioner is performing ideally after a refrigerant recharge?
Begin by measuring the temperature differential: record intake and discharge air temperatures after 15 minutes of operation. Aim for a 15–22°F drop.
Next, verify electrical parameters with a multimeter, checking voltage and compressor amperage against specs.
Inspect refrigerant system integrity for leaks using visual cues and electronic detectors. Confirm airflow is unobstructed and fan speed is optimal. Also, ensure the coils are clean and sensor connections are secure to maintain optimal operation.
Monitor the unit over several hours for stable cooling and normal sounds.
| Test Type | Parameter | Acceptable Range |
|---|---|---|
| Temperature Differential | Intake vs. Discharge | 15–22°F drop |
| Electrical | Compressor Amperage | Manufacturer’s spec range |
| Refrigerant Integrity | Leak Detection | No leaks detected |
Tips for Maintaining Optimal RV AC Performance
Hey there! So, if you want your RV AC to perform at its best, one of the key things you should do is clean or replace those filters regularly. It really helps with airflow and keeps the system from working too hard.
And while you’re at it, don’t forget to check the electrical system. Look for any loose connections or signs of wear that could mess with performance. Also, make sure to check for leaks in seals and hoses to avoid system inefficiency.
Trust me, taking these steps will make sure your AC runs reliably and efficiently.
Regular Filter Cleaning
Since maintaining clean filters is essential for your RV air conditioner’s efficiency, regular cleaning guarantees ideal airflow and prevents dust buildup that can impair performance.
Start by disconnecting power, then remove the filter via clips or screws. Vacuum loose debris for light cleaning. Soak reusable filters up to 30 minutes in a mild detergent or vinegar solution for deep cleaning. Rinse gently and let dry thoroughly before reinstalling. It is also important to adhere to manufacturer’s maintenance guidelines to ensure optimal performance and avoid damage.
Key steps for effective filter maintenance:
- Clean reusable filters every two months; replace disposable filters every 90 days or yearly.
- Avoid bleach and power washers to prevent damage.
- Dry filters fully overnight to prevent mold.
- Secure clips or screws tightly to ensure proper sealing and airflow.
Consistent filter care improves cooling, reduces dust, and extends your AC’s lifespan.
Electrical System Checks
Regular filter cleaning keeps airflow ideal, but the electrical system also demands close attention to maintain your RV air conditioner’s performance.
First, verify shore power by ensuring the 30A/50A plug is fully seated and voltage at the pedestal reads correctly with a voltmeter.
Check breakers and power cords for damage or corrosion, resetting any tripped breakers.
Inspect the 12-volt control system by testing battery charge, fuses, switches, and wiring for secure, corrosion-free connections.
Measure amperage draw during operation; excessive current may signal motor issues and lead to compressor overload.
Confirm voltage remains above 105V to prevent compressor damage.
Examine wiring, capacitors, and contactors for wear or overheating.
Always disconnect power before inspections and avoid DIY repairs on high-voltage parts.
Consult certified technicians if problems persist.
Frequently Asked Questions
What Type of Refrigerant Is Best for Older RV AC Models?
For older RV AC models originally using R-22, the best refrigerant depends on your system’s compatibility.
While R-22 was standard, it’s now restricted and costly.
You can retrofit with R-410A, but it requires compatible components due to higher pressure.
Always check your unit’s specifications and consult a certified technician before switching.
Avoid unauthorized substitutes to prevent damage and maintain efficiency.
Proper evaluation guarantees safe, reliable cooling performance.
How Often Should I Schedule Professional Maintenance for My RV AC?
You should schedule professional maintenance for your RV air conditioner at least once a year to guarantee peak performance and longevity.
If you’re a full-time RVer or frequently travel in dusty environments, consider biannual inspections.
Regular servicing prevents costly repairs and maintains efficiency.
Focus on thorough inspections, coil and filter cleaning, electrical checks, and drain maintenance.
Stick to this schedule to avoid malfunctions and keep your AC running smoothly.
Can I Upgrade My RV AC System for Better Energy Efficiency?
Yes, you can upgrade your RV AC system for better energy efficiency.
Consider inverter-based units that adjust compressor speeds, smart thermostats for precise control, and eco-friendly R32 refrigerant. Improving insulation and adding heat pumps also help.
Make sure to have professional installation to handle ducting modifications and compatibility. Regular maintenance is vital for peak performance.
These upgrades reduce energy consumption, enhance comfort, and increase your RV’s resale value.
What Is the Typical Lifespan of an RV Rooftop Air Conditioner?
Wondering how long your RV rooftop air conditioner will last? Typically, these units endure about 10 to 15 years under normal usage.
Keep in mind, harsh environments and heavy use can shorten this lifespan.
Regular maintenance, like cleaning coils and monitoring component health, extends functionality.
Tracking maintenance records helps you anticipate wear.
When efficiency drops or parts fail frequently, it might be time to weigh repair costs against replacement options.
Are There Eco-Friendly Refrigerant Alternatives for RV Air Conditioners?
Yes, you can use eco-friendly refrigerants like R-32 and R-290 in RV air conditioners.
These alternatives offer lower global warming potential and improved energy efficiency compared to traditional refrigerants.
When selecting or servicing your unit, verify compatibility with these refrigerants to comply with environmental regulations.
Always consult manufacturer guidelines or a certified technician to safely handle and recharge your RV air conditioner with these eco-friendly options.
From Recharging to Road Trips: Keeping Your RV AC Adventure-Ready
Now that you’ve mastered recharging your RV air conditioner, you’re equipped to tackle what feels like a mountain of refrigerant issues with precision and confidence. Remember, regular maintenance isn’t just a good idea; it’s the secret to keeping your AC running at peak performance for countless adventures ahead.
Stay vigilant for leaks, follow safety protocols strictly, and test thoroughly after each recharge to guarantee your system cools efficiently every time.

