
Last Updated on July 30, 2025
To turn off the “Check Trailer Wiring” ding, first inspect and clean your trailer wiring connectors, ensuring pins are corrosion-free and fully seated. Check for damaged or frayed wires and replace blown fuses.
Reset the trailer brake controller by unplugging it briefly and cycling the ignition. If needed, disable the trailer brake system safely following the manufacturer’s guidelines.
Addressing wiring faults and controller issues prevents alerts. For detailed troubleshooting, wiring maintenance, and legal considerations, further steps can help optimize your towing setup.
Key Takeaways
- Inspect and clean trailer wiring connectors to fix corrosion or loose pins causing the warning ding.
- Reset the trailer brake controller by unplugging it for 10 seconds and cycling vehicle ignition off/on.
- Check and replace blown fuses related to trailer wiring to restore proper circuit function.
- Ensure all trailer wiring grounds are secure, clean, and free from corrosion to prevent false alerts.
- If necessary, disable the trailer brake system through the brake controller settings or proper wiring disconnection.
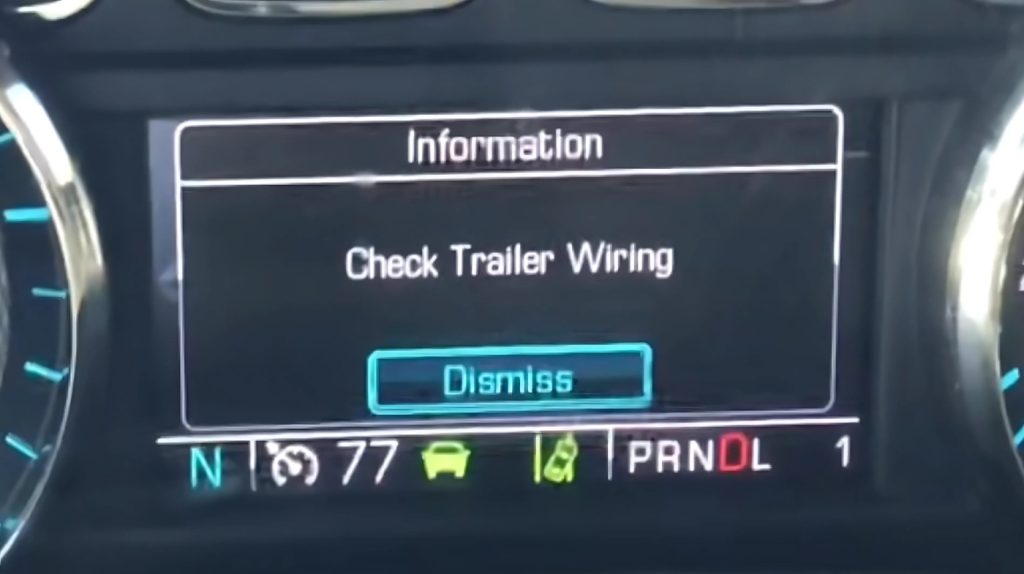
About the “Check Trailer Wiring” Warning
Although you mightn’t see visible damage, the “Check Trailer Wiring” warning signals a detected fault in your trailer’s electrical connection system. This alert originates from your vehicle’s trailer wiring monitor, integrated within the electronic control units, which continuously checks voltage, continuity, and grounds in the trailer connectors.
When parameters deviate from expected ranges due to shorts, opens, or poor grounding, the warning activates, often accompanied by a dashboard message and a dinging sound. It doesn’t always mean your trailer brakes or lights have failed but indicates compromised wiring integrity.
The system’s purpose is to notify you early, preventing total brake or lighting failure and ensuring towing safety. Proper maintenance and care of trailer wiring can help prevent false warnings and extend system reliability.
Promptly addressing this warning maintains electrical communication between the vehicle and trailer within regulatory and operational standards. One common cause is a faulty trailer wiring or a bad ground connection that interrupts proper signal transmission.
Common Causes of Trailer Wiring Alerts
You’ll want to inspect wiring connectors for corrosion or loose pins, as these often trigger alerts. Using a penetrating stain on trailer decks can prevent moisture-related electrical issues. Faults in the trailer brake controller can cause warning signals, so make certain it’s properly calibrated and functioning.
Additionally, check fuses and ABS components for damage or failure to rule out electrical interruptions. Verify that all trailer light bulbs are functioning properly, since faulty bulbs frequently cause trailer wiring warnings.
Wiring Connector Issues
How can dirty or loose connectors disrupt your trailer’s wiring system? Contaminants and corrosion on trailer plug contacts increase electrical resistance, causing intermittent alerts. Loose connections result in unstable circuits that trigger warning dings during towing.
To fix this, unplug the connector, clean all pins with an electrical contact cleaner, and inspect for corrosion or damage. Apply dielectric grease to prevent future oxidation and improve conductivity. Guarantee all pins are straight and fully seated when reconnecting to avoid False fault detections.
Also, check for messy wiring in junction boxes, as tangled wires can cause shorts or open circuits. Regularly unplugging and reseating connectors can temporarily clear alerts caused by minor contamination or connector movement.
Maintaining clean, secure, and properly seated connectors is essential to prevent wiring fault warnings. Ensuring that your trailer wiring uses durable materials designed to withstand environmental stress can help reduce such electrical issues.
Trailer Brake Controller Faults
When trailer wiring alerts occur, the brake controller often plays a central role in the fault diagnosis. You should first inspect the brake controller unit for faults, as software glitches or hardware failures can trigger False alerts even if wiring is intact. Check for error codes like “oL” indicating open load or electrical issues.
Next, verify ground and signal connections corroded or loose grounds frequently cause intermittent brake faults. Use a multimeter to test continuity. Also, inspect trailer brake hardware; over-adjusted shoes or stuck magnets can distort controller feedback and cause alerts.
Finally, measure the controller’s voltage output during braking to detect spikes or drops. If anomalies persist without wiring faults, consider replacing the brake controller unit to stop erroneous alerts efficiently.
For overall safety during travel, have a well-stocked first aid kit accessible in your RV to manage any minor injuries that might occur while addressing trailer issues.
Fuse and ABS Problems
Although trailer wiring alerts can stem from various issues, fuse and ABS problems rank among the most common causes. First, check the fuse protecting the ABS circuit; a blown fuse disrupts power flow to the ABS control module, triggering warning lights. Replace any blown fuses with the correct rating and reset the system.
Next, inspect wiring for corrosion, damage, or loose connections that can cause intermittent ABS alerts due to lost sensor signals. Also, verify wheel speed sensors near the wheels are clean and functional, as faulty sensors cause ABS malfunctions.
The ABS light on the trailer serves as an early warning for potential safety issues and should not be ignored. Using durable materials and ensuring corrosion resistance in wiring can reduce such electrical problems.
Finally, ensure stable power and ground connections to the ABS module, as interruptions here lead to erratic ABS behavior. Regular inspection and maintenance of these components help prevent and clear trailer wiring alerts effectively.
Inspecting and Cleaning Trailer Wiring Connectors
Since corrosion and dirt can cause faulty connections, you should regularly inspect and clean your trailer wiring connectors to maintain ideal electrical performance. Using a simple 4-pin connector circuit tester can help identify specific wiring issues before cleaning.
Regular inspection is important to ensure the connectors maintain their durability and performance over time. Begin by checking for bent, broken, or pushed-back pins and ensure all contacts are properly seated and free from rust or corrosion.
Use an electrical contact cleaner spray directly on the connector contacts to dissolve corrosion without excess liquid. Gently wipe the connectors with a soft brush or cloth, then allow them to dry completely.
After cleaning, apply dielectric grease to protect against moisture and future corrosion. Verify tightness by ensuring connectors fit without excessive looseness. Replace any connectors with severe damage or degraded contacts to avoid electrical faults and help prevent “Check Trailer Wiring” alerts.
Checking for Physical Damage in Trailer Wiring
Start by thoroughly inspecting the entire wiring harness for any signs of wear or damage along its length. Pay close attention to connector pins, ensuring they’re clean, straight, and free of corrosion. Addressing these physical issues promptly helps prevent warning dings and electrical failures.
Additionally, examine connectors and junctions regularly to catch any hidden issues before they escalate. Using a generator with RV-ready ports can simplify diagnosing electrical wiring issues by providing stable power connections during troubleshooting.
Inspect Wiring Harness
When inspecting the wiring harness, you need to carefully examine its entire length for any signs of chafing, cuts, or abrasions caused by road debris.
Start at the trailer connector and follow the harness along the trailer frame, checking both sides. Pay special attention to areas where the harness bends or contacts sharp edges, as these spots are prone to wear. Use a flashlight to spot subtle damage and gently flex the wiring to reveal hidden cracks or breaks in the insulation.
Any exposed wires or compromised insulation can cause shorts or open circuits, triggering the “Check Trailer Wiring” ding. If you find damage, repair or replace the affected section promptly to restore reliable electrical continuity and eliminate false alerts.
Ensuring the ground connection is on an unpainted chassis surface is equally important to prevent wiring issues. Additionally, maintaining proper battery protection in your vehicle’s electrical system helps avoid electrical faults that may cause warning alerts.
Examine Connector Pins
Although the wiring harness may appear intact, you need to thoroughly examine the trailer connector pins for physical damage that can disrupt electrical signals.
Start by visually inspecting each pin for bending, corrosion, discoloration, or pitting. Check for dirt buildup or oxidation that might block conductivity. Remember that the brake controller may indicate a disconnection, suggesting a wiring or connection problem.
Using screws with corrosion resistance can help prevent moisture-related electrical issues in trailer wiring. Verify pins are uniform in shape, securely seated, and not loose or misaligned. Also, inspect the plastic housing for cracks that could let moisture in, causing corrosion.
- Identify bent or broken pins and straighten or replace as needed
- Clean pins with electrical contact cleaner and apply dielectric grease
- Use a multimeter to test voltage across pins during operation
- Compare pin alignment against a known good connector
- Regularly maintain pins to prevent future wiring faults and warnings
Verifying and Replacing Relevant Fuses
Before you replace any fuses, you need to verify their condition carefully to avoid unnecessary replacements or overlooking underlying issues. Locate the trailer wiring fuse, often found in the driver’s side fuse box or under the dashboard.
Use the fuse panel diagram to identify the fuse labeled for the trailer socket, typically a 20A blade fuse in position 14. However, note that some vehicles, especially cab/chassis builds, may have the trailer wiring fuse located in an inline fuse within the starter battery box under the driver’s feet.
Ensure proper fuse rating and condition to prevent electrical system failures commonly protected by RV surge protectors. Visually inspect the fuse for melted plastic or broken metal strips. Confirm fuse integrity with a multimeter by checking continuity; no continuity indicates a blown fuse.
If the fuse is intact but the circuit has no power, test the power fuse switch. When replacing, match the original fuse’s amperage exactly. Insert the new fuse firmly without forcing, then test trailer functions to ensure the issue is resolved.
Resetting the Trailer Brake Controller
To reset the trailer brake controller, start by unplugging its wiring harness and waiting about 10 seconds before reconnecting it. This simple reset procedure can often resolve error messages and restore normal brake function.
Cycle your vehicle’s ignition off and on to complete the reset process. Afterward, test the trailer brakes to verify the error message clears and the system functions properly.
Controller Reset Procedure
When you encounter persistent errors like a “Check Trailer Wiring” alert, resetting your trailer brake controller by power cycling is an effective first step. To perform a proper reset:
- Disconnect the brake controller wiring harness or unplug the controller to cut power.
- Wait about 10 seconds to ensure the controller fully resets.
- Reconnect by pulling on the plug, not the wires, to avoid damage.
- This interrupts internal memory and error codes, clearing faults.
- After reconnecting, the controller restarts sensing trailer brake pulses. The TowPro Electronic Brake Controller, for example, uses a three-axis AIS accelerometer to measure acceleration in all directions, so accurate calibration and reset are crucial for proper function.
This method often resolves sensing pulse interruptions or shorts, causing the alert. If issues persist, check wiring integrity before further troubleshooting or recalibration. Proper reset supports accurate brake control and reduces false warnings.
Ignition Cycle Steps
Although resetting the trailer brake controller requires a specific sequence, following the ignition cycle steps carefully guarantees proper system initialization and fault clearance.
First, turn the ignition off completely, confirm the trailer is securely connected, and ensure the battery and controller have adequate power. It is also important to disconnect the vehicle’s negative battery cable before beginning any wiring work to prevent electrical damage and personal injury.
Next, turn the ignition to “on” without starting the engine; observe the controller’s display as it runs self-tests and sends diagnostic pulses through the trailer wiring. Monitor for connectivity icons and fault alerts. Then, switch the ignition off briefly to clear error codes and reset parameters.
Turn the ignition on again to reinitialize the system. If faults persist, inspect wiring or consider reprogramming. Completing these steps properly resets the controller and prepares it for normal operation.
Post-Reset Brake Check
Once you complete the reset process, you should immediately verify that the brake controller displays normal operation without error codes or warnings. Confirm the trailer brake system applies power correctly when you press the brake pedal. Use the controller’s LED indicators or bar graph to check output levels visually.
Ensure the trailer connection status shows as active on your vehicle’s display. Perform a controlled road test to validate proper function under real conditions. Unplug the brake controller for at least 10 seconds during the reset to ensure the system fully resets.
- Check for absence of error codes or warnings on the controller display
- Verify brake power application corresponds with brake pedal input
- Inspect LED or bar graph output indicators for expected response
- Confirm trailer connection status on vehicle message center
- Conduct a road test to validate braking performance post-reset
Methods to Disable Trailer Brake System Safely
Because trailer brake systems vary widely, you need to choose a disabling method that matches your trailer type and towing setup. Trailer brake systems differ, so select a disabling method suited to your specific trailer and towing configuration.
For surge brakes, insert a properly sized pin into the designated hole on the actuator to block brake engagement, ensuring the lunette is fully extended for access.
For trailers with electrical systems, use the vehicle’s trailer brake control module to switch off or reduce brake power via the control switch or controller knob. The Trailer Brake Power Control Module manages the electrical current to the trailer brakes and is key to safely disabling the system.
Avoid simply disconnecting wiring to prevent error codes; instead, perform a proper reset or switch off. If needed, physically disconnect the trailer wiring connector carefully, but remember this disables all trailer electrical functions and requires additional safety measures.
Troubleshooting Advanced Electrical and ABS Issues
After disabling your trailer brake system as outlined earlier, you may encounter complex electrical or ABS issues that require detailed troubleshooting.
Start by verifying wiring integrity and ABS compatibility to prevent false warnings or malfunctions. Make sure to inspect wire insulation for damage or moisture infiltration, as this can cause conductor failure and affect system performance (wire insulation).
- Use a continuity tester and test light to check for wiring breaks and power presence.
- Perform voltage drop tests across connectors to identify corrosion or poor connections.
- Inspect ABS wiring and scan for fault codes linked to trailer wiring faults.
- Ensure grounding points are clean, secure, and free of corrosion to avoid electrical noise.
- Confirm aftermarket converters correctly interface with ABS signals without causing interference.
Legal and Safety Considerations When Disabling Trailer Brakes
Although disabling trailer brakes might seem like a straightforward solution, you must carefully consider the legal and safety ramifications before proceeding.
Trailer brakes are legally required on trailers over certain weights, typically 3,000 pounds, to ensure safe control and stopping. Disabling them increases stopping distances and risks trailer sway, compromising road safety.
Additionally, tampering with brake systems can lead to fines, insurance denial, and liability in accidents. Note that most states require brakes on trailers with a GVWR of 3,000 pounds or more, emphasizing compliance with these regulations for safety and legality.
| Aspect | Consideration |
|---|---|
| Legal Requirements | Brakes mandated for trailers ≥3,000 lbs GVWR |
| Safety Risks | Increased stopping distance, loss of control |
| Enforcement | Roadside checks, fines, vehicle impoundment |
| Liability | Insurance claims denial, contributory negligence risk |
Preventative Maintenance to Avoid Future Wiring Warnings
To prevent future wiring warnings, you should perform regular inspections and maintenance on your trailer’s electrical system. Addressing issues early helps maintain reliable connections and avoids false alarms. Focus on these key preventive tasks:
- Inspect wiring for corrosion, frays, and loose connections; replace damaged sections promptly.
- Apply dielectric grease to connectors to prevent moisture-induced corrosion.
- Secure exposed wires with conduit or tape to minimize wear and abrasion.
- Test all lights and brake controllers before trips to verify proper operation.
- Maintain proper tire pressure and inspect suspension components to reduce stress on wiring harnesses.
- Additionally, regularly check the wiring and electrical connectors every 3 months to ensure preventative maintenance.
Frequently Asked Questions
Can Aftermarket Trailer Wiring Kits Cause the Check Trailer Wiring Warning?
Yes, aftermarket trailer wiring kits can cause the “Check Trailer Wiring” warning. If you install a non-OEM harness, it mightn’t match your vehicle’s electrical system, especially on newer models with CAN Bus.
Incorrect pin assignments, faulty connections, or failing “black box” modules can trigger voltage irregularities detected by your vehicle. To avoid this, use vehicle-specific kits, verify wiring compatibility, and test connections thoroughly after installation.
How Does Cold Weather Affect Trailer Wiring Performance?
Cold weather hits your trailer wiring like a brick wall, stiffening insulation and making cables brittle. This stiffness leads to cracks and connection issues, causing erratic lighting or brake function.
Moisture from ice and snow can sneak into connectors, triggering corrosion and short circuits. To keep performance steady, use cold-resistant wiring with thermoset insulation and silicone sleeves, and protect connections with lubricants to prevent moisture damage and maintain reliable electrical contact.
Are Wireless Trailer Brake Controllers Reliable Alternatives?
You can rely on wireless trailer brake controllers for light to moderate towing, as they offer easy installation and flexibility. However, be aware that signal interference or hacking risks may affect braking reliability, especially in heavy towing or critical situations.
To guarantee safety, choose models with backup modes and accelerometer-based braking. For heavy-duty use, wired controllers remain the more dependable option due to minimal interference and consistent performance.
What Smartphone Apps Can Diagnose Trailer Wiring Issues?
Want to quickly diagnose trailer wiring issues using your phone? You can use apps like FordPass for Ford F-150 models, Tow-minator paired with a seven-way tester, or vehicle diagnostic scanner apps that work with OBD-II dongles.
These apps provide real-time voltage, continuity tests, and fault codes. Look for wireless connectivity, guided testing, and compatibility with your trailer’s wiring standard to efficiently identify grounding faults, broken wires, or signal problems.
Prevent Recurring Alerts with Proper Wiring Maintenance
Now that you know how to tackle the “Check Trailer Wiring” ding, don’t let it be a thorn in your side. Regular inspections, cleaning connectors, and addressing fuse issues keep your trailer’s electrical system running smoothly.
If you choose to disable the brake system, be sure to follow legal guidelines carefully. Staying proactive with maintenance is your best shield against future warnings—keeping your trailer safe and your mind at ease on every journey.

