

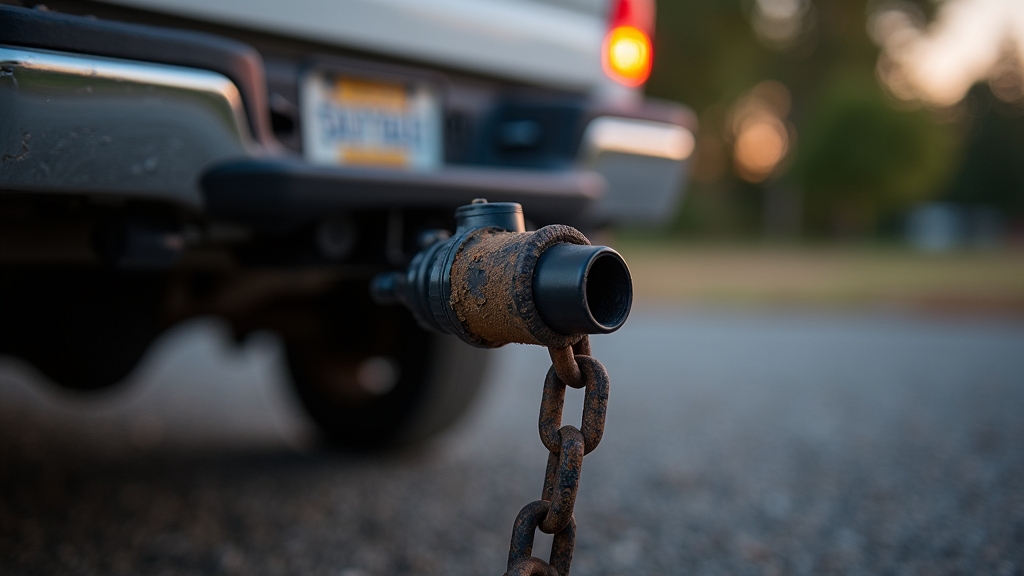
If your trailer brake disconnect warning appears, check for damaged, corroded, or loose wiring and connectors, especially at the 7-pin plug and brake magnets. Inspect brake shoes and adjust as needed, since mechanical issues can cause disconnection signals.
Verify brake controller compatibility and test electrical output using a multimeter. Secure and clean all connections to prevent intermittent faults. Understanding these causes and maintenance steps can help you troubleshoot effectively and guarantee safe, reliable trailer braking.
Key Takeaways
- Trailer brake disconnect warnings often stem from damaged wiring, corrosion, or loose connectors at the 7-pin trailer plug or vehicle side.
- Symptoms include dashboard alerts, inconsistent warnings, delayed brake engagement, and audible brake controller fault signals.
- Inspect all wiring connections for corrosion, frayed insulation, and secure ground attachments to maintain electrical continuity.
- Test brake controller output voltage and axle wiring integrity with a multimeter to identify breaks, shorts, or resistance issues.
- Properly adjust brake shoes using the star wheel adjuster to prevent brake disconnect signals and ensure consistent mechanical contact.
Common Causes of Trailer Brake Disconnect Warnings
When you encounter trailer brake disconnect warnings, the issue often stems from wiring damage or connection problems caused by wear, corrosion, or improper connectors.
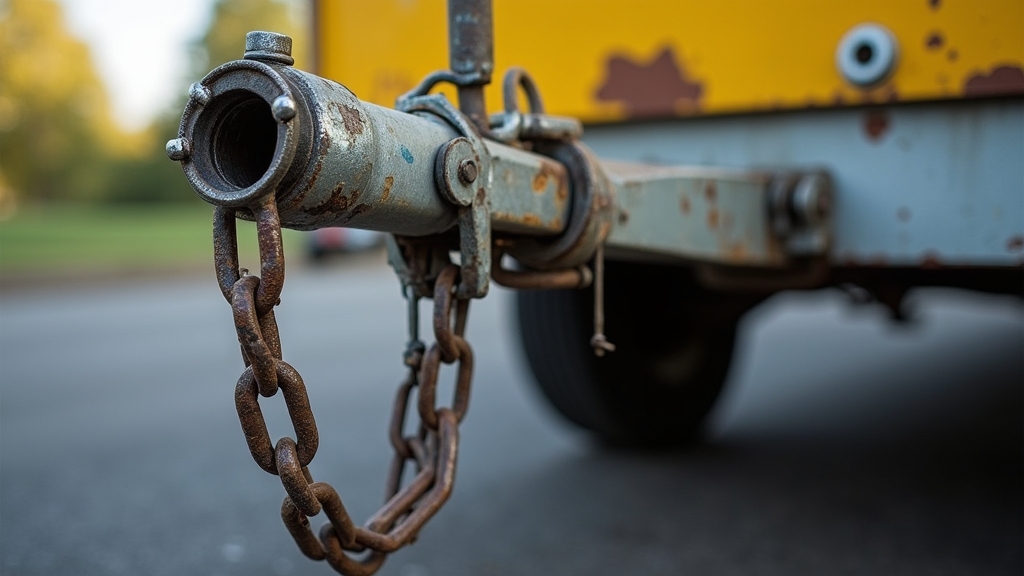
Wiring exposed to rough terrain frequently suffers abrasions or breaks, especially when hanging unsecured beneath the trailer. Corroded or loose connectors at the 7-pin trailer plug or vehicle side disrupt brake signals, triggering warnings. Ensuring the correct wiring and controller functionality is essential for proper brake system operation.
Using a high-quality sealant to protect exposed wiring can help prevent corrosion and damage over time. Using improper junctions like scotch locks can cause intermittent connectivity failures. Protect wiring with conduit and ensure proper securement to minimize damage.
Additionally, corrosion at connection points degrades electrical continuity, leading to intermittent brake disconnect messages. Maintaining clean, tight electrical connections and avoiding substandard connectors are critical. Understanding these common wiring and connector issues helps you diagnose and resolve trailer brake disconnect warnings effectively before exploring other potential causes.
Recognizing Symptoms and Warning Behaviors
Although trailer brake disconnect issues often stem from wiring faults, recognizing their symptoms and warning behaviors is crucial for timely diagnosis and repair. You’ll notice dashboard alerts like “Trailer Brakes Disconnected” or “Check Trailer Brake Wiring,” sometimes fluctuating during driving.
Trailer brake disconnects often indicate wiring issues; watch for dashboard warnings and inconsistent alerts while driving. Audible warnings from the brake controller may signal communication faults. Brake response can become inconsistent, delaying activation or causing uneven braking, which jeopardizes safety.
Electrical faults often present as loose or corroded connections and intermittent shorts. It is important to inspect wiring regularly to identify frays, damage, or loose connections that could lead to disconnect issues.
Key signs to watch for include:
- Intermittent or persistent disconnect messages on the dashboard
- Audible brake controller alerts during driving
- Delayed or failed trailer brake engagement
- Jerky or unstable towing behavior
- Visible frayed wiring or corroded plug connections
Regular maintenance and use of durable wiring materials can help prevent disconnect problems. Recognizing these symptoms early helps prevent unsafe towing conditions.
Electrical Troubleshooting Techniques
First things first, check all the wiring connections. You want to look for any signs of corrosion, looseness, or damage since these issues can really disrupt the electrical flow. Proper maintenance and regular inspections also help prevent electrical failures.
Once you’ve done that, go ahead and test the brake controller output. Make sure it activates properly when you press the brake pedal. This step is crucial to ensure everything is functioning correctly. Use a test light or multimeter to verify voltage at the magnet wiring to confirm proper magnet activation.
Lastly, don’t forget to verify the integrity of the axle wiring. It’s important to rule out any breaks or shorts that could affect the brake magnet function. Ensuring the wiring can handle the motorhome’s load is essential for reliable brake performance.
Inspect Wiring Connections
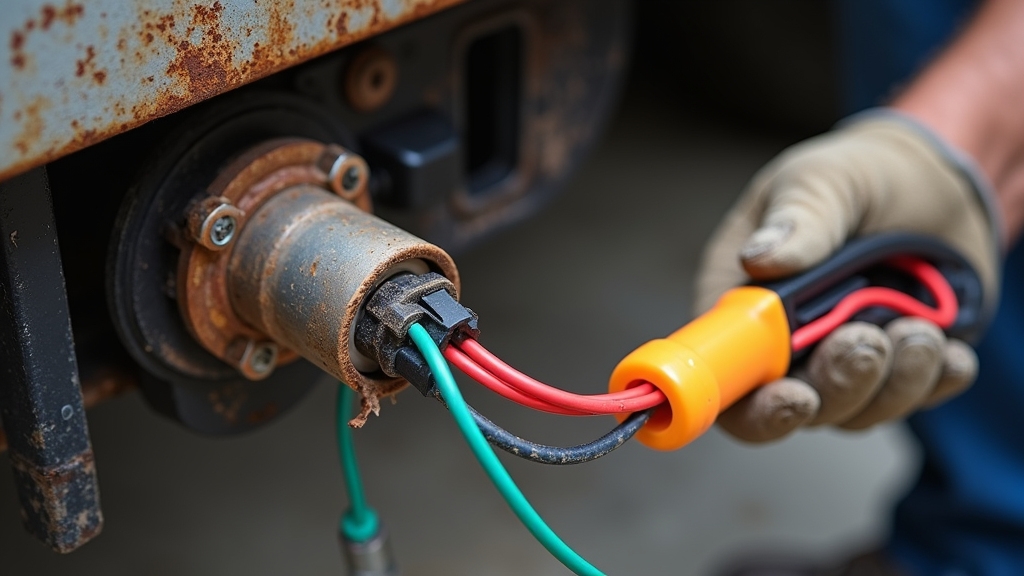
Since trailer brake issues often stem from faulty wiring connections, you should thoroughly inspect all wiring harnesses and connectors for physical damage and secure fitment. Start by checking for frayed wires, broken insulation, or corrosion that could interrupt the electrical path.
Confirm connectors lock firmly in place and verify ground wires attach to clean, unpainted metal surfaces for proper grounding. Pay special attention to areas where the blue brake wire may be grounding against the chassis or other wires, such as inside the 7-pin plug.
Proper tire maintenance practices also include securing wiring to prevent damage from road vibrations. Use a multimeter to test continuity and resistance, ensuring no shorts, opens, or reversed wiring exist. Look for bent pins, broken locking tabs, or corrosion on connectors. Ensure all wiring is securely zip tied along the frame to prevent damage.
Verify correct connector placement following color codes. Confirm trailer ground wire integrity and clean connection points. Test wiring continuity and resistance with a multimeter for faults.
Test Brake Controller Output
After confirming wiring integrity, you need to verify the brake controller’s output to guarantee it delivers the correct electrical signals to the trailer brakes. Proper tire choice enhances safety and performance, ensuring a reliable towing experience with stable braking conditions.
Use a brake force meter to simulate trailer brakes, enabling real-time monitoring of brake force output and gain settings without the trailer attached. The brake force meter also provides load signals to the vehicle’s ECU, ensuring the controller accurately detects trailer connection and operates correctly with load sensing.
Alternatively, measure current output with a multimeter set to ammeter mode at the controller’s brake output wire. Verify that the amperage aligns with the magnet specifications (e.g., 7.5–8.2 amps for two 10”–12” drum brakes). Maintaining correct PSI ratings on trailer tires is essential for overall system safety during braking.
You can also use a test light or incandescent globe to simulate load, confirming the controller responds correctly by detecting the load. For direct signal checks, sever the blue brake wire near the controller and use a circuit tester while applying the manual slide or brake pedal to verify output function.
Check Axle Wire Integrity
Although axle wiring is often overlooked, ensuring its integrity is essential for reliable trailer brake operation. Start by visually inspecting connectors and wires for corrosion, damage, or loose fittings. Use a digital multimeter or test light to verify voltage and continuity, applying T-pins to access wires without cutting insulation.
Perform voltage drop tests under load to detect resistance caused by poor connections or damaged wiring. Regular maintenance, including cleaning contacts and securing connectors, prevents intermittent faults. Proper maintenance practices also extend the lifespan of electrical components and improve safety.
- Inspect connectors and terminals for corrosion or wear
- Test continuity with a multimeter or circuit tester
- Perform voltage drop tests while activating brakes
- Use T-pins to probe wires without damage
- Clean and secure connections to maintain conductivity
Testing the wiring harness before each towing trip is crucial to ensure system reliability and prevent brake failure. These steps help you pinpoint and resolve axle wiring issues effectively.
Mechanical Components Affecting Brake Connectivity
Hey there! So, when it comes to brake systems, it’s super important to keep an eye on those worn brake shoes. You know, if they get too worn down, they can really reduce friction, which in turn compromises how well the brakes engage. Choosing components that meet safety standards can also help ensure reliable performance.
And let’s not forget about those stuck brake magnets. They can be a real troublemaker, preventing proper activation of the brakes. This can lead to some inconsistent braking force, which we definitely want to avoid, right?
Now, another thing to consider is the proper adjustment of the brake shoes. Getting that just right ensures they make ideal contact with the drum or rotor. This is key for maintaining effective brake connectivity, which we all want for safety on the road!
Additionally, regularly inspecting the cables and linkages is crucial since they transfer the braking force from the actuator to the trailer brakes, ensuring everything works smoothly.
Worn Brake Shoes
When brake shoes wear down, their reduced friction material thickness directly lowers your trailer’s stopping power and braking efficiency. If the lining dips below 2 mm, replace the shoes immediately to avoid brake failure or metal-to-metal contact with the drum, which causes costly damage. Worn shoes can also lead to damage in other brake components if not addressed promptly.
Additionally, maintaining proper cycle life of mechanical parts ensures longer-lasting brake performance. Uneven wear can lead to brake shoe protrusion, resulting in inconsistent braking and excessive wear. Key points to watch for:
- Squealing noises during braking indicating worn or contaminated linings
- Increased pedal travel or a soft brake pedal signaling reduced friction
- Visible grooves, thinning, or rivet damage on the brake shoe lining
- Uneven braking or vehicle pulling due to irregular shoe wear
- Burning smells from overheated, compromised brake shoes
Stuck Brake Magnets
Since brake magnets play a critical role in engaging your trailer’s braking system, any sticking can severely impact brake performance and safety. Stuck magnets cause continuous drag or a disconnected feeling by failing to retract from the drum, which can be influenced by the quality and condition of your license plates mounting.
Corrosion, dirt buildup, or mechanical wear hinders proper magnet movement. Electrical faults like residual currents or faulty wiring also keep magnets engaged unexpectedly. The magnet wiring is typically done in parallel to ensure that a fault in one magnet does not disable the entire brake system.
| Cause | Effect |
|---|---|
| Corrosion buildup | Increased friction, sticking |
| Residual current | Magnet remains energized |
| Worn springs | Incomplete magnet retraction |
| Dirt & debris | Mechanical obstruction |
Brake Shoe Adjustment
Although brake magnets initiate the braking force, proper brake shoe adjustment guarantees the mechanical connection between the shoes and drum functions effectively.
You adjust brake shoes by turning the star wheel adjuster through access plugs on the backing plate. Tighten the shoes until you feel slight drag on the wheel. Too loose reduces braking, while too tight causes drag and wear. Proper adjustment also helps to maintain the battery performance by reducing unnecessary power draw on brake controllers.
Adjust all brakes evenly for balanced performance. Use a flathead screwdriver or brake spoon for adjustment. Remove rubber plugs to access the star wheel. Elevate the trailer safely on jack stands with wheels off the ground.
Inspect brake components regularly, including springs and retainers, to ensure they are properly installed and functioning as they hold the brake shoes in place and affect adjustment.
Adjust after the first 125 miles, then every 3,100 miles or as needed. Check for slight resistance by spinning the wheel manually. Correct adjustment prevents brake disconnect signals and ensures reliable braking connectivity.
Brake Controller Compatibility and Issues
Understanding brake controller compatibility is essential to ensuring safe and effective trailer braking performance. You must match the controller type to your trailer’s brake actuator—electric or electric over hydraulic (E/H)—to avoid malfunctions.
Surge brakes, being a hydraulic, self-contained system, do not require electrical connections, which can simplify compatibility in certain setups. Proportional controllers, which measure deceleration, deliver smoother braking and higher compatibility than time-delayed units. The latter may cause jerky stops.
Vehicle-specific factors also matter. GMC/Chevrolet trucks post-2017 need adapters like the K58-036-00 for DX Series E/H actuators, while older models often lack support. Ford integrated controllers generally perform well, but RAM compatibility varies by model year.
Additionally, ABS and electronic brake systems can interfere with controller signals, requiring software updates. Bluetooth and integrated controllers add convenience but demand careful compatibility checks, especially with mixed brake systems or newer vehicle models.
Recommended Maintenance and User Solutions
When you maintain your trailer’s brake system regularly, you substantially reduce the risk of disconnections and guarantee reliable braking performance.
Focus on electrical connections, brake components, and environmental protection to avoid “trailer brake disconnected” errors. Keep wiring intact, clean contacts, and test the brake controller often. In cold temperatures, be aware that trailer brakes may temporarily not work or be detected, so repeated brake application may be necessary to restore function cold weather impact.
Key maintenance steps include:
- Inspect and clean trailer plug pins and sockets; apply dielectric grease to prevent corrosion.
- Secure wiring connections; replace damaged pins and avoid quick-fix connectors.
- Check brake components for wear, ensuring magnets, actuators, and ground wires are sound.
- Use compressed air to clear moisture and debris from connectors.
- Store trailers in dry, covered areas and update vehicle and trailer firmware regularly.
Frequently Asked Questions
Can Cold Weather Cause Trailer Brake Disconnect Warnings?
Yes, cold weather can cause trailer brake disconnect warnings. When temperatures drop, moisture in air brake lines can freeze, blocking airflow and impairing brake function. Frozen wiring and brittle connections may interrupt sensor signals, triggering false disconnect alerts.
Ice buildup on components further disrupts brake operation. To prevent this, you should regularly inspect and maintain your brake system, drain moisture, and warm brakes before use to guarantee reliable sensor performance and avoid false warnings.
Is It Safe to Drive With Intermittent Trailer Brake Disconnect Alerts?
No, it’s not safe to drive with intermittent trailer brake disconnect alerts. These alerts indicate inconsistent brake function, which can cause sudden loss of trailer braking power and increase accident risk.
You risk compromised control, unexpected wheel lockup, and added strain on your tow vehicle’s brakes. You should diagnose and repair the issue before towing, inspecting connectors, wiring, and brake magnets to guarantee reliable and safe trailer braking performance.
How Often Should Trailer Brake Wiring Be Replaced?
You should replace trailer brake wiring when you notice visible damage, intermittent brake function, or error messages, rather than after a fixed interval. Regular inspections every 6,000 to 12,000 miles help identify wear like corrosion, fraying, or melting.
Immediate replacement is necessary if you detect overheating or gouging. Following manufacturer specs and using proper tools during repairs guarantees reliable operation and prevents brake controller errors.
Do Wireless Brake Controllers Reduce Disconnect Warnings?
Think of wireless brake controllers as sophisticated sentinels. They don’t erase disconnect warnings but help you spot issues faster. While they streamline control via Bluetooth, they can’t fix physical wiring faults causing disconnects. You’ll still need to inspect and maintain trailer connectors regularly.
Wireless controllers improve diagnostics and alert you promptly, but they rely on solid mechanical connections. So, they reduce confusion, not the warnings themselves.
Can Tire Size Affect Trailer Brake System Performance?
Yes, tire size directly impacts trailer brake system performance. Larger or heavier tires increase rotational inertia and braking demand, which can lengthen stopping distances and cause brake component wear.
Mismatched tire sizes create uneven brake torque distribution, leading to imbalance and inconsistent stopping. You’ll need to recalibrate or upgrade your brake system when changing tire sizes to maintain ideal braking efficiency, heat management, and component longevity.
Find Reliable Trailer Brake Controllers That Prevent Costly Failures
You might think trailer brake disconnect warnings are just minor annoyances, but ignoring them risks safety and costly repairs. By understanding common causes, recognizing warning signs, and applying straightforward electrical and mechanical troubleshooting, you can quickly resolve these issues.
Ensuring your brake controller is compatible and performing regular maintenance keeps your braking system reliable. Taking proactive steps not only protects you but also extends your trailer’s lifespan. Don’t wait until a small problem becomes a major failure.

