Last Updated on April 10, 2023
Even the roving nomads among us aren’t immune to annoying toilet problems. RV owners know all too well that a leaky loo can quickly become an unwelcome guest. Fortunately, figuring out and fixing this common conundrum is rarely as overwhelming or time-consuming as it might first seem.
Worn-out gaskets and seals, loose bolts or nuts, and cracked bowls/bases can be common sources of inconvenience down the road. Make sure you check for any installation issues which could lead to costly repairs later on if left unchecked.
Read on and learn why this type of leakage may occur, along with helpful tips on how best to repair and prevent future leaks.
Why Is My Rv Toilet Leaking Between Bowl And Base: Common Causes
Leaking between the bowl and base of your RV toilet is often caused by a few common problems. The most likely culprits are:
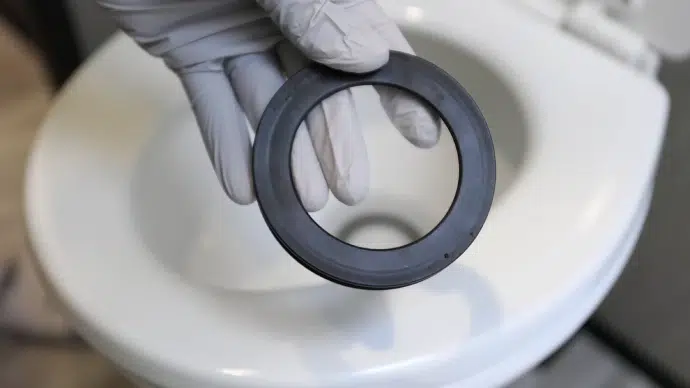
1. Worn Out Gaskets and Seals
RV owners are all too familiar with the annoyance of a leaky toilet. Often, the culprit is worn-out gaskets and seals. These small but mighty components prevent water from seeping between the bowl and the toilet’s base.
However, exposure to chemicals and other elements found in RV toilets can cause them to become brittle and cracked over time. When this happens, water can leak onto the floor, creating a frustrating mess and wasting precious water resources.
2. Loose Bolts or Nuts
Loose bolts or nuts are a common culprit for these leaks. Ongoing usage of your toilet can cause those all-important bolts or nuts to become loose over time, resulting in an unsightly gap between the toilet base and the flange.
3. Cracked Toilet Bowl or Base
A cracked toilet bowl or base is also common for RV toilet leaks. This issue can arise from a variety of factors, including the toilet’s age, wear, or misuse. You might notice water seeping out from the toilet if there’s a crack in the bowl or base.
The crack’s visibility will depend on its position, but regardless, it needs to be located if you want to solve the leak.
4. Improper Installation
Improper Installation is another common cause of RV toilet leaks. If the toilet is not installed correctly, it could cause leaks between the bowl and base. This can happen if the bolts are not tightened enough or the wax ring is not properly installed.
How to Diagnose RV Toilet Leaks Between the Bowl and Base?
To save yourself from costly repairs later, diagnosing and dealing with any leaks between your RV toilet’s bowl and the base is essential. Don’t wait until the damage worsens.
Here are some steps to help you diagnose the source of the leak:
#1: Identifying the Location of the Leak
To identify where the leak is coming from, start by drying off any visible water on and around the toilet. Next, add a few drops of food coloring to the toilet bowl and wait a few minutes. If you see colored water leaking out from under the toilet, you’ll know that’s where the problem is.
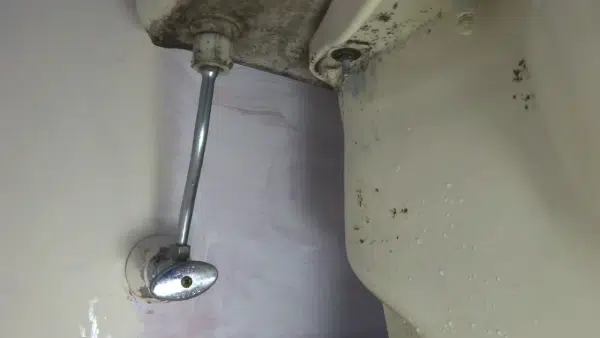
Check around the water supply line and the flush valve if you don’t see any leaks under the toilet. Look for any signs of moisture or discoloration that could indicate a leak.
#2: Checking for Damaged Gaskets or Seals
Ensure the gaskets and seals are up to snuff to keep your RV bathroom from becoming a mini-pool. These components provide that all-important watertight seal between the toilet bowl and base, so you don’t get any unwanted leaks.
Over time, gaskets and seals can wear out or become damaged, causing leaks. Turn off the water supply to your RV’s toilet to check for damaged gaskets or seals. Then, flush the toilet to remove any remaining water from the bowl.
Next, use a flashlight to inspect the area between the bowl and the base of your RV’s toilet. See if there are any moisture or water stains that could indicate a leak. If you see evidence of a leak, carefully examine the gaskets and seals for cracks, tears, or other damage.
#3: Inspecting for Cracks
Cracks can occur due to various reasons, such as age, wear and tear, or improper use. Even small cracks can cause significant leaks that can damage your RV’s flooring and subflooring.
To inspect for cracks, cut off the toilet’s water supply and empty the bowl and tank. Next, carefully examine the entire toilet bowl and base surface for any visible signs of cracks or damage. You may need to use a flashlight to see clearly in dimly lit areas.
Steps to Fix RV Toilet Leaks Between Bowl And Base
If you have identified that your RV toilet is leaking between the bowl and base, there are several steps you can take to fix the problem. Here are some steps to fix RV toilet leaks:
Step ONE: Replacing Worn Out Gaskets and Seals
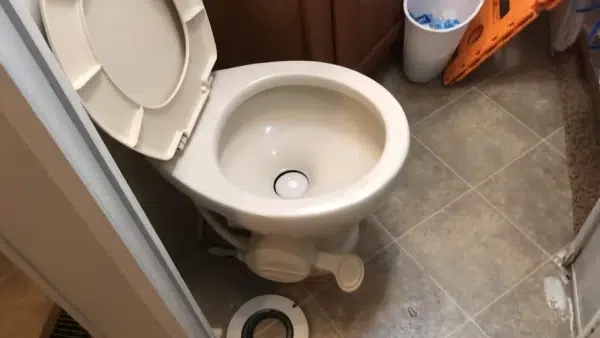
If you have identified that the cause of your RV toilet leak is due to worn out gaskets and seals, replacing them is the best solution. To replace the gaskets and seals, turn off the toilet’s water supply first.
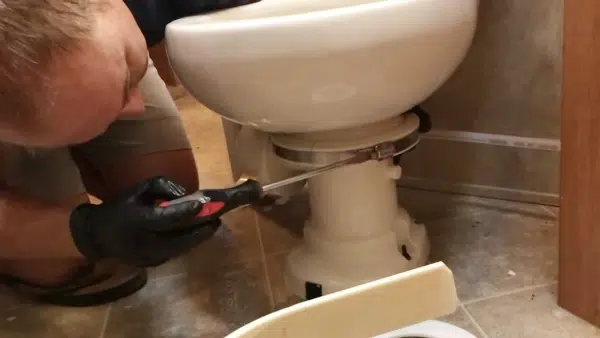
Then, remove the nuts that hold the toilet in place using a wrench or pliers. Carefully lift the toilet off of its base and set it aside.
Next, locate the old gaskets and seals around the toilet’s base. Remove them carefully, ensuring not to damage any surrounding parts or surfaces. Clean any debris or residue from around the area where they were located.
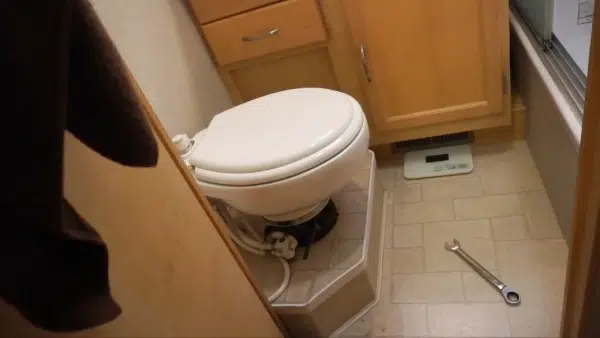
Step TWO: Tightening Loose Bolts and Nuts
If your RV toilet is leaking due to loose bolts and nuts, tightening them is a simple way to fix the problem. To begin, turn off the water supply to the toilet. Then, using a wrench or pliers, check all of the bolts and nuts that secure the toilet to the floor and tighten them as needed.
Be careful not to over-tighten, as this can cause damage or cracking.
Be sure to inspect the washers between the bolts and nuts too. If they are worn or damaged, replace them with new ones before re-tightening.
Step THREE: Repairing a Cracked Toilet Bowl or Base
The first step is to inspect the crack and determine its severity. If the crack is small, you may be able to repair it with epoxy. Epoxy is a strong adhesive that can seal small cracks and prevent them from spreading.
Apply the epoxy directly over the crack and allow it to dry completely before using the toilet again.
However, if the crack is larger or more severe, you may need to replace the entire toilet. A cracked toilet bowl or base can compromise the structural integrity of your RV’s plumbing system and lead to more serious issues down the line.
Step FOUR: Reinstalling the Toilet Correctly
When it comes to fixing a leaking RV toilet, one of the most critical steps is reinstalling the toilet correctly. This may seem simple, but if not done properly, it can lead to further leaks and even damage to your RV.
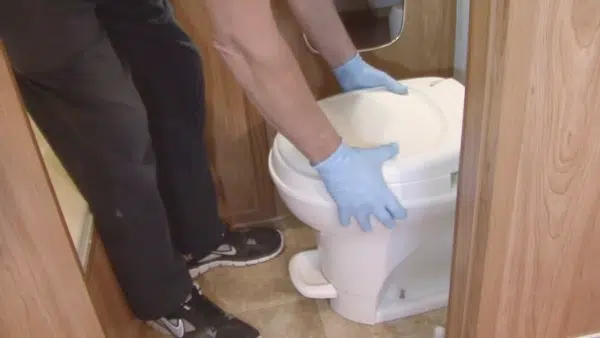
To begin with, you will need to remove the toilet from its mounting bolts. Turn off the water supply and disconnect any hoses or connections before doing so. Once removed, inspect the area around the mounting bolts for any signs of damage or wear.
Next, clean both the toilet base and the flange on the RV floor where it will be mounted. Use a putty knife or scraper to remove any old sealant or debris that may have accumulated over time.
Before reinstalling the toilet, ensure all mounting bolts are securely fastened and in good condition. If any bolts are damaged or missing, replace them before proceeding.
Apply a new sealant layer around the RV floor flange where the toilet will be mounted. Be sure to use a sealant specifically designed for use with toilets and compatible with both plastic and porcelain surfaces.
Carefully lower the toilet onto the mounting bolts, ensuring it is centered over the flange. Apply pressure evenly across all sides of the base until it is firmly seated on top of the sealant. Tighten each mounting bolt in a diagonal pattern until it is snugly secured.
Preventative Measures to Stop RV Toilet Leaks
To prevent RV toilet leaks, there are several preventative measures that you can take. By following these steps, you can avoid the hassle and expense of repairing a leaking toilet.
ONE: Regular Maintenance Checks
To avoid RV toilet leaks, it is essential to perform regular maintenance checks. This can help you identify any potential issues before they become major problems. Here are some tips to keep your RV toilet in good condition:
- Check for any signs of leaks, such as water on the floor around the base of the toilet or a foul odor coming from the bowl.
- Inspect the gaskets and seals regularly and replace them if they show signs of wear and tear. These parts are crucial in preventing leaks between the bowl and base.
- Make sure that all bolts and nuts are tight. Loose bolts or nuts can cause gaps between the toilet components, leading to leaks.
- Clean your RV toilet regularly using only recommended cleaning products. Harsh chemicals can damage the gaskets and seals, causing them to deteriorate faster.
- Use your RV toilet properly by following manufacturer instructions. Avoid flushing anything other than human waste and toilet paper down the bowl.
TWO: Proper Use and Cleaning Habits
Developing proper use and cleaning habits is important to avoid RV toilet leaks. These are some tips for keeping your RV toilet in good shape:
- Use RV-friendly Toilet Paper: Regular toilet paper can clog the pipes and cause leaks. Use toilet paper specifically designed for RVs, which dissolves faster and is gentler on the system.
- Avoid Using Harsh Chemicals: Bleach and drain cleaners can damage the seals and gaskets on your RV toilet. Instead, use mild cleaning products that are safe for your RV’s plumbing system.
- Clean Regularly: Regular cleaning can prevent the buildup of waste and debris that can cause blockages and leaks. Clean the toilet bowl and surfaces with a soft brush or sponge, being careful not to scratch anything.
- Check for Leaks: Inspect your RV toilet regularly for leaks, like water on the floor or a bad smell. Make sure you take care of any issues before they get worse.
THREE: Upgrading to a High-Quality RV Toilet
If you have tried all the steps to diagnose and fix your RV toilet leak, but it still persists, then it might be time to consider getting a better RV toilet. Upgrading your RV toilet can solve your leak problem and improve your overall bathroom experience.
High-quality RV toilets are designed with better materials and advanced technology, ensuring durability, efficiency, and comfort. They come with improved flushing systems that use less water while still providing powerful flushes. This can help conserve water and save you money in the long run.
When choosing a high-quality RV toilet, consider factors such as size, shape, height, flushing system, water usage, and ease of installation. Some popular brands include Dometic, Thetford, and Nature’s Head.
Does a Leak From An RV Toilet Bowl to Its Base Pose Any Risks?
A broken RV toilet can bring with it costly consequences! Whether the leak drips down onto your flooring or soaks into the woodwork, repairs to both the bowl and its surroundings may prove a hefty expense. Here are some of the risks associated with a leaking toilet:
Water Damage: One of the most immediate and visible risks associated with a leak between the bowl and base of an RV toilet is water damage. If the leak is not detected and fixed quickly, it can cause significant damage to the floor and subfloor of the RV.
Health Risks: A leak between the bowl and base of an RV toilet can also pose health risks to the occupants of the RV. If the leak is not detected and fixed quickly, it can lead to the growth of mold and mildew, which can cause respiratory problems and allergies.
Unpleasant Odors: Another potential risk associated with a leak between the bowl and base of an RV toilet is unpleasant odors. The leak can cause sewage to seep out, leading to foul smells that can permeate the entire RV.
Increased Maintenance Costs: If a leak between the bowl and base of an RV toilet is not detected and fixed quickly, it can lead to increased maintenance costs. The longer the leak goes untreated, the more damage it can cause, leading to more extensive repairs and higher costs.
Reduced Resale Value: If a leak between the bowl and base of an RV toilet is not detected and fixed, it can lead to reduced resale value. Buyers will likely notice the issue during an inspection, and it may be a red flag that the RV has not been properly maintained.
Is It Ok to Fix A Leaking RV Toilet Yourself?
For most, it is a feasible task to tackle home repairs when concerning RV toilets. Taking the time to research your specific model and learning a few plumbing basics can make all the difference in ensuring a successful repair job, so don’t be afraid to grab some tools.
It is also helpful to have a thorough understanding of the parts involved and how they work together when troubleshooting a problem. If you do not feel comfortable with the repair process, it is always best to seek out professional assistance from an experienced technician.
Taking this approach will ensure that your toilet is fixed quickly and correctly while avoiding any potential risk of damage or injury.
Spot the Leak: Locate & Check for Damage
Dealing with RV toilet leaks is frustrating and unhygienic. As discussed in this article, common causes of leaks include corroded seals and gaskets, loose bolts, and cracked toilet bowls.
To diagnose the leak, one must identify its location and inspect for damaged parts like gaskets or seals. Once identified, fixing the leak can be done by replacing worn-out parts, tightening loose bolts and nuts, or replacing a cracked toilet bowl.
Preventative measures like regular maintenance checks, proper use and cleaning habits, and investing in a good RV toilet can help avoid future leaks.
By following these steps and ensuring regular maintenance checks to your RV toilet system, you can rest assured that your next camping trip will be trouble-free.