
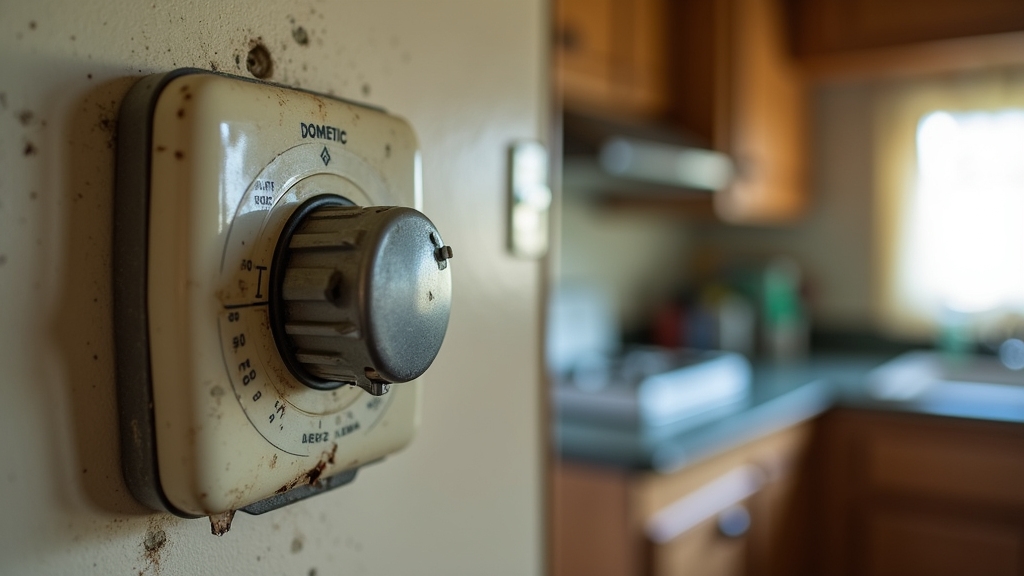
If your Dometic thermostat shows a blank display or is unresponsive, start by checking power supply and fuses. Inspect wiring for loose, corroded, or damaged connections, and verify sensor functionality.
Continuous fan issues often stem from faulty control boards or incorrect fan settings. Set it to “auto” to fix this. Re-solder cracked joints and clean switch contacts to restore operation. Understanding these key checks helps you pinpoint and resolve common faults before considering replacement or advanced repairs.
Key Takeaways
- Check for loose, corroded, or damaged wiring connections causing communication or power issues in Dometic thermostats.
- Inspect fuses, circuit breakers, and ensure stable 12V power supply if the thermostat display is blank or unresponsive.
- Identify error codes like E1 (communication loss) and E7 (power failure) to target troubleshooting efforts effectively.
- Reset the thermostat by cycling power or using model-specific button combinations to clear temporary faults.
- Re-solder cracked solder joints and clean switch contacts to fix unresponsive controls or continuous fan operation problems.
Common Issues With Dometic Thermostats
Although Dometic thermostats offer reliable climate control, you may encounter several common issues that impact their performance.
Loss of communication between the thermostat and power module boards often triggers an E1 error code. To fix this, perform a factory reset, verify power sources, inspect fuses, and check for physical damage or faulty connections.
An E1 error indicates lost communication; try a factory reset, check power, fuses, and connections.
Unresponsive buttons often result from dirt accumulation or require gentle tapping instead of pressing. Cleaning the surface or inspecting for damage can help. For persistent button malfunctions, it may be necessary to remove the PC board and clean the switch contacts with spray contact cleaner.
Continuous fan operation usually stems from incorrect fan mode settings. Ensure it’s set to automatic. Temperature fluctuations may indicate sensor faults or calibration needs. Regular maintenance helps here.
Electrical problems like cracked solder joints or faulty switches require inspection, cleaning, or re-soldering. If issues persist, consult an RV technician for professional diagnosis.
Diagnosing a Blank Display
When your Dometic thermostat display goes blank, the first step is to verify its power supply.
Check that the thermostat receives a stable 12V from the RV power source or house batteries.
Inspect related circuit breakers and fuses for trips or damage.
Use a multimeter to detect weak or fluctuating voltage that could cause display failure.
Examine wiring harnesses and communication cables for loose, broken, or corroded connections, ensuring proper orientation and secure seating.
Visually inspect solder joints and circuit board traces for cracks or damage.
Confirm the on/off switch functions correctly without mechanical faults.
Also, verify no safety interlocks like condensate pump float switches are cutting power, as these system safety devices can shut down the thermostat to prevent water damage.
If all electrical inputs and connections check out, consider potential hardware failure or software glitches before replacing the thermostat. Additionally, understanding the durability and maintenance of your RV’s electrical components can help prevent future issues.
Causes of Unresponsive Thermostats
Sure! Here’s a more conversational version of the text:
First things first, you’ll want to check the power switch for any cracked solder joints. These little cracks can really mess with the thermostat’s power supply. It’s interesting how often faulty or cold solder connections can lead to that frustrating intermittent unresponsiveness, right?
Also, it’s a good idea to check power supply to the thermostat, including the RV plug and batteries, to make sure it’s getting proper power. Ensuring proper voltage levels is crucial for the thermostat to function reliably without unexpected failures.
Power Switch Issues
Why won’t your Dometic thermostat respond even when it seems powered? Often, the culprit lies in power switch issues within the furnace or the fuse panel. Here’s how to pinpoint the problem:
- Furnace Power Switch: Verify that the furnace’s onboard switch is set to “On.” If turned off, the thermostat won’t receive power since many Dometic units route power through the furnace. Testing continuity across this switch can help confirm whether it is functioning properly.
- Fuse Panel Integrity: Inspect fuses for tight seating, corrosion, or blown status. Even intact fuses may fail due to poor contact or wiring faults behind the panel.
- Wiring and Connectors: Check for loose, corroded, or physically damaged wiring and connectors. A multimeter can help confirm continuous 12V supply.
Addressing these areas methodically restores reliable thermostat operation by ensuring consistent power delivery.
Faulty Solder Joints
Although your Dometic thermostat may appear powered, faulty solder joints, especially around the power switch, can disrupt reliable operation. These joints often crack due to weak physical support, causing intermittent AC cycling or total failure.
Regular maintenance and proper care are crucial to prevent issues that might affect system components and overall functionality. You’ll notice dull, cold solder joints prone to cracking, sometimes accompanied by damaged circuit traces near the switch.
Contaminants worsen connectivity, leading to unresponsive controls. Understanding how bio enzymes work to maintain system components can provide insights into preventing further damage.
To diagnose, visually inspect joints under magnification for cracks or dullness and test the switch’s response while manipulating it. Early symptoms often include the AC turning on and off during travel or inconsistent thermostat responses, indicating potential power switch issues.
Repair by carefully resoldering with electronic-grade solder and a fine-tipped iron, reinforcing broken traces with wire bridges. Clean switches before repair to improve contact longevity. Avoid excess solder and ensure mechanical support to prevent recurrent fractures and restore consistent thermostat function.
Understanding Temperature Fluctuations
When your Dometic thermostat experiences temperature fluctuations, it often stems from sensor misalignment, wiring issues, or environmental factors affecting sensor accuracy. These fluctuations cause inefficient HVAC cycling, discomfort, and increased energy use. To address this, focus on three critical areas:
- Sensor Placement: Ensure sensors are positioned away from drafts, direct sunlight, or heat sources to prevent false readings.
- Wiring Integrity: Check for loose, corroded, or damaged wiring that can disrupt signal transmission and cause erratic thermostat behavior.
- Environmental Stability: Minimize exposure to inconsistent power supply and maintain a clean, dust-free thermostat environment.
Regular maintenance and checking for proper functioning are essential to prolong the lifespan of your thermostat and ensure efficient temperature control.
Troubleshooting Continuous Fan Operation
If your Dometic thermostat’s fan runs constantly, start by verifying that the fan setting is on “Auto” rather than “On,” as incorrect settings often cause nonstop operation. Ensuring you understand basic troubleshooting steps can improve your emergency preparedness.
Next, check for power issues like blown fuses or tripped breakers and inspect the thermostat for physical damage. You can also try power cycling the unit to reset stuck settings. During troubleshooting, ensure that the furnace’s control board and wiring connections are intact, as a faulty control board or wiring fault can cause the fan to operate continuously.
Use this table to guide your troubleshooting:
| Step | Action | Purpose |
|---|---|---|
| Fan Setting | Set to “Auto” | Prevent continuous fan running |
| Power Check | Inspect fuses & breakers | Ensure stable power supply |
| Manual Override | Toggle fan setting | Test fan response |
| Physical Inspection | Look for damage | Identify hardware faults |
If problems persist, consult a professional technician.
Interpreting Error Codes and Their Meanings
Because error codes provide critical insight into your Dometic thermostat’s status, understanding their meanings helps you quickly identify and resolve issues. These codes appear on the LCD screen, replacing the temperature set-point, and pinpoint exact problems like communication failures or sensor faults.
Here’s how to interpret them effectively:
- E1 vs. E7: E1 signals loss of communication between the thermostat and power module. E7 indicates a power supply failure, often due to loss of 120 VAC power. Checking the power supply stability can prevent many of these errors.
- Sensor Errors (E5 & E6): E5 means an open or out-of-range freeze sensor. E6 relates to a malfunctioning humidity sensor, both affecting AC and dehumidification. Dometic systems monitor these sensors continuously to detect faults early and ensure safe operation sensor monitoring.
- Zone Configuration (E8 & E9): These errors arise from invalid zone setups, impacting system control.
Understanding these codes lets you target connection checks, sensor replacements, or power verifications precisely.
Step-by-Step Guide to Resetting Your Thermostat
To reset your Dometic thermostat effectively, start by powering it down completely and locating the control buttons or temperature settings. Maintaining proper control over temperature helps manage humidity levels inside your RV.
Next, disconnect power by removing the thermostat from its base and carefully detaching the wires, noting their positions.
Wait five minutes to discharge residual power. During this time, it is important to allow any residual power or settings to fully dissipate.
Reconnect the wires securely, reinstall the thermostat, and restore power.
Perform a model-specific reset by pressing the appropriate button combination (e.g., “Mode” + “Up” or “Mode” + “Zone” + “On/Off”).
Confirm the reset via display indicators. Finally, set your desired temperature and test the system for proper function.
| Step | Action | Notes |
|---|---|---|
| Power Down | Turn off thermostat | Locate control buttons |
| Disconnect Power | Remove wires, wait 5 minutes | Note wire colors and terminals |
| Reset | Press model-specific buttons | Watch for display confirmation |
Preventive Maintenance Tips for Longevity
To help your Dometic thermostat last longer, it’s a great idea to set up a regular cleaning routine. This means keeping it dry to prevent moisture from getting in and making sure to dust off those contact points. Because the thermostat’s buttons are touch-sensitive and rely on foam behind them to register your input, maintaining cleanliness helps preserve their responsiveness.
And don’t forget to check all the wiring connections often! Look for any signs of corrosion or looseness. This is key to ensuring that the sensor signals stay consistent. Proper material choice in wiring can significantly impact durability and resistance to corrosion.
Regular Cleaning Routine
Although regular cleaning might seem routine, it plays a crucial role in maintaining your Dometic thermostat’s performance and longevity. Dirt and grime buildup can impair sensor accuracy and airflow, leading to inefficient operation.
Follow these essential cleaning steps:
- Exterior Cleaning: Wipe the thermostat surface gently with a soft, damp cloth. Avoid spraying water directly or using solvents, especially on capacitive-touch models, to prevent damage. The Dometic Furnace Thermostat (Heat Only) Model 32300 features a durable finish designed to withstand regular cleaning without degradation, supporting long-term use. mechanical thermostat design
- Filter and Coil Maintenance: Every two weeks, remove, wash, and reinstall the air filter behind the return air grille. Proper maintenance routines like this are critical for preventing buildup that could affect system efficiency and prevent damage.
- Coil Cleaning: Clean condenser coils with a specialized cleaner and straighten fins to ensure top-notch airflow.
- Moisture Control: Keep doors and windows closed during operation to minimize condensation. Ensure proper ventilation and drainage to prevent moisture buildup that can affect sensor responsiveness.
Adhering to this routine helps sustain system efficiency and extends thermostat life.
Inspecting Connections Frequently
Since wiring connections serve as the critical communication and power pathways for your Dometic thermostat, you must inspect them frequently to prevent failures.
Begin by verifying that all wires are securely seated and perform a light tug test to ensure terminal screws are properly torqued.
Check for corrosion, discoloration, or damage on terminals and wire tips. Confirm wiring gauge compatibility and correct color coding according to the original layout. Proper pole durability can also impact the stability of electrical connections in related outdoor equipment.
Inspect RJ-11 connectors for secure fit and replace any worn plugs. Always power off the thermostat before handling connectors.
Use a multitester to detect broken or intermittent wires. Verify fuse integrity and measure voltage at power inputs. Before beginning any inspection or replacement work, always remove power fuse to ensure safety and prevent electrical hazards.
Ultimately, assess mechanical strain risks like pinched wires or loose mounting to prevent connection degradation over time.
How to Inspect and Repair Faulty Connections?
When inspecting and repairing faulty connections in your Dometic thermostat, start by thoroughly examining the wiring for secure attachments and visible damage.
Check that each wire is tightly secured in its terminal and look for cracked insulation or corrosion that can cause faults.
Next, test for power presence and continuity using a multimeter to identify breaks or voltage drops.
Finally, inspect the thermostat PCB for cracked solder joints or lifted traces, re-soldering as needed to restore connections.
- Confirm wires are firmly seated with no visible damage or corrosion.
- Measure voltage and continuity to detect wiring issues or fuse failures.
- Repair cold solder joints and clean switch contacts to ensure reliable operation.
Follow these steps carefully to restore your thermostat’s functionality.
When to Consider Replacing Your Thermostat?
If your Dometic thermostat shows a blank display or fails to power on despite proper wiring and power supply, it’s a clear sign that replacement may be necessary.
Other indicators include unresponsive controls, persistent error codes, or physical damage like cracked solder joints. Note that a thermostat failure can cause the water heater to overheat, resulting in potentially dangerous temperature control issues.
| Symptom | Possible Cause | Replacement Needed? |
|---|---|---|
| Continuous fan operation | Thermostat malfunction | Yes |
| E1 error code | Communication loss | If unresolved |
| Cracked solder joints | Intermittent failures | Yes |
| Inaccurate temperature | Sensor or internal component | Yes |
Replacing your thermostat ensures reliable operation and avoids cascading system failures. If troubleshooting fails to resolve these issues, replacing the unit is the most effective solution.
Frequently Asked Questions
Can I Use My Dometic Thermostat With a Smart Home System?
You generally can’t directly integrate your Dometic thermostat with a smart home system because it lacks native smart features and protocols.
To achieve smart control, you’ll need an aftermarket smart thermostat like Micro-Air EasyTouch or WalTech. These models offer WiFi and app-based remote control.
They replace your existing unit with minimal rewiring and provide compatibility with your RV HVAC system. This enables seamless integration into your smart home environment.
How Do Firmware Updates Improve Thermostat Performance?
Firmware updates improve your thermostat’s performance by fixing bugs, refining temperature calibration, and enhancing system responsiveness.
They optimize communication between your thermostat and HVAC units, reducing lag and improving reliability.
Updates also add power management features to extend device lifespan.
By implementing these improvements, firmware guarantees your thermostat runs smoothly, reacts quickly to your inputs, and maintains accurate climate control.
Ultimately, this boosts overall efficiency and user experience.
What Are the Energy Savings of Using a Dometic Thermostat?
You can expect moderate energy savings with a Dometic thermostat, mainly by maintaining consistent temperatures and minimizing unnecessary heating or cooling.
While specific savings data isn’t detailed, their multi-zone control and digital precision help optimize energy consumption in RVs.
Compared to smart thermostats, savings may be less pronounced, but Dometic’s durability and tailored design offer reliable, cost-effective energy management.
This is especially true in RV environments with variable conditions.
Is Professional Installation Recommended for Dometic Thermostats?
You might think installing a Dometic thermostat yourself saves money, but professional installation is strongly recommended. You’ll ensure precise wiring, correct terminal torque, and secure housing alignment, all critical for safety and function.
Pros follow manufacturer guidelines, properly route cables, and perform system initialization and calibration. This expertise prevents malfunctions and optimizes performance, saving you time and costly repairs down the line.
Don’t risk it; trust a qualified technician.
How Do I Calibrate My Thermostat for Accurate Readings?
You can’t directly calibrate your thermostat manually.
Instead, compare its temperature reading to a reliable external thermometer inside your space.
If there’s a discrepancy, perform a factory reset by turning the thermostat off, then pressing and holding MODE + ZONE buttons as per the manual.
After reset, reconfigure settings and verify dip switches match your system.
If inaccuracies persist, contact a service center for diagnostics or sensor replacement.
Keep Your RV Comfortable with Consistent Temperature Control
You’re not alone. Over 40% of Dometic thermostat issues stem from simple connection problems. By regularly inspecting wiring and resetting your device, you can prevent most malfunctions. If your thermostat shows a blank display or unresponsive controls, start with these troubleshooting steps before considering replacement.
Staying proactive with maintenance not only extends your thermostat’s lifespan but also guarantees consistent temperature control and efficient fan operation. This saves you time and costly repairs.

