Last Updated on July 12, 2026
If your RV toilet doesn’t hold water, check the bowl seal and flush valve first.
Dry, cracked, or misaligned seals often cause leaks and prevent water retention.
Press the flush pedal to make certain the ball valve moves freely and seats tightly against the seal.
Clean any debris or residue around these parts and apply a light coat of silicone-based grease to keep the seal flexible.
Persistent issues may require replacing the seal or adjusting alignment.
Further steps can help you fix and prevent this problem efficiently.
Key Takeaways
- Check the rubber bowl seal for dryness, cracks, or deformation causing water to leak from the toilet bowl.
- Inspect flush and ball valve alignment to ensure the valve closes tightly and seals properly.
- Clean debris and residue from the seal and flush valve to restore full contact and prevent leaks.
- Apply a light coat of silicone-based plumber’s grease to the seal to maintain flexibility and prevent drying.
- Replace the bowl seal if cleaning and lubrication do not restore water retention in the toilet bowl.
Common Causes of RV Toilet Bowl Seal Leaks
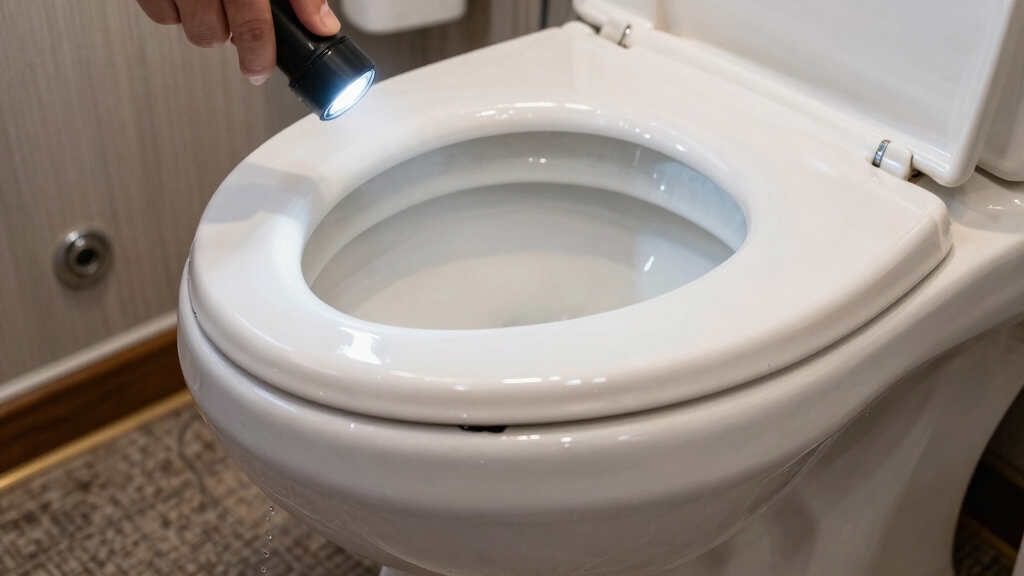
When your RV toilet bowl won’t hold water, the problem often boils down to issues with the water seal.
You’ll want to check if the rubber seal has dried out or lost flexibility, as this commonly causes leaks.
Misalignment of the seal can also let water escape even if it looks intact.
Even a perfectly intact seal can leak if it’s not properly aligned.
A disconnected or shifted ball valve may prevent the flush opening from sealing properly, so verify it moves freely and closes fully.
Debris buildup around the seal or valve can disrupt contact, causing leaks.
Additionally, seals can deform from wear or compression and might require replacement.
Start by inspecting for dryness, misalignment, and buildup, since these factors directly affect the water seal’s ability to hold water in the bowl efficiently.
Using regular cleaning and maintenance helps prevent seal damage and ensures the toilet functions properly.
Checking Your Flush Valve and Bowl Seal
First things first, go ahead and press the flush pedal. You want to make sure that the ball valve is moving freely and closes all the way. It’s a simple check, but super important!
Next, take a good look at the seal. Check for any signs of dryness, deformation, or even debris that might be affecting how well it fits. You don’t want anything getting in the way!
Finally, let’s test how well the bowl holds water. This is key to confirming that the seal is doing its job properly. If it’s holding steady, you’re in good shape!
To keep everything functioning well and avoid odors, regular cleaning with an RV-specific cleaner is highly recommended.
Inspect Ball Valve Movement
Press the flush pedal firmly and observe the ball valve’s movement within the flush valve assembly. The ball valve should move smoothly without sticking and close tightly against the seal to hold water in the bowl.
If it hesitates or doesn’t fully close, debris or misalignment may be the cause. Check for any visible buildup around the valve or flush opening that could interfere with its seating.
Gently manipulate the valve by hand to verify free movement and full closure. If the valve appears disconnected or shifted, reposition it carefully to restore proper alignment.
Addressing these issues promptly prevents leaks and maintains effective water retention. A properly functioning ball valve is critical for your RV toilet to hold water and operate correctly. Regular maintenance is essential to prevent buildup that can affect the black tank system and overall sanitation.
Examine Seal Condition
Inspect the flush valve and bowl seal closely for signs of wear, dryness, or deformation. Check if the rubber seal has become dry, flattened, or loose, as these conditions reduce water retention.
Press the flush pedal and observe the seal edge for dirt, debris, or uneven contact that can prevent a tight fit. Lightly press around the seal to test its flexibility. Stiffness indicates aging or damage.
Clean the seal and surrounding surfaces thoroughly to remove buildup. Then apply a light coating of plumber’s grease to temporarily restore flexibility and prevent premature drying.
If lubrication doesn’t improve the seal’s condition, prepare to replace it with a model-specific part. Ensure correct alignment to avoid leaks. Proper seal maintenance is critical for preventing water loss in your RV toilet.
Using enzyme-based treatments can also help maintain overall toilet system performance and reduce buildup that may affect seals.
Test Water Retention
After ensuring the seal is clean, flexible, and properly aligned, check how well your RV toilet holds water by testing the flush valve and bowl seal.
Press the flush pedal and observe whether the ball valve moves freely and closes completely. Hold the pedal open to inspect the seal edge for dirt, buildup, or uneven contact that might cause leaks.
Lightly press around the seal to confirm it conforms properly, improving water retention. If you notice dryness, flattening, or looseness, clean and lubricate with plumber’s grease for a temporary fix.
Persistent leaks usually indicate seal wear or misalignment, requiring replacement. Always identify your toilet model before ordering parts to guarantee compatibility.
Accurate seal seating during reinstallation is vital to restore proper water retention and prevent recurring leaks. For enhanced convenience and reliability, consider upgrading to an electric dump valve to minimize manual maintenance tasks.
Cleaning and Lubricating the Bowl Seal
First things first, you’ll want to give the bowl seal and the area around it a good cleaning. It’s important to get rid of any debris or buildup that might mess with the seal’s effectiveness.
Once it’s nice and clean, grab some plumber’s grease and apply a light coat. This helps keep the seal flexible and prevents it from drying out too soon.
Taking these steps can really boost water retention and extend the life of the seal. Just keep in mind, if the seal is already worn or damaged, this might only be a temporary fix.
For best results, consider using RV toilet chemicals regularly to maintain proper function and prevent odors.
Seal Cleaning Techniques
Clean the bowl seal and its surrounding surfaces thoroughly to restore proper water retention and prevent leaks.
Begin by pressing the flush pedal to expose the seal area, then inspect for dirt, debris, or residue that can compromise the watertight fit.
Use a soft brush and mild, non-abrasive cleaner to remove buildup without damaging the rubber.
Avoid harsh chemicals that degrade the seal material.
After cleaning, check the seal edge for even contact and flexibility by lightly pressing around it.
Make certain the flush valve components are free-moving and correctly aligned.
This cleaning process removes contaminants that hinder sealing performance, improving water hold before considering lubrication or replacement.
Regular maintenance reduces premature seal wear and helps identify early signs of damage or deformation requiring further attention.
It is also important to follow best practices for regular cleaning schedules to maintain optimal seal function and avoid buildup.
Lubrication Benefits and Tips
You’ll often find that applying a light coating of plumber’s grease to the bowl seal markedly improves its flexibility and water retention.
This lubricant reconditions a dry seal, restoring its ability to conform tightly against the flush valve, reducing leaks.
Before applying grease, thoroughly clean the seal and surrounding surfaces to remove debris or buildup that might interfere with sealing.
Use only toilet-safe lubricants like silicone-based plumber’s grease to avoid damaging the rubber.
Remember, lubrication is a short-term fix; if the seal is worn or deformed, replacement is necessary.
Regularly lubricating the seal helps prevent premature drying and cracking.
Incorporate this into your routine RV maintenance to maintain a watertight toilet bowl, ensuring peak performance and avoiding water leakage issues.
For enhanced durability and performance, consider using components made from corrosion-resistant materials when replacing seals and valves.
Replacing a Worn or Damaged Bowl Seal
Replacing a worn or damaged bowl seal involves carefully removing the old seal from the flush valve area and installing a new one that matches your toilet’s exact model. Start by identifying the model to verify compatibility.
Then, follow these steps:
- Remove the toilet seat and bowl if necessary to access the flush valve.
- Lift out the old seal, inspecting for cracks, flattening, or deformation.
- Clean the flush valve area thoroughly to remove debris and residue.
- Position the new seal precisely, confirming it seats evenly without gaps or misalignment.
Proper installation prevents leaks and restores water retention in the bowl. Avoid forcing parts to maintain valve and seal integrity.
If the seal is misaligned or damaged, water will continue to leak. Precision during replacement is critical for a reliable fix. Using a sealant with high elongation properties can enhance the durability and leak prevention of the seal.
Tips for Dometic and Thetford Toilet Models
When working with Dometic and Thetford RV toilets, understanding their specific design quirks is essential for resolving water seal issues effectively.
Dometic models often present challenges with bowl seal fit and flush valve alignment. Make certain the ball valve moves freely and seats tightly.
Dometic toilets require careful attention to bowl seal fit and flush valve alignment for leak-free performance.
For Thetford toilets, you might need to remove the bowl to access and inspect the seal thoroughly. Always identify your exact model before ordering parts, as seals are model-specific.
Clean debris from the seal and valve surfaces meticulously. Then apply a toilet-safe lubricant to temporarily restore flexibility.
If leaks persist, replace the seal, seating it precisely to avoid misalignment. Regular inspection and correct handling of flush mechanisms help maintain seal integrity, preventing recurring leaks common in certain Dometic and Thetford setups.
Understanding the installation process can also help prevent improper fitting that leads to water seal problems.
Preventing Leaks With Regular Seal Maintenance
Maintaining the seal on your RV toilet prevents leaks and extends its service life. Regular seal maintenance guarantees a tight water hold and avoids unpleasant odors.
Follow these steps to keep your seal in peak condition:
- Clean the seal and surrounding surfaces regularly to remove residue and debris that impair sealing.
- Apply a light coat of plumber’s grease or a compatible lubricant to prevent the rubber from drying and cracking.
- Inspect the seal for signs of wear, deformation, or misalignment during routine RV maintenance checks.
- Replace the seal promptly if cleaning and lubrication don’t restore full sealing. Make certain you use a model-specific replacement part.
Frequently Asked Questions
Can Water Hardness Affect My RV Toilet’s Bowl Water Level?
Yes, water hardness can impact your RV toilet’s bowl water level. Hard water deposits mineral buildup around the bowl seal and flush valve, causing poor sealing and leaks that lower water levels.
To prevent this, regularly clean and descale these areas using appropriate cleaners. Applying a compatible lubricant afterward helps maintain seal flexibility and proper contact. This ensures the bowl holds water effectively.
Consider a water softener if hardness is a persistent issue.
How Do Temperature Changes Impact the Toilet Bowl Seal?
Temperature changes can wreak havoc on your toilet bowl seal, causing it to shrink, harden, or crack.
When cold, the rubber can become brittle and lose flexibility, leading to leaks.
Heat may cause the seal to soften or deform.
To combat this, regularly inspect and lubricate the seal with plumber’s grease.
This keeps it supple and prevents premature drying or warping that compromises the water hold.
Are There Eco-Friendly Lubricants Safe for RV Toilet Seals?
Yes, you can use eco-friendly lubricants safe for RV toilet seals.
Look for biodegradable, non-toxic plumber’s grease or silicone-based lubricants designed for rubber seals.
These options prevent drying without harming the environment or compromising seal integrity.
Avoid petroleum-based products, as they can degrade rubber over time.
Always check compatibility with your toilet’s seal material and apply sparingly to maintain flexibility and prolong the seal’s life while protecting the ecosystem.
How Long Does a Typical RV Toilet Seal Last Under Normal Use?
In typical use, an RV toilet seal lasts about 3 to 5 years before needing replacement.
For example, a frequent RVer replaced their Dometic seal after 4 years due to drying and minor warping.
You can extend seal life by regularly cleaning and lightly lubricating it with plumber’s grease.
Keep in mind, harsh use or environmental factors may shorten this lifespan.
Inspect the seal during routine maintenance for early signs of wear.
Can Using RV Toilet Chemicals Damage the Bowl Seal or Valve?
Using RV toilet chemicals generally won’t damage the bowl seal or valve if they’re designed for RV systems and used as directed.
However, harsh or non-compatible chemicals can dry out or degrade rubber seals over time, leading to leaks.
To protect your seals, choose toilet-safe, RV-specific chemicals and avoid strong solvents.
Rinsing the system regularly also helps maintain seal integrity.
Regular inspection and lubrication of seals help maintain their flexibility and prevent premature wear.
Keep Your RV Toilet Leak-Free With Proper Maintenance
Don’t let a leaking RV toilet bowl seal drain your adventure. By regularly checking, cleaning, and lubricating the flush valve and bowl seal, you’ll keep your system tight.
If wear or damage shows, replace the seal promptly to prevent water’s silent seep. With targeted care, especially for Dometic and Thetford models, you’ll guarantee your throne remains a fortress.
This keeps leaks at bay and ensures your travels are smooth and dry.