

Last Updated on April 14, 2023
If you think about installing an RV awning on your house, it’s a great way to create more outdoor living space while protecting it from the elements.
Before embarking on your installation project, several key factors must be considered for a safe and successful outcome.
We will outline the proper planning procedures, steps involved in completing the installation process, and ongoing maintenance tasks that should be kept in mind throughout. Keep reading to learn more about this exciting endeavor.
Can You Put an RV Awning on a House: 3 Factors
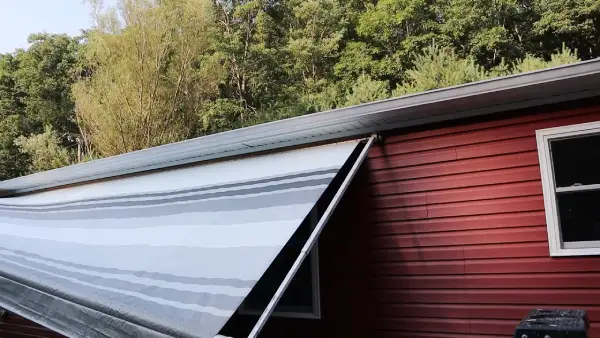
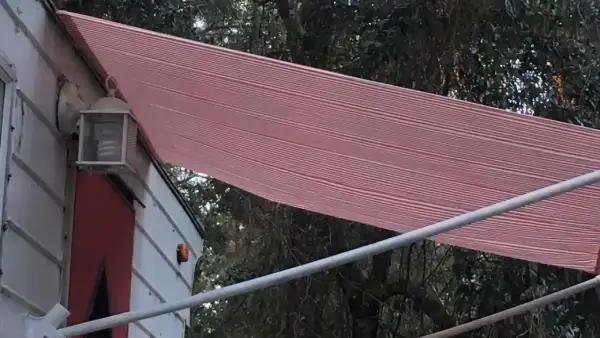
An RV awning can be attached to a house if you are wondering if it is possible. RV awnings can be installed on the house to provide extended outdoor living space, protection from sun and rain, and increased energy efficiency.
However, before installing an RV awning on your house, there are several factors that you need to consider.
Factors to Consider Before Installing an RV Awning on a House
Before installing an RV awning on the house. These include local building codes and regulations, structural support, and the size and type of awning.
1. Local Building Codes and Regulations
When considering installing an RV awning on the house, it is important to check with local building codes and regulations. These codes may vary depending on the location and can have specific requirements for outdoor structures.
For example, some areas may require a permit to install an awning, while others may not allow any permanent structures to be attached to a house. It is essential to research and check with local authorities before proceeding with installations.
Additionally, some areas may restrict the size or type of awning that can be installed. Ensuring that the chosen awning meets all relevant regulations before purchasing is important.
2. Structural Support
Aside from the size of the RV awning, one important factor to consider is structural support. The weight of the awning and its ability to withstand wind and other weather conditions will depend on the strength of the structure it is attached to.
Before installing an RV awning on the house, it is essential to ensure that the structure can support the awning’s weight. This may require consulting with a professional contractor or engineer to assess the load-bearing capacity of the house’s exterior walls and roof.
In addition, it is important to consider how the awning will be attached to the house. The brackets must be strong enough to hold the awning’s weight and withstand any weather conditions.
It is recommended that brackets be attached directly to studs or other load-bearing structures within the wall for maximum support.
Lastly, following all local building codes and regulations is essential when installing an RV awning on the house. These codes may dictate specific requirements for structural support and attachment methods.
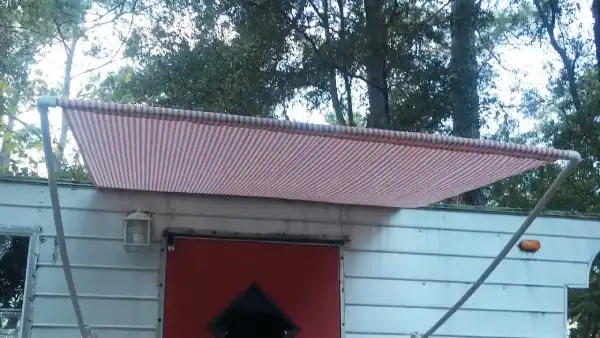
3. Size and Type of Awning
RV awnings should be installed on the house after you choose the right size and type of awning. The size of the awning will depend on the available space and how much coverage is desired. It’s important to measure the area where the awning will be installed to ensure it fits properly.
Different types of RV awnings are available in the market, including manual and motorized options. Manual awnings require manual operation, while motorized ones can be operated with a remote control or switch. Motorized awnings are more expensive than manual ones but offer greater convenience.
Another factor to consider when choosing an RV awning for your house is the material it is made of. The most common materials used for RV awnings are vinyl and acrylic fabric. Vinyl is less expensive but less durable than acrylic fabric, which can withstand harsh weather conditions better.
It’s also important to consider whether you want a retractable or a fixed RV awning. Retractable awnings can be easily retracted when unused, providing flexibility in outdoor living spaces. Fixed awnings are permanently attached to the house and cannot be retracted.
Steps to Install an RV Awning on a House
Installing an RV awning on the house can be a great way to add outdoor living space and protection from the elements. Here are the steps to follow for a successful installation:
Step 1: Gather Tools and Materials
Gathering the right tools and materials is essential for installing RV awnings on houses. You will need a drill, screws, brackets, measuring tape, level, and the awning fabric.
Before starting the installation process, carefully read the manufacturer’s instructions for your specific awning model. This will ensure you have all the components and tools required for installation.
Step 2: Determine Proper Placement
When installing an RV awning on the house, determining the proper placement is crucial. The location of your awning will affect not only its functionality but also its visual appeal.
Firstly, consider the purpose of your awning. Are you looking to create shade for a patio or deck area? Or do you want to cover a window or door from direct sunlight and rain? Depending on your needs, you may need to adjust the placement accordingly.
Secondly, consider the direction of the sun and wind in your area. You want to position your awning to provide optimal shade during the hottest parts of the day while protecting against strong winds.
Thirdly, ensure enough clearance space above and around where you plan to install the awning. This includes checking for any nearby trees, power lines, or other obstacles that could interfere with installation or use.
Lastly, consider the aesthetic appeal of your awning placement. You want it to complement your home’s overall look and style while also providing functionality. Take note of any architectural features or design elements that could be accentuated by adding an RV awning.
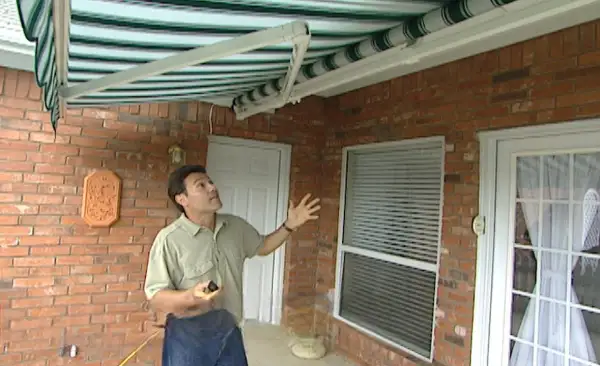
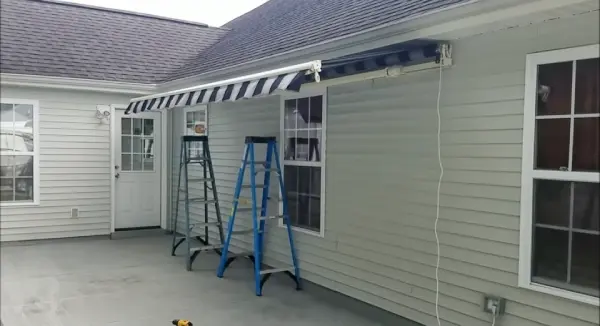
Step 3: Attach Brackets to House
You must first attach brackets to install an RV awning on the house. The brackets will serve as the support for the awning and ensure that it stays securely in place.
Before attaching the brackets, it is important to determine the proper placement for the awning. Consider factors such as the size of the awning, the amount of shade or coverage desired, and any potential obstacles or obstructions that may affect placement.
Step 4: Install Awning Fabric
Installing the fabric is one of the most important steps when installing an RV awning. This can be done by sliding the fabric into place on the roller tube and then attaching it to the arms of your awning using hooks or other fasteners.
It’s important to take care when installing your awning fabric, as any mistakes could result in damage or even injury. Always follow manufacturer instructions closely, and don’t hesitate to seek professional help if needed.
Benefits of Installing an RV Awning on a House
Installing an RV awning on the house can provide numerous benefits. Here are some of the advantages you can enjoy when you install an RV awning on your home:
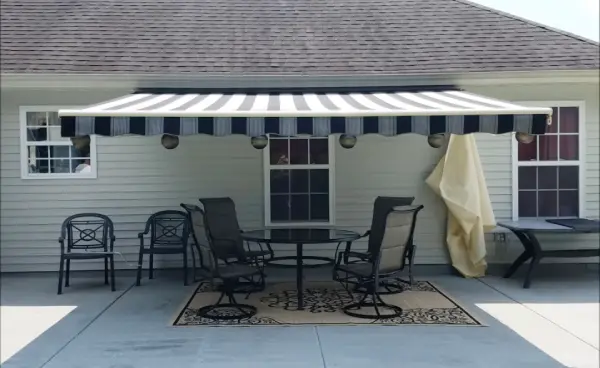
Extended Outdoor Living Space
One of the main benefits of installing an RV awning on the house is the extended outdoor living space it provides. With an RV awning, you can create an outdoor area protected from the sun and rain, allowing you to enjoy your backyard or patio even in less-than-ideal weather conditions.
This additional space can be used for various purposes, such as hosting outdoor gatherings with friends and family or simply relaxing outside with a book or cup of coffee. You can even use this space as an outdoor dining area with a table and chairs.
Furthermore, an RV awning on the house can also increase the value of your property by creating a desirable outdoor living space. This added feature can make your home more attractive to potential buyers if you ever decide to sell.
Protection from Sun and Rain
An RV awning can provide significant protection from the sun and rain, making it an ideal addition to a house. The awning can create a shaded area for outdoor activities and protect your home’s exterior from water damage caused by rain.
Protection from the sun is one of the most important advantages of RV awnings for homes. An awning can shade your outdoor living space, making it more comfortable during hot summer days.
Additionally, it can help reduce the temperature inside your home by blocking sunlight from entering through windows or doors.
An RV awning also protects from rain. Rainwater can cause significant damage to your home’s exterior over time, especially if it is exposed to water for extended periods.
With an RV awning installed on your house, you can protect your home’s siding, windows, and doors from water damage caused by heavy rainfall.
Increased Energy Efficiency
First, it’s important to understand how RV awnings work. By shading your RV’s windows and walls, you reduce the amount of heat you get inside.
This same principle can be applied to a house. By installing an RV awning over windows or doors that receive direct sunlight, you can reduce the heat entering your home.
In fact, studies have shown that shading windows with awnings can reduce solar heat gain by up to 77%. This means less reliance on air conditioning during hot summer months, resulting in lower energy bills and a reduced carbon footprint.
Maintenance and Care for Your RV Awning on a House
Maintaining and caring for your RV awning on the house is essential to extend its lifespan and ensure it continues to function properly. Here are some tips to keep your awning in top condition.
Cleaning Tips
Keeping your RV awning clean is essential to ensure its longevity and functionality. Over time, dirt, debris, and mold can accumulate on the fabric, causing damage and reducing its effectiveness. Here are some cleaning tips to help you maintain your RV awning on the house:
- Use the Right Cleaning Solution
When cleaning your RV awning, avoid using harsh chemicals or abrasive cleaners that can damage the fabric. Instead, use a mild detergent solution mixed with water. You can also use specialized awning cleaners designed to remove tough stains and dirt.
- Start with a Thorough Rinse
Before applying any cleaning solution, start by rinsing the awning thoroughly with water to remove loose dirt and debris. Use a hose or pressure washer in a low-pressure setting to avoid damaging the fabric.
- Apply the Cleaning Solution
Next, apply the cleaning solution to the entire awning surface using a soft-bristled brush or sponge. Work in sections and scrub gently to avoid damaging the fabric.
- Rinse Again
After applying the cleaning solution, rinse off the entire surface of the awning again with clean water until all traces of soap are removed.
- Allow Time to Dry
Once you have rinsed off your RV awning on the house, let it air dry completely before retracting it back into its housing unit. Do not fold or roll up your awning while it is still wet, as this can cause mold growth and damage over time.
Inspection and Repair
Regular inspection and repair of your RV awning on the house are crucial to ensure its longevity and functionality. Over time, wear and tear can cause damage to the fabric or hardware of the awning, which can compromise its ability to provide shade and protection.
To properly inspect your RV awning on the house, check for any visible signs of damage, such as tears or holes in the fabric. If you notice any damage, it’s important to address it immediately to prevent further deterioration.
You can patch small tears with an adhesive patch or replace larger sections of damaged fabric altogether.
It’s also important to inspect the hardware of your RV awning on the house regularly. Ensure all bolts and screws are securely fastened and tighten them if necessary. Lubricate moving parts such as hinges and springs with silicone spray lubricant to keep them functioning smoothly.
In addition to regular inspections, performing routine maintenance on your RV awning on the house is important. Keep the fabric clean by washing it with mild soap and water every few months, especially in an area with high pollution levels or dust.
Does an RV awning keep a room cooler?
RV awnings are designed to provide shade and air circulation, which can help keep the interior of the RV cooler. The shade the awning provides blocks the sun’s rays, reducing the amount of heat entering the RV.
Additionally, the air circulation created by the awning can help to create a more comfortable environment by moving hot air out of the RV and bringing in cooler air.
However, it is important to note that RV awnings provide less shade as the sun gets lower, so turning on the A/C and closing windows may be necessary as the sun gets higher.
In cooler evenings, turning off the A/C and opening windows to let cool air flow in is best. If needed, the A/C can be turned back on. It is also important to avoid cooking inside the RV, as this can further warm up the interior.
Are you allowed to sleep in an RV awning?
Whether or not you are allowed to sleep in an RV awning depends on the rules of the campsite you are staying at. It is important to check with campsite supervisors before sleeping in an RV awning, as some campsites may have specific rules against it.
Additionally, RV awnings are not designed for long-term stays and may not provide comfortable or safe sleeping space. RVs are designed to provide a designated sleeping area that is comfortable and safe for occupants.
If you plan to stay in an RV for an extended period, it is best to use the designated sleeping areas in the RV and dispose of waste at designated RV dump stations.
How do you attach a retractable awning to a house?
Attaching a retractable awning to a house requires a few steps. First, finding the studs on the house using a stud finder is important. Once the studs have been located, the locator holes on the brackets should be filled with silicone caulking.
The brackets can then be installed onto the house, ensuring that they are level and plumb. Once the brackets are securely in place, the awning hood and bar can be mounted onto the brackets.
The awning can then be bolted to the brackets, and the operation of the awning should be tested to ensure that it is functioning properly. It is important to note that awnings require 6-12 inches of the open wall or roof space to be installed correctly.
Effortlessly Replace Your RV Awning Roller Tube
While it may seem unconventional, installing an RV awning on your house can offer numerous benefits, from additional outdoor living space to increased energy efficiency.
However, it’s crucial to carefully consider all factors, including building codes, building support, and the type and size of awning needed, to ensure a safe and successful installation.
Proper planning, installation, and maintenance allow you to enjoy your new outdoor living space and protect yourself from the elements for years.

