
Last Updated on June 13, 2023
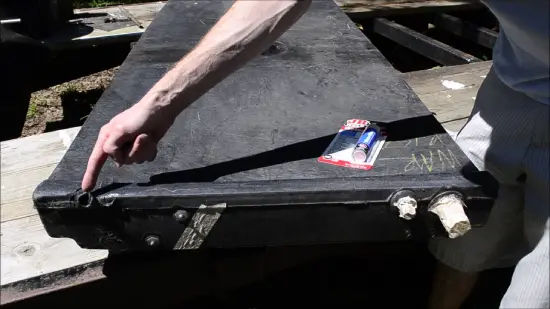
When your RV water tank gets cracked, fixing it as soon as possible is crucial to avoid further damage.
To fix a cracked RV water tank, assess the extent of the crack to determine the appropriate repair method. Once you know the crack’s size, location, and severity, proceed to drain the tank completely and thoroughly clean the area around the crack to remove any debris.
Next, choose the best repair method for your specific tank material and crack size. Options include plastic welding, fiberglass repair, epoxy or adhesive products, or temporary fixes with adhesive tapes.
Follow the instructions carefully for your chosen method. After completing the repair, give it time to cure according to the manufacturer’s recommendations.
We’ll guide you through the steps to fix a cracked RV water tank, so you can rest easy knowing you have the tools to handle this situation if it arises.
How to Fix a Cracked RV Water Tank: Step-By-Step Guide
Here is a quick overview of how to fix a cracked RV water tank:
Step #2: Drain and Clean the Tank
Step #3: Choose the Repair Method and Repair
Let’s get into it.
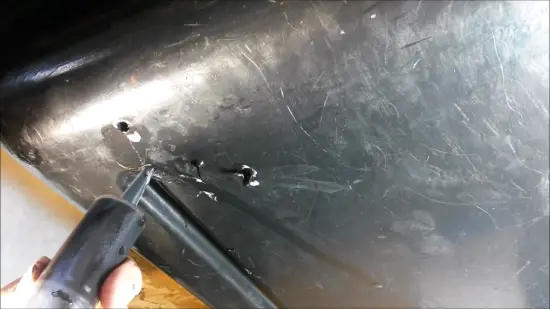
Step #1: Assess the Damage
To begin with, you need to take a good look at your RV water tank and figure out the extent of the damage. Begin by identifying the size, location, and severity of the crack. This will help you determine the appropriate method for repairing the tank.
By assessing the damage, you can make an informed decision about how to repair your RV water tank.
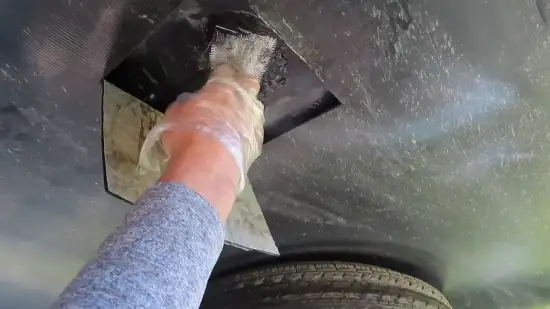
Step #2: Drain and Clean the Tank
Completely drain and thoroughly clean the surface surrounding the damaged area of your RV’s water receptacle. Locate the drain valve and open it to release any remaining water inside the tank. Use a hose to flush out any remaining water until the tank is completely empty.
Next, remove any debris or dirt around the crack using a stiff brush and a cleaning solution. Scrub the surface thoroughly to ensure that any residue or buildup is removed.
After cleaning, rinse the area with clean water and dry it thoroughly. You can use a towel or air-dry the surface.
Once the surface is dry, you can proceed with the repair process. Remember, a clean and dry surface is essential for any successful repair.
Step #3: Choose the Repair Method and Repair
Now that you’ve assessed the extent of the crack, it’s time to choose the method for repairing your RV water tank.
You can use different repair techniques, including fiberglass repair, plastic welding, epoxy or adhesive products, and patching with tape.
Each method has its advantages and shortcomings, so you need to consider which would work best for your situation.
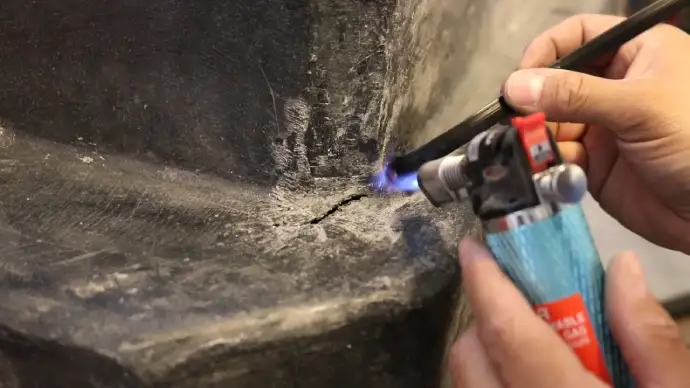
1. Plastic Welding
Plastic welding is a highly effective repair method that combines plastic, creating a strong and durable bond.
To start, use the plastic welding tool to melt the cracked area and ensure that the plastic on both sides of the crack is adequately heated. Once the plastic is melted, press the two sides of the crack together to fuse them.
Allow the plastic to cool and solidify before testing for leaks. With proper execution, plastic welding can seamlessly repair cracks in ABS tanks, making it an excellent option for fixing RV water tanks.
2. Fiberglass Repair
Using layers of fiberglass cloth or matting coated in a resin-catalyst mixture, a durable and reinforced seal can be made for damaged areas of the tank. To complete this process, follow these steps:
- Cut a piece of fiberglass cloth or matting that’s larger than the crack.
- Mix the fiberglass resin and catalyst according to the manufacturer’s instructions.
- Apply a layer of resin onto the cracked area and place the fiberglass cloth or matting over it.
- If necessary, apply another resin layer over the cloth/matting and repeat the process for additional layers.
This method provides excellent strength and durability, making it a popular choice for fixing cracks in RV water tanks.
3. Epoxy or Adhesive Products
Using the right epoxy or adhesive is like finding the perfect puzzle piece to complete the repair of your damaged water tank. When choosing an epoxy or adhesive for plastic repairs, ensure it’s compatible with the tank material.
Before applying the mixture, ensure that the crack is thoroughly cleaned and dried. Following the manufacturer’s instructions, mix the epoxy or adhesive and apply it to the crack, covering the area fully. Press the crack together and hold it in place until the epoxy or adhesive sets.
Allow it to cure completely before testing. With the right epoxy or adhesive, you can easily and effectively fix small cracks in your RV water tank, ensuring you can confidently enjoy your travels.
4. Patching with Tape
Don’t let a leak throw a wrench in your plans – patching with specialized adhesive tape can provide a quick and effective solution for your water containment needs.
If you have a cracked RV water tank, applying adhesive tape can temporarily fix the problem. Start by cleaning and drying the cracked area, then apply the tape, ensuring a tight seal. Smooth out any wrinkles or air bubbles to guarantee a secure bond.
Although this is just a temporary solution, it can buy you some time until you can perform a more permanent repair. Remember that the tape may not hold up against high pressure or extreme temperatures, so it’s best to replace the tank as soon as possible.
Step #4: Test for Leaks
Ensure you closely inspect the repaired crack for any signs of leakage and check for drips or seepage before filling the RV water tank with water to test for leaks.
Be sure to thoroughly examine the repaired area to ensure that there are no remaining leaks or weak spots.
Here are three steps to follow when testing for leaks:
- Fill the tank with water: Once you’ve completed the repair, fill the RV water tank with water. Make sure to fill it to the recommended level to get an accurate test result.
- Wait for a few hours: After filling the tank with water, wait for a few hours. This will give enough time for the water to seep into any cracks or weak spots and reveal any leaks that may be present.
- Check for leaks: Once the waiting period is over, check the repaired area for any signs of leakage. Look for drips or seepage, and pay close attention to any water escaping from the repaired area.
If you notice any leaks, you may need to make further repairs before reusing the RV water tank.
Can you use duct tape to fix a cracked RV water tank?
Duct tape isn’t a reliable solution for fixing a cracked RV water tank. It may seem like a quick and easy fix, but it’s not designed to handle the constant exposure to water and pressure that a water tank endures.
Over time, the tape is likely to peel and lose its adhesive properties, leading to leaks and further damage to the tank.
Can you use the same repair method for both the gray water tank and the black water tank?
In general, the repair method for an RV’s gray and black water tanks can be similar since they are typically made of ABS plastic.
ABS (Acrylonitrile Butadiene Styrene) is a commonly used material for these tanks due to its durability and resistance to chemicals and impacts. But, the specific repair method may still vary depending on factors such as the size and severity of the crack or damage.
How often should you inspect your RV water tanks for cracks or leaks?
Inspecting your water tanks at least once every few months or before and after each travel season is recommended.
Remember that the frequency of inspections may vary depending on how often you use your RV and the age of your water tanks. If you notice any signs of a leak or damage, it’s best to inspect your tanks right away and make any necessary repairs.
Restoring RV Water Tanks With the Right Repair Approach
Fixing a cracked RV water tank is a manageable task with the right approach. By following the step-by-step guide provided, you can address the issue effectively and restore the integrity of your water tank.
Assessing the damage, draining and cleaning the tank, selecting the appropriate repair method, and testing for leaks are crucial steps in the process.
Whether you choose plastic welding, epoxy or adhesive products, fiberglass repair, or temporary solutions with tapes, ensure you follow the instructions meticulously.
Remember, with proper care, you can enjoy a leak-free water system in your RV, saving you the cost and hassle of replacing the entire tank.
Don’t hesitate to take on DIY repairs, and with the right materials and techniques, you can tackle this challenge and be proud of your successful repair job.

