
Last Updated on May 4, 2023
The ceilings of RVs are often made of thin paneling, which is easily damaged. As a result of water damage, weathering, and aging, the panels may need to be removed. YouTube video tutorials are plentiful, but most omit important steps or are confusing.
Installing and removing are equally problematic. It takes time to measure, make sure you’re level, and then screw in each panel. If you don’t get them all lined up perfectly, they might start to shift or fall! Now, how to remove RV ceiling panels without damaging your RV?
We’re here to help. In this article, we’ll take you step-by-step through the entire process, explaining replacements and related details along the way. You’ll be able to remove the RV ceiling panels within a limited time!
Steps on How to Remove RV Ceiling Panels
RV ceilings are typically made up of panels that fit into a frame. They are typically made of thin, lightweight material so they can be easily damaged. If the RV ceiling has been damaged by water, weathering, or aging, it may be necessary to remove the sheets and replace them.
Removing the RV ceiling coverings can be a difficult process if you are not familiar with them. The following steps will help you remove the panels without damaging your RV.
Step 01: Ready the Tools You Will Need
There are a lot of things you will need during the repair work. Be sure to have all of them ready before you start. This includes things like screwdrivers, drills, pry bars, hammers, measuring tape, levels, saws, chisels, and more.
You can also save time later on by having the right replacement parts ready. This might include things like new ceilings, sealants, caulking, and more.
Step 02: Locate the Ceiling Panel Frame
The frame that the ceilings fit into is typically located in the center of the RV. You can find it by looking up at the ceiling and locating the trim that surrounds the panels.
In some cases, the trim may be hidden by cabinets or other furniture. If this is the case, you can remove the furniture to get a better view of the trim.
Step 03: Remove the Trim
The trim surrounding the sheets is typically held in place by screws. Remove the screws and set them aside. In some cases, the trim may be glued to the inside ceiling. If this is the case, you will need to use a pry bar to remove it.
You can also use a pry bar to remove the panels from the frame. However, be careful not to damage the frame.
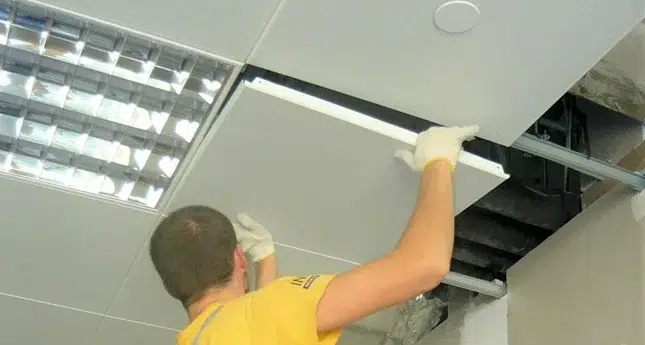
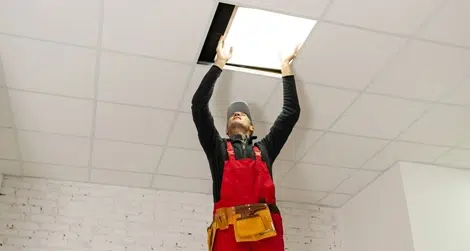
Step 04: Remove the Panels
Once the trim is removed, you can remove the pieces from the frame. In most cases, this can be done by gently pulling on them. Be careful not to damage the panels or the frame.
If the sheets are difficult to remove, you may need to use a screwdriver or a pry bar to loosen them.
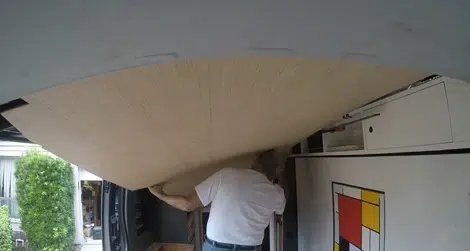
Step 05: Place the Panels in a Safe Location
Once the sheets are removed, you should place them in a safe location. Make sure they are not damaged and that they will not fall off of a table or other surface. You should also cover them to protect them from the weather.
For extra protection, you can wrap them in plastic wrap or place them in a sealed container. Furthermore, you can label them to make sure they are not mistaken for trash with your carpentry skill.
Step 06: Secure All Screws and Trim
Once the panels are removed, you should secure all of the screws and trim. This will help keep them in place and prevent them from becoming lost. You can also use magnetized screws to help keep them in place. To secure the trim, you can use a strong spray adhesive or silicone.
Step 07: Make Sure Electric Wires are Protected
If there are any electric wires in the area where the panel enclosures were located, you will need to make sure they are protected. You can check the wires by looking for a wiring diagram or contacting the manufacturer of your RV. Once you have ensured the safety of the electric wires, you can proceed to the next step.
Further Considerations During RV Ceiling Panel Removal
There are some additional things you can do to remove RV ceilings. Keep following the instructions and you will be able to do it without any problem.
1. Locate RV in Safe Place
The first and foremost thing you need to do before starting with anything is to move your RV to a safe place. This is because, during the repair work, there would be a lot of things coming down from the ceiling and if they happen to fall on your RV, it would get severely damaged.
2. Be Aware of Children or Pets
If you have children or pets running around, be sure to keep an eye on them as there is a lot of potential for accidents. Things like sharp tools and chemicals can be dangerous for them.
3. Remove All Objects in the Way
Before you start, remove all the objects in the way so that there is nothing obstructing your view and you have complete access to the area. This would include things like cabinets, furniture, shelves, etc.
4. Disconnect Electricity if Present
If there are live wires present in the area where you’re working, it is important to disconnect the electricity first. It’s best to have a professional do it for you as there is a lot of risks involved in doing it yourself.
5. Protect the Area with Drop Cloths
Once you’re done disconnecting electricity, use drop cloths to protect the floor and furniture from any kind of damage or paint spills. This will also keep the area clean.
Now you are ready to start working on the RV ceiling. Just follow these simple steps and you will be able to remove ceilings without any problem.
How to Replace RV Ceiling Panels?
When you are removing RV ceilings, there is a good chance that you will also need to replace them. If this is the case, you can follow these steps to do it yourself.
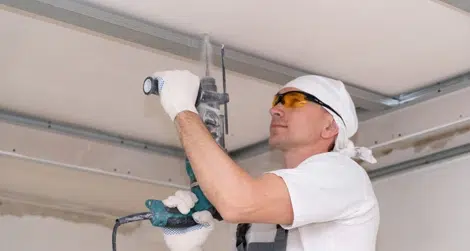
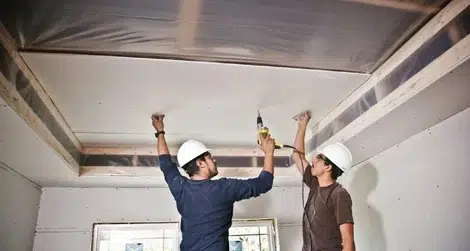
Step 01: Wear Protective Gear
Before you start, make sure to wear protective gear. This includes things like a hard hat, safety glasses, and gloves. You can also use a face mask to protect yourself from dust and debris.
Step 02: Clean All of the Surrounding Area
The next step is to clean the surrounding area. This will help reduce the amount of dust and debris that gets in the way. You can use a vacuum cleaner or a wet towel to do this.
You also need to clean the frame of the RV. This can be done by using a soft brush and some soapy water. Also, make sure to clean the screws and trim.
Step 03: Measure the Frame and Panel
The next step is to measure the frame and the sheet. This will help you determine the size of the new panel. Make sure to take accurate measurements to avoid any problems later on. A tape measure could be used for this process.
Step 04: Cut the Panel to Size
Once you have measured the frame and the panel, use a saw to cut the panel to size. Be very careful while doing this as it can be dangerous. To help you make a straight cut, you can use a straight edge. You can also use a level to make sure the panel is straight.
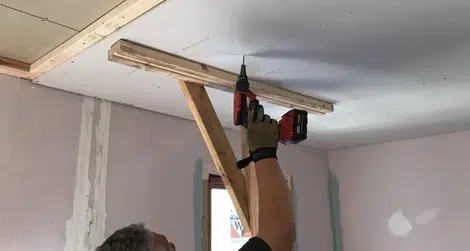
Step 05: Drill Holes in the Panel
Now, it’s time to drill holes in the panel. This will help you secure it to the frame. Make sure to drill the holes in the correct places so that they line up with the screws on the frame. Each hole should be accurate to avoid any problems later on.
Step 06: Drill Holes in the Frame
The next step is to drill holes in the frame. This will help you secure the panel in place. Make sure to drill the holes in the correct places so that they line up with the screws on the panel.
Step 07: Insert Screws into Panel and Frame
Once you have drilled all the holes, it’s time to insert the screws into the panel and frame. This will help secure the panel in place. Be very careful while doing this as it can be risky.
Step 08: Secure Panel in Place
Once you have inserted all the screws, it’s time to secure the panel in place. You can use a hammer to do this. Just make sure that you hit the screws evenly so that they are firmly in place. In some cases, you need to apply adhesive to the back and secure it in place.
Step 09: Check the Panel for any Leaks
After you have secured the panel in place, it’s time to check it for any roof leaks. If there are any leaks, you can fix them by using a sealant or caulking. Once the sealant is dry, you can test the panel again.
Step 10: Paint the Panel If Necessary
Now, it’s time to paint the panel if necessary. This will help protect it from the elements. Make sure to use good quality paint that will be durable.
Step 11: Reattach Electricity and Other Accessories
Once you are done with the panel, it’s time to reattach the electricity and other accessories. Make sure to reconnect everything correctly so that there is no danger of a fire.
After you have followed these steps, you will be able to replace RV ceilings without any problem. Just make sure to take your time and be careful while doing this. It could be dangerous if you are not careful. Once you are done, you can reinstall the RV ceilings and enjoy your trip.
Types of Materials Used To Replace An RV Ceiling Panel
There are several types of materials that can be used to replace RV ceiling panels. The most popular materials are given below:
Wood Panels
Wood panels are a popular choice for replacing RV ceilings. They are easy to install and are very durable. They can also be painted to match the interior of the RV. But, they can be a bit expensive because of the quality.
Fiberglass Panels
Fiberglass panels are another type of RV ceiling panel that is becoming increasingly popular. They are lightweight and easy to install. They are also weatherproof and can withstand extreme temperatures. Some fiberglass panels can also be painted to match the interior of the RV.
Metal Panels
Metal panels are a good choice for replacing RV ceilings. They are very durable and can withstand extreme temperatures. Metal panels are also easy to install and can be painted to match the interior of the RV.
Plastic Panels
Plastic panels are thin and lightweight. With a low price point, they are a great option for an RV ceiling panel, especially those with a flat roof. They are easy to install and can be painted to match the interior of the RV. But, they are not as durable as other materials.
Fabric Panels
New fabric ceilings are one of the most popular choices for an RV ceiling panel. They are most durable and can be painted to match the interior of the RV. They are also easy to install and come in a variety of colors and designs.
Vinyl/PVC Panels
Vinyl panels or PVC tiles panels are other popular choices for an RV ceiling panel. They are easy to install and come in a wide range of colors and styles. Vinyl/PVC materials are also very durable and can withstand extreme temperatures.
Paneling Panels
There are several types of paneling options that can be used to replace RV ceilings like wood, fiberglass, metal, and plastic. They are all easy to install and come in a selection of colors and patterns.
Tips and Tricks for Maintaining RV Ceiling Panels
As an RV owner, you will want to make sure that you properly maintain your RV ceiling system. The tips and tricks given below can help:
NO #1: Clean the Panels Regularly
It is important to clean the RV ceiling system regularly. You can do so by using a damp cloth and mild soap. Be sure to dry the surfaces completely before using them.
NO #2: Protect the Panels from the Elements
The panels should be protected from the elements as much as possible. This can be done by using a cover when the RV is not in use.
NO #3: Keep the RV interior Clean
It is important to keep the RV interior clean so that the panels do not get dirty. This can be done by using a vacuum and a damp cloth.
NO #4: Avoid Standing on the RV Roof
One of the most important tips for maintaining an RV ceiling sheet is to avoid standing on the top. This can damage the panels and shorten their lifespan.
NO #5: Inspect the Panels for Damage
It is important to inspect the panels for damage regularly. This can be done by looking for dents, scratches, and other signs of wear and tear. If any damage is found, it should be repaired as soon as possible.
By following these tips, you can help to keep your RV ceilings in good condition. Always be sure to consult your RV owner’s manual for specific instructions on how to maintain your panels.
Frequently Asked Questions
There are several questions that are commonly asked about RV ceiling panels. The most common questions are given below:
1. What Is an RV Ceiling Made Of?
The RV ceiling is typically made of a variety of materials like wood, metal, fiberglass, and plastic. Many RV owners choose to replace the standard ceiling panel with panels made of a different material.
2. How Do You Repair A Water Damaged RV Roof?
The RV top needs to be repaired as soon as possible if it has been damaged by water. This can be done by using a sealant or caulking gun. You can also use a patch kit to repair the roofing.
3. How Do I Fix the Ripples in My RV Ceiling?
If you have ripples in your RV ceiling, you can fix them by using a heat gun or hairdryer. Be sure to start from the center of the ripple and work your way out. You can also use a vacuum cleaner to suck out the air.
4. How Do You Replace RV Paneling?
The process of replacing RV paneling is not difficult, but it can be time-consuming. The sheets can be replaced by using a drill, screwdriver, and saw. First, remove the old panels and then measure and cut the new pieces to size. Finally, attach the new siding to the RV with screws or nails.
5. What Is the Lifespan of RV Ceiling Panels?
The lifespan of an RV ceiling panel varies depending on the type of panel and the amount of wear and tear it experiences. Generally, however, the panels should last for several years with proper maintenance.
6. How Do I Paint My RV Ceiling?
You can paint your RV ceiling by using a standard paintbrush or roller. Be sure to use a primer before painting the ceiling. You should also use high-quality paint that is made for RV ceilings.
Conclusion
Maintaining your RV ceiling panels is important if you want them to last for a long time. By following the tips and tricks given in this article, you can help to keep your panels in good condition.
Always consult your RV owner’s manual for specific instructions on how to maintain your panels or how to remove RV ceiling panels. Make sure to also consult a professional if you are unsure about how to properly maintain your RV.
Hope this article was of some help. If you have any questions or comments, please feel free to leave them in the comment section below. Thanks for reading!

