
Last Updated on September 19, 2023
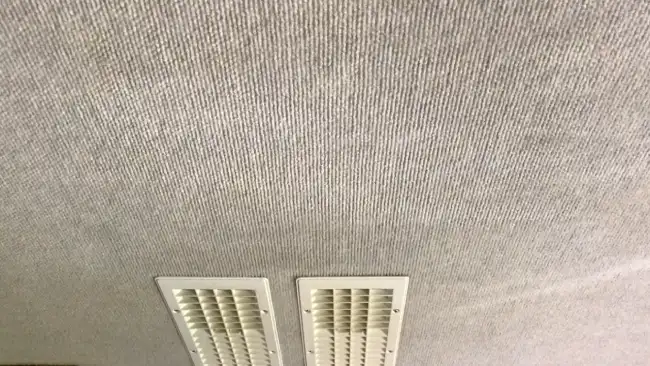
If you’re a motorhome owner, then you’re familiar with how pesky water stains on your ceiling can be. These unsightly splotches are not only an eyesore but can also be a symptom of a bigger issue. But removing water stains from your motorhome ceiling is easier than you think.
By creating a simple paste mixture, performing a spot check, and applying a thin coating, you can scrape off pesky water stains and restore your ceiling in no time. Our guide offers an easy step-by-step process to remove those pesky marks using just household items.
So, if you’re tired of staring at water stains in your motorhome, keep reading, and we’ll explain how to get rid of them for good.
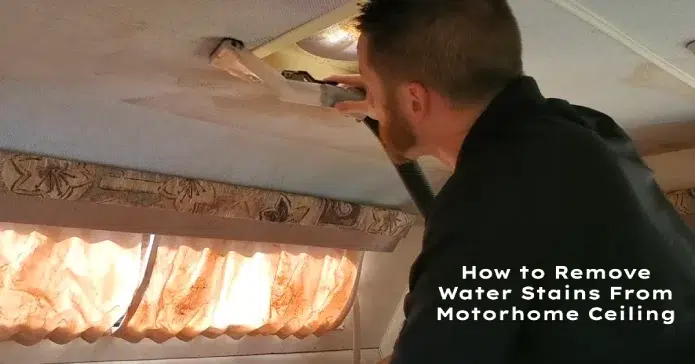
How to Remove Water Stains From Motorhome Ceiling: Steps to Follow
Step 1: Create a paste mixture
Step 5: Remove excess moisture
Get rid of water stains on your motorhome ceiling with ease. Follow these simple steps, and watch your ceiling come back to life.
Step ONE: Create a Paste Mixture
To create the paste mixture, combine 1/4 cup of baking soda with hydrogen peroxide in a container. Make sure to mix the ingredients thoroughly until a thick paste is formed. This paste will work wonders in having your motorhome ceiling free of water stains.
When creating the paste, it’s important to ensure it’s not too watery or thick. You want it thick enough to stick to the ceiling and spread easily.
Step TWO: Perform a Spot Check
Before we go any further, we must test the paste mixture on a concealed area of the RV ceiling to ensure that the magic potion doesn’t cause any unsightly damage. Choose a small, inconspicuous spot on the ceiling, such as a corner or a hidden area. Let the paste mixture sit for a few minutes on the spot.
Ensure the spot after a few minutes to ensure the paste doesn’t cause discoloration or damage to the ceiling fabric. If the paste passes the spot check and doesn’t cause any damage, it’s time to move on to the next step.
However, if the paste causes any discoloration or damage, it’s best to stop and try a different solution or seek professional help.
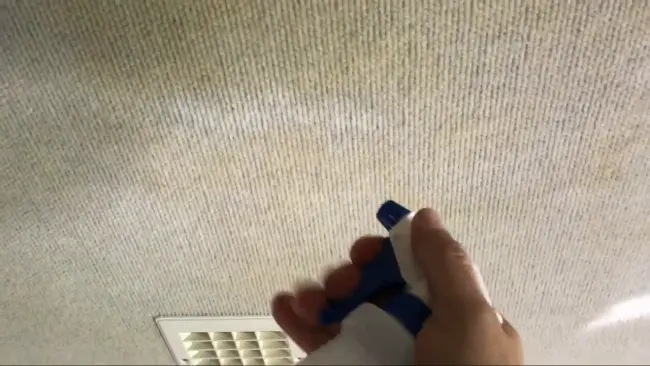
Step THREE: Apply a Thin Coating
Make sure that the sponge you use to apply the paste absorbs a sufficient amount to ensure that the paste is spread evenly across the stain.
Once you’ve applied the paste, leave it on the ceiling for up to three hours to work its magic. This will give the paste enough time to penetrate the stain and break it down, making it easier to remove.
Step FOUR: Remove the Paste
Using a moist sponge, start wiping the ceiling in a circular motion, covering all areas coated with the paste. Rinse the sponge frequently in plain water to prevent transferring the paste back onto the ceiling. Use a light touch when wiping the ceiling, especially if the water stains are deep-seated.
Continue wiping the ceiling until all the paste has been thoroughly removed. After removing the paste, removing any excess moisture from the ceiling is important. Use a dry towel or rag to blot the ceiling gently.
NOTE: Make sure not to rub the ceiling too hard, as this might cause damage to the surface.
Step FIVE: Remove Excess Moisture
Gently blot any excess moisture from the fabric on the ceiling with a towel. Removing as much moisture as possible is important to prevent further water stains from forming. Make sure to use a clean towel and change it out as needed to avoid spreading any dirt or debris onto the ceiling.
Once you’ve removed the excess moisture, it’s time to promote drying and air circulation. This will help prevent further water damage and mold or mildew from forming. Open windows and doors to allow fresh air to circulate, and use a fan or dehumidifier to help dry out the area.
What Causes Water Stains in RV Ceilings?
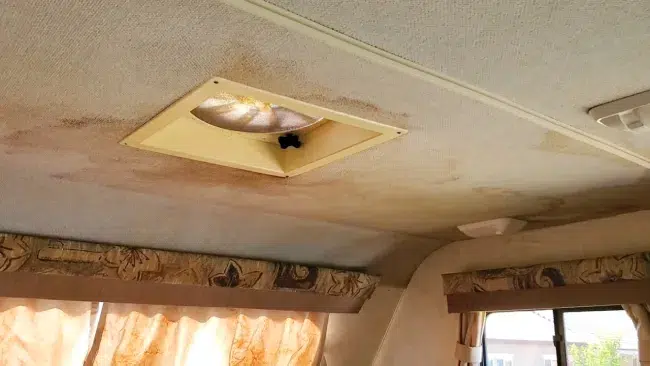
Water stains on your RV ceiling can be annoying and unsightly. But why do they happen in the first place? Here are some causes of motorhome ceiling water stains.
ONE: Water Leaks
If you’ve noticed discoloration or splotches on the top of your RV’s interior, you likely have a leak that needs to be addressed.
Water leaks are one of the most common causes of water stains on an RV ceiling. Leaks can occur for various reasons, including damaged roofs, cracked sealants, or faulty plumbing. When water enters the RV through a leak, it can cause damage to the interior, including the ceiling.
Identifying the source of the leak is crucial for preventing further damage and removing water stains from the ceiling. To identify the source of the leak, start by inspecting the roof and sealant around the RV. Look for any visible damage, cracks or holes, and address them promptly.
TWO: Condensation
Condensation occurs when warm, moist air comes into contact with a cooler surface, such as the ceiling of your motorhome. This is especially common during winter or in areas with high humidity.
You can take a few simple steps to prevent condensation from forming on your RV’s ceiling. First, make sure that your camper is properly ventilated. Open windows or vents to allow for airflow, and consider using a dehumidifier to keep moisture levels in check.
Additionally, you can add insulation to your RV’s ceiling to prevent warm air from escaping and coming into contact with the cooler surface. By taking these steps, you can reduce the likelihood of condensation forming and causing water stains on your motorhome’s ceiling.
THREE: Other Factors
Don’t let high humidity levels and poor ventilation ruin your RV experience. Learn what else is causing your motorhome’s ceiling to stain to prevent mold and mildew.
Plumbing issues, for example, can cause water to leak onto your ceiling and create unsightly discoloration. It’s important to regularly check your plumbing system for leaks and fix any issues as soon as possible.
Also, cooking and showering can contribute to high humidity levels in your RV. Proper ventilation, such as opening windows or using a fan, can help reduce humidity and prevent water stains.
Another factor that can contribute to water stains on your RV ceiling is dirty air conditioning filters. When the filters are clogged with dust and debris, they can cause the air conditioning unit to work harder and produce excess moisture. This can lead to mold and mildew growth and discoloration on your ceiling.
Regularly cleaning or replacing your air conditioning filters can help prevent this issue. Remember, prevention is key to keeping your RV in top condition and avoiding the need for expensive repairs.
Will Painting an RV Ceiling Remove Water Stains?
If you want to remove water stains from your RV ceiling, painting it may be a viable solution. However, it’s important to note that painting the ceiling will only prevent water stains from occurring in the future.
If you do decide to paint your RV ceiling, make sure that you use a waterproof sealant or primer before applying the paint. To get started, follow these steps:
Step 1: Clean
To get started, ensure your cleaning tools are soft and gentle to prevent any damage to your surface. You don’t want to scratch or scuff the ceiling while trying to remove water stains.
Use a soft cloth or duster to wipe away any dust or dirt gently. If there are more stubborn particles, use a vacuum cleaner with a brush attachment to get rid of them. This will ensure that the surface is clean and debris-free before you begin the painting process.
Step 2: Tape and Cover
Now it’s time to protect your RV’s interior and create clean lines by using tape to cover fixtures and vents. Before you start taping, make sure that the ceiling is completely dry. You can use a fan or a hair dryer to speed up the drying process.
Once the ceiling is dry, use painter’s or masking tape to cover fixtures, vents, or other areas you don’t want to paint. This will ensure a clean, precise paint job without accidental drips or smears. The tape acts as a barrier, preventing paint from getting on the areas you don’t want it to.
In the long run, this will save you time and energy because you won’t have to worry about cleaning up any accidental messes.
Step 3: Apply Primer
Before painting your RV, it’s crucial to use bonding or gripper primer to ensure a strong and long-lasting bond between the primer and your RV surface. Traditional primers may not adhere well to RV surfaces, resulting in a poor finish and early wear and tear.
You can achieve better adhesion and a more durable finish for your RV painting project using bonding or gripper primer.
In addition to creating a stronger bond, primer helps to even out the surface and improve its appearance. It fills in imperfections and creates a smooth surface for the paint to adhere to. This step is especially important if you’re dealing with stains from water.
The primer will help cover any discoloration and prevent it from showing through the new paint.
Step 4: Paint
If you want a smooth and consistent coat on your RV’s walls, consider using a paint sprayer instead of rollers. A paint sprayer can save you time and effort, especially if you have a larger surface area to cover.
It also helps to achieve a more professional-looking finish, as it evenly distributes the paint without leaving brush marks or uneven spots.
Use the same paint as the RV’s walls for color consistency and a cohesive look. Before applying the next coat, let the previous one thoroughly dry. Apply thin, even coats of paint. You may need to apply multiple coats depending on the color and type of paint you’re using.
Is it OK to use bleach on an RV roof?
Clean your RV roof with bleach, but don’t use cleaners that contain petroleum solvents or harsh abrasives. Bleach can remove water stains on an RV roof, but it’s crucial to dilute it first.
Mix one part bleach with three parts water in a spray bottle, and apply it directly to the stain. Allow the solution to sit for a few minutes before rinsing it off with a hose.
Bleach is a powerful cleaning agent that breaks down and removes stains, particularly water stains, which are hard to remove with other cleaners. However, use bleach in moderation and don’t overdo it, as too much bleach can damage the roof material. Use it sparingly and only when necessary.
Is Dawn safe to use on RV roofs to clean water stains?
Dawn dish soap is a great and affordable option for cleaning tough water stains on your RV roof without damaging the material. It’s a gentle and effective cleaning solution that won’t harm the surface of your RV roof.
It creates a powerful cleaning solution that can easily remove water stains and other stubborn marks from your motorhome ceiling when mixed with water. Using Dawn dish soap to clean your RV roof is easy.
You only need a bucket of warm water and a few drops of Dawn dish soap. Mix the solution together and dip a soft-bristled brush into the mixture. Then, gently scrub the stains on your RV roof until they’re removed.
Rinse the area with water and let it air dry. One of the best things about using Dawn dish soap on your RV roof is that it’s safe to use on all types of materials.
It won’t damage rubber, fiberglass, or any other types of roofing materials commonly used in RVs. Plus, it’s much cheaper than buying specialized RV roof cleaning products.
Maintain and Inspect Your RV to Prevent Water Stains
Great job on getting rid of those pesky water stains on your motorhome ceiling. These types of stains are common in RVs and can require much effort to remove.
Following the steps we outlined in this article, you successfully tackled the problem and restored your ceiling to its previous condition.
Still, remember that regularly maintaining and inspecting your RV can help prevent leaks and avoid water damage altogether. It’s crucial to be cautious when using harsh chemicals like bleach on your RV roof, as this can lead to damage that may void your warranty.
These safety measures allow you to keep your motorhome functioning and looking its best for years.

