
Last Updated on December 24, 2023
RV water filters are essential for providing clean and safe drinking water while protecting your plumbing from harmful contaminants. When storing your RV for the off-season, maintain your filter to keep it in good condition properly. But how can you make sure this filter stays in good condition?
To store an RV water filter, prepare the filter for storage by turning off the water supply. Next, drain the filter entirely and remove the filter cartridge. After that, clean the filter housing and seal the ends.
Our goal today is to discuss storing your RV water filter properly. So keep reading.
How to Store RV Water Filter: Key Steps to Follow
Water filters are essential to your RV’s plumbing system, ensuring clean, healthy water while on the road. To keep the water filter’s efficiency intact for longer, following certain steps when storing them is crucial.
- STEP 1. Prepare for storage:
- STEP 2. Drain the Filter:
- STEP 3. Remove the Filter Cartridge:
- STEP 4. Clean the Filter Housing (if necessary):
- STEP 5. Seal the Ends:
- STEP 6. Use a Zip-Lock Storage Bag:
- STEP 7. Choose a storage location:
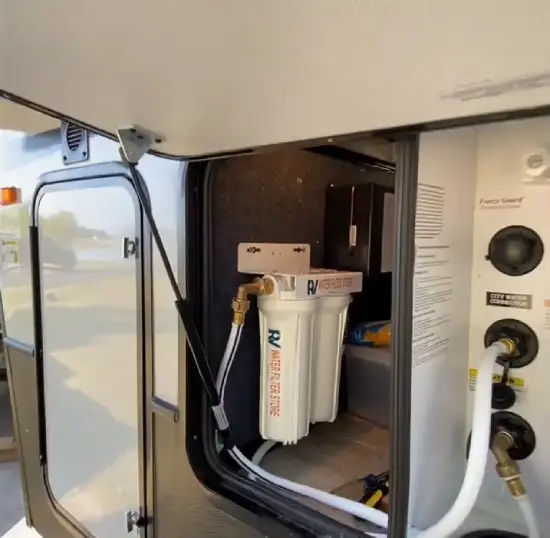
STEP 1. Prepare for Storage:
To prevent water flow during storage, disconnect the RV water filter from the water source and turn off the water supply. This is important because water in the filter can cause bacteria or mold growth. It can also damage the filter, making it ineffective for future use.
STEP 2. Drain the Filter:
Now that you’ve disconnected the filter, drain it completely. Locate the drain valves or plugs on the filter housing and open them up, allowing all excess water to empty. Take your time during this step to ensure that all water is completely drained.
After draining, let the filter air dry for a few hours to ensure that any remaining moisture evaporates and won’t cause damage during storage. Once the filter is completely dry, reattach any plugs or valves.
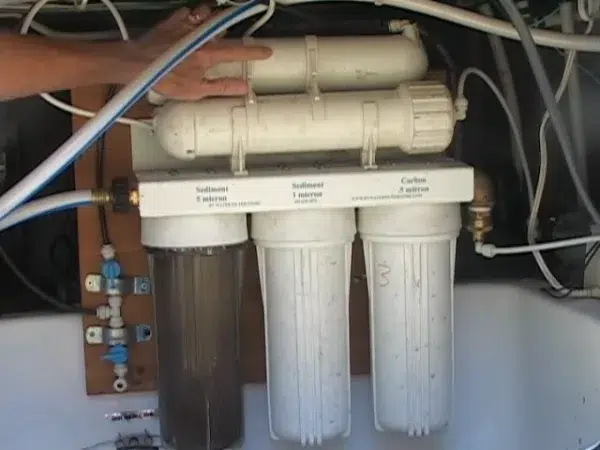
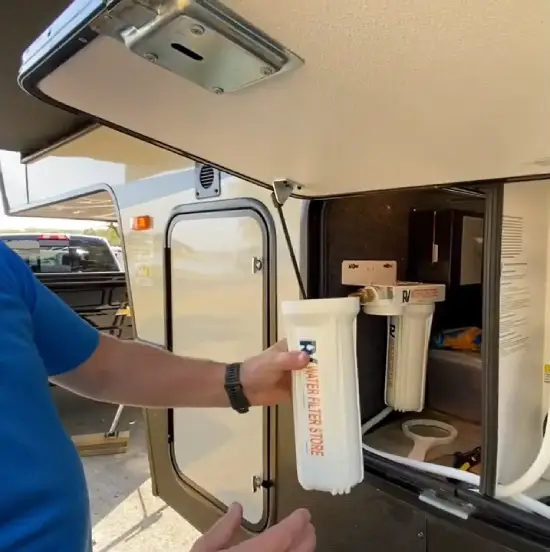
STEP 3. Remove the Filter Cartridge:
Now it’s time to remove the filter cartridge from its housing, so follow the instructions provided by the manufacturer. Depending on the type of water filter you have, there are different ways to remove the cartridge. Some filters require simply unscrewing the cartridge from the housing.
While others may have a locking mechanism that needs to be released before the cartridge can be removed. Follow the manufacturer’s instructions to remove the cartridge safely and properly.
Once the cartridge has been removed from the housing, inspect it for any signs of wear or damage. If the cartridge appears in good condition, it can be stored later. To store the cartridge, place it in a clean, dry location away from direct sunlight and extreme temperatures.
STEP 4. Clean the Filter Housing (if necessary):
Now that the filter has been removed, it’s time to clean the filter housing. First, use mild detergent and water to remove visible dirt or sediment from the housing. Rinse the housing carefully to ensure no residue is left, and leave it to dry completely before proceeding.
You can gently remove stubborn stains or deposits from the filter housing using equal parts white vinegar and water. Once the mixture is ready, pour it into the housing and let it sit for about 10-15 minutes before rinsing thoroughly with water.
STEP 5. Seal the Ends:
Don’t forget to seal both ends of your filter housing to keep it free from dirt or contaminants when not in use. Whether you have an in-line or two-stage water filter, prevent unwanted particles from entering the filter during storage.
One way to do this is using plastic caps that might have come with the filter. These caps can be easily attached to cover the openings on both ends of the water filter housing.
If you don’t have any plastic caps, you can use three-foot hoses to seal both ends of the filter housing. Simply attach the hoses to the housing and seal them with caps or plugs.
STEP 6. Use a Zip-Lock Storage Bag:
To keep your filter housing clean and protected, simply place it inside a zip-lock bag that’s big enough to accommodate it comfortably. Using a storage bag is a simple and effective way to ensure your RV water filter stays in top condition for as long as possible.
STEP 7. Choose a Storage Location:
The ideal spot for storage is inside your refrigerator, especially if you have one in your RV. A refrigerator will keep the filter housing sealed and protected from damage or knocks while on the road.
Choosing a spot inside your refrigerator to store the filter housing depends on how easy it is to access and where it will not interfere with other items. You want to avoid accidentally knocking it over or getting buried behind other items in the fridge.
What Are the Benefits of Storing RV Water Filters Between Trips?
Storing your RV water filters between trips can offer numerous benefits, from protecting them from contamination to saving you money. The followings are some key benefits:
Protection from Contamination:
Storing your RV water filters in a safe and clean environment prevents them from getting contaminated with dirt or debris. This is especially crucial during periods of non-use when filters are left unused for extended periods.
Contaminated filters not only affect the quality of your water but can also pose a health risk. Storing them correctly ensures that your filters remain effective and clean when ready to use them again.
Prolongs Filter Lifespan:
Proper storage of RV water filters can significantly extend their lifespan. When stored correctly, the filters are protected from damage, moisture, and high temperatures that can lead to degradation, maximizing their effectiveness.
This means you can use them longer, reducing the frequency of replacements and ultimately saving you money in the long run.
Cost Savings:
Storing your RV filters between journeys can save you money. As mentioned earlier, storing the filters correctly extends their lifespan, reducing the need for frequent replacements, which can be an added expense. Properly maintaining and storing the filters prevents premature replacements and ensures their longevity.
Convenience:
Storing RV water filters between trips makes them readily available for future use. Instead of purchasing new filters for every trip, you can retrieve the stored filters, saving time and effort. This convenience adds to your overall RV experience and frees up space in your RV storage area.
How long can a water filter sit unused?
If your water filter goes unused, it can sit indefinitely without losing effectiveness as long as it remains dry. To maintain its functionality, keeping it in a dry and secure storage spot is crucial.
Humidity and moisture trigger bacteria, mold, and other contaminants, damaging and rendering the filter useless. Avoid storing it in a damp basement or garage. Store it in a well-ventilated spot away from moisture sources.
Also, store your filter in its original packaging or a sealed plastic bag to protect it from gathering dust, dirt, and other contaminants over time. You should perform regular maintenance and cleaning if you plan to store your filter for an extended time.
Can I let a water filter dry out when storing?
When storing a water filter, ensure it remains dry to prevent contamination from bacteria, mold, and other harmful pollutants. To achieve this, remove the filter from the RV’s water system and run tap water through it to remove any remaining debris and pollutants.
Allow the filter to dry completely on a dry paper towel for a few hours before storing it in a cool, dry place. Remember to label the filter with the date of its last use and consider using a storage container for added protection.
How long does it take for a filter to dry out?
After rinsing the filter with tap water, give it ample time to dry. In general, leave it to dry overnight, but leave it for at least 30 minutes or one hour at the very least.
To ensure the filter doesn’t succumb to mold or mildew growth, keep it in a well-ventilated, dry area while it dries. Consider propping it up on a clean surface for the best airflow.
Don’t touch the filter with your hands or other objects during this time to prevent bacteria or other contaminants. Avoid storing the filter in a humid or damp area, which can lead to mold growth. Once the filter is entirely dry, it can be stored in a cool, dry location until needed.
Maximizing Your RV Water Filter: Store It Carefully for Longevity and Effectiveness
Get the most out of your RV water filter by storing it properly and following manufacturer instructions. To keep it working efficiently, flush the filter before and after use and replace it regularly. Maintain optimal performance and longevity with those simple steps.
When storing your filter, please remove it from the RV and keep it in a dry and cool place, away from direct sunlight. Keeping the filter in a plastic container or bag is also helpful to protect it from dust and debris.
You can avoid expensive RV water filter replacement by taking these preventative measures. Stay hassle-free and keep your filter in top-notch condition by following these easy and effective steps.

