
When setting up your travel trailer, start by inspecting the site for hazards and easy hookup access. Position your trailer close to utilities, chock wheels, engage the parking brake, and level it side-to-side and front-to-back using blocks and the tongue jack.
Connect safe, filtered water and secure sewer lines with gloves. Then plug into shore power with a surge protector. Deploy stabilizers and awnings, check propane and detectors inside, and adjust interior systems for comfort.
Following these steps guarantees a smooth setup. You can uncover even more tips to perfect your stay.
Key Takeaways
- Inspect the site for obstacles, level ground, and utility access before parking your travel trailer.
- Position the trailer close to hookups, chock wheels, engage brakes, and level using blocks and the tongue jack.
- Connect electrical, water, and sewer lines carefully, using surge protectors, pressure regulators, and gloves as needed.
- Deploy the awning securely, set up outdoor furniture, and maintain tire pressure for comfort and safety.
- Power on interior systems, extend slide-outs after clearing debris, check propane, detectors, and secure stabilizer jacks.
Survey the Site: Pick the Ideal Spot for Setup

Before you settle your travel trailer, start by surveying the site carefully to make certain it meets all your needs.
First, check for low-hanging branches or obstacles that could damage your roof or awning.
Next, identify available utility connections: water, electric, and sewer to guarantee convenient hookups.
Assess the ground’s levelness; uneven terrain can complicate setup and comfort.
Verify there’s enough clearance for your slide-outs to extend fully without obstruction.
Also, consider the site’s proximity to water and electrical pedestals, so you don’t have to stretch hoses or cables excessively.
Taking these steps will help you pick a spot that’s safe, accessible, and practical, making your setup smoother and your stay more enjoyable.
Additionally, using heavy-duty RV awning tie downs can enhance stability and safety, especially in windy conditions.
Position and Secure Your Travel Trailer Safely
First things first, you’ll want to align your travel trailer so that all the hookups are easily accessible. This way, you won’t have to stretch any hoses or cables, which can be a hassle!
Once you’ve got it positioned just right, make sure to engage the parking brake. Don’t forget to shift the transmission into park too—this is really important for preventing any unexpected movement.
And to top it all off, grab some wheel chocks and place them securely on both sides of the tires. This little step will help keep your trailer stable throughout your stay, giving you peace of mind. Enjoy your travels!
For added safety during tire changes, consider using a jack with adequate load capacity to ensure stability and prevent accidents.
Align For Hookup Access
Position your travel trailer to guarantee easy access to all necessary hookups, maximizing convenience and safety during setup.
Begin by surveying the site for utility connections: water, electric, and sewer. Align your trailer so these are within comfortable reach.
Make certain the trailer’s side with hookup points is close enough to avoid stretching hoses or cables, but maintain enough space to walk safely around.
Check for obstacles like low branches or uneven ground that might hinder connections. Keep the trailer straight to simplify hose and cable routing, reducing strain and potential damage.
Finally, consider the direction of your trailer’s door and living area in relation to hookups for smooth workflow.
This alignment sets the foundation for a hassle-free setup and safe, efficient use of utilities.
Additionally, selecting a water tank with the appropriate capacity and dimensions ensures your water hookup needs are met without compromising space or weight limits.
Engage Parking Brake
Always engage the parking brake immediately after you’ve aligned your travel trailer in its final position to prevent any unintended movement.
Locate the brake lever or pedal, usually near the driver’s seat or on the floor, and firmly apply it until you feel resistance.
Confirm the parking brake indicator light illuminates on your dashboard if your vehicle has one.
This step locks the trailer’s wheels and stabilizes your setup before you continue with further preparations.
Next, shift your tow vehicle’s transmission into park to secure the entire rig.
Double-check that the trailer doesn’t roll by gently rocking it.
Engaging the parking brake is a critical safety step that keeps your travel trailer firmly in place, reducing the risk of accidents or damage while setting up or during your stay.
To further protect your travel trailer’s electrical system during setup, consider using RV surge protectors to guard against power fluctuations encountered at RV parks.
Use Wheel Chocks
To keep your travel trailer securely in place after engaging the parking brake, place wheel chocks firmly on both sides of at least one tire.
Start with the tires on the downhill side if you’re parked on a slope. Use high-quality rubber or plastic chocks designed for your trailer’s tire size.
Position them tightly against the tire tread to prevent any movement. For added safety, chock both front and back of the tire if the ground is uneven.
Avoid placing chocks on loose or soft ground where they might sink. Once set, test stability by gently rocking the trailer to ensure it doesn’t shift.
Properly securing your trailer with wheel chocks is a vital step to guarantee it stable and safe throughout your stay. For additional safety, regularly check your tire pressure and maintain it within the recommended range using tire inflators with pressure gauges.
Get Your Travel Trailer Level and Steady
Once you’ve secured your travel trailer in place, leveling it’s essential for both comfort and functionality.
Start by checking side-to-side level with a bubble level. Place leveling blocks under the wheels on the low side, then carefully drive onto the blocks before unhooking.
Next, use the tongue jack to level front-to-back. Finally, extend the stabilizer jacks to steady the trailer, not for leveling.
Remember these key points:
Always check side-to-side level first. Use sturdy leveling blocks under tires on the low side. Level front-to-back using the tongue jack after side leveling.
Extend stabilizer jacks to prevent sway, not to level. Following this process guarantees your travel trailer stays stable and comfortable throughout your stay.
For best results, choose a bubble level with high accuracy and durability to ensure reliable readings in all conditions.
Hook Up Power, Water, and Sewer
Hey there! Let’s get your trailer all set up with power, water, and sewer.
First things first, plug that electrical cord into the power pedestal. Oh, and don’t forget to use a surge protector! It’s a great way to protect your system from any unexpected power surges.
Now, onto the water! Grab your water hose and attach it with a pressure regulator and filter. This will help ensure that the flow is clean and controlled, which is super important for your comfort.
Finally, it’s time to tackle the sewer setup. Make sure to wear some gloves for hygiene. Connect your sewer hose carefully, securing all the fittings. And remember, it’s crucial to maintain a proper slope for drainage. That way, everything flows smoothly!
Also, consider using a portable generator sized between 3000 to 4000 running watts to reliably power your essential RV appliances during your trip.
Electrical Connection Safety
Although connecting your travel trailer to utilities may seem straightforward, prioritizing electrical safety is essential to prevent damage and hazards.
Before plugging in, always inspect cords and connectors for wear or damage. Use a surge protector to shield your trailer’s electrical system from power surges.
Confirm the power pedestal provides the correct voltage and amperage for your trailer. Never force connections; make sure plugs fit securely and correctly to avoid loose contacts.
To stay safe, remember to:
- Turn off power at the pedestal before connecting or disconnecting.
- Use a high-quality, RV-rated extension cord if needed.
- Avoid running cords across walkways to prevent tripping.
- Keep connections dry and protected from rain or moisture.
Installing an RV battery disconnect switch can further protect your battery system by preventing drain during periods of inactivity.
Following these steps helps safeguard your equipment and guarantees reliable power throughout your stay.
Water Hose Setup
After securing your electrical connections with safety in mind, focus on setting up the water hose to guarantee a clean and steady supply.
Start by attaching a potable water hose to the campground’s water spigot, ensuring it’s rated for drinking water to avoid contamination.
Next, connect the other end to your trailer’s city water inlet. Use a water pressure regulator between the spigot and hose to protect your plumbing from high pressure.
Before turning on the water, double-check all fittings for tightness to prevent leaks. Slowly open the spigot and monitor for steady water flow inside your trailer.
If you plan to filter water, attach the filter inline between the spigot and hose.
Finally, coil any excess hose neatly to avoid tripping hazards and keep your campsite tidy.
For optimal safety and durability, select hoses that are NSF/ANSI 61 certified to ensure clean drinking water free from harmful chemicals.
Sewer Hose Installation
Connect your sewer hose with care to maintain hygiene and guarantee proper waste flow. First, put on gloves to protect your hands and prevent contamination.
Attach the hose securely between your trailer’s sewer outlet and the campground’s sewer inlet. Make certain all fittings are tight to avoid leaks. Position the hose with a continuous downward slope to promote smooth drainage and prevent blockages.
After connecting, open the black tank valve first, then the gray tank valve to flush the hose.
Keep these points in mind:
- Use a high-quality, flexible hose made for RV use.
- Secure connections with clamps or threaded fittings.
- Avoid kinks or sharp bends in the hose.
- Store the hose in a sealed container after use to prevent odors.
Using hoses with pre-attached swivel fittings can greatly enhance maneuverability and ease during installation.
Following these steps makes certain efficient, sanitary waste disposal.
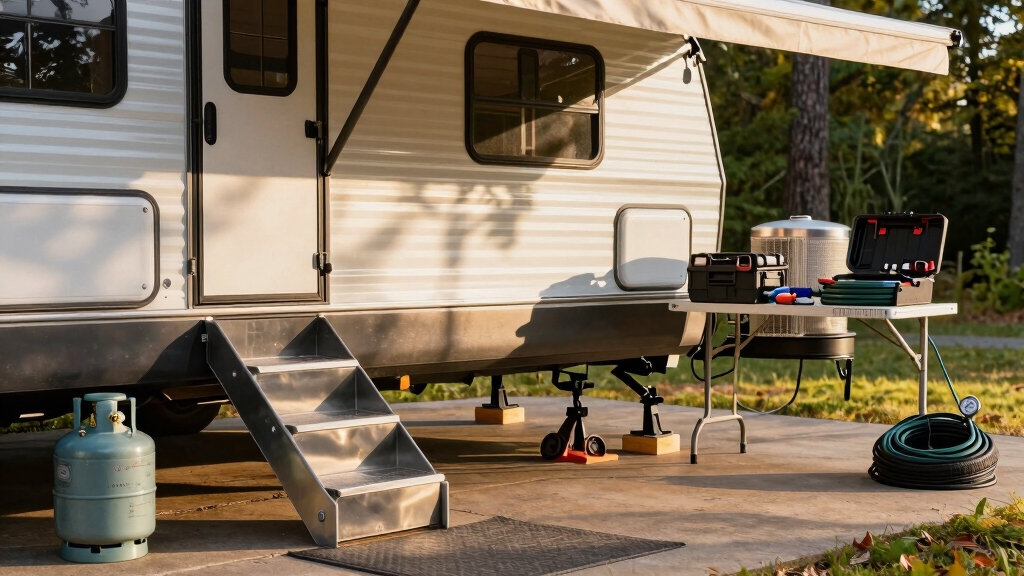
Set Up Exterior Features for Your Travel Trailer
When you’re ready to enhance your travel trailer’s outdoor living space, start by carefully deploying the awning.
Make certain to secure the rafter arms firmly to withstand wind.
Ensure rafter arms are tightly secured to keep your awning stable during windy conditions.
Next, extend the stabilizing jacks, placing pads or blocks beneath them to protect the ground and guarantee solid support.
Set up your safety step at the entrance for easy access.
Arrange outdoor furniture thoughtfully, considering sun angles and traffic flow.
Don’t forget to open an umbrella if you want added shade.
If you rely on a cellular booster antenna, position it for the best signal reception.
These steps will create a comfortable, stable, and inviting exterior area, letting you enjoy your campsite fully while keeping everything safe and functional.
Prepare the Interior for a Smooth Stay
Start by powering up your travel trailer’s essential systems to make sure everything runs smoothly during your stay.
Begin with turning on the refrigerator using 120-volt AC power, so it starts cooling immediately. Next, release and extend any slide-outs after clearing debris to maximize your living space.
Briefly activate the water heater to fill the tank, ensuring hot water availability. Then, set up the kitchen by unpacking and organizing your utensils and supplies for easy access.
Focus on these key interior preparation steps:
- Turn on refrigerator and water heater
- Extend slide-outs after debris check
- Organize kitchen and stow items properly
- Activate heat, AC, and water pump; add waste tank conditioner
Completing these tasks will create a comfortable, functional environment inside your trailer.
Perform Final Safety Checks and Make Comfort Adjustments
Although you’ve completed the major setup steps, performing final safety checks guarantees everything functions correctly and keeps you secure.
Start by inspecting all utility connections. Confirm electrical cords are intact, water hoses are leak-free, and sewer fittings are tight.
Confirm propane valves are fully opened and check for any gas odors. Test smoke and carbon monoxide detectors to make sure they’re operational.
Verify stabilizer jacks are firm, and wheel chocks remain in place. Inside, double-check slide-outs are securely locked.
Adjust interior temperature settings and lighting to your comfort. Arrange furniture for easy movement and confirm emergency exits are unobstructed.
Finally, review your checklist one last time to confirm no step was missed. These final actions confirm safety and a comfortable stay in your travel trailer.
Frequently Asked Questions
How Do I Winterize My Travel Trailer Before Storage?
To winterize your travel trailer, start by draining all water tanks and the water heater.
Bypass the water heater, then use a hand pump or the city water connection to pump non-toxic RV antifreeze through the water lines.
Don’t forget to pour antifreeze in all drains and toilets.
Next, clean and dry the interior thoroughly, disconnect batteries, and cover vents.
Seal any openings to prevent pests and moisture during storage.
What Maintenance Should I Perform After Every Trip?
Did you know that 70% of travel trailer issues come from neglected post-trip maintenance?
After every trip, clean your exterior and interior thoroughly.
Check for leaks or damage, and inspect tire pressure and condition.
Drain and flush your water system, empty waste tanks, and sanitize if needed.
Test all appliances and electrical systems to make certain they work properly.
Lubricate moving parts and store your trailer safely, ready for your next adventure.
How Can I Troubleshoot Common Electrical Issues in Travel Trailers?
Start by checking your circuit breakers and fuses to make sure none are tripped or blown.
Use a multimeter to test voltage at the electrical pedestal and inside your trailer to confirm power flow.
Inspect all connections for corrosion or loose wires, especially at the breaker box and outlets.
Don’t forget to verify your surge protector is functioning properly.
If problems persist, test individual appliances to isolate the issue before calling a professional.
What Are the Best Tips for Conserving Water While Camping?
To conserve water while camping, you should limit shower time and use a low-flow showerhead.
Turn off taps when brushing teeth or washing dishes. Collect gray water for plants, and use biodegradable soap to minimize waste.
Refill your water tank only when necessary, and monitor usage closely. Prioritize dry camping techniques like using hand sanitizer instead of frequent handwashing with water to stretch your supply longer.
How Do I Safely Transport a Travel Trailer on Rough Roads?
You’ll want to secure your load and check tire pressure before hitting rough roads. This lowers the risk of blowouts and sway.
Drive slowly, maintain a steady speed, and avoid sudden braking or sharp turns to keep your trailer stable.
Use sway control devices and make certain your hitch is properly tightened.
Also, double-check all lights and signals for safety.
These steps help you protect your trailer and enjoy a smoother journey.
From Arrival to Relaxation: The Perfect Trailer Setup
Setting up your travel trailer is like tuning a finely crafted instrument. Each step guarantees harmony on the road. By surveying your site carefully, securing and leveling your trailer, hooking up utilities, and preparing both exterior and interior spaces, you create a safe, comfortable haven.
Don’t forget your final safety checks and comfort tweaks. With this checklist, you’ll strike the perfect chord every time, turning your campsite into a seamless, relaxing retreat.

