
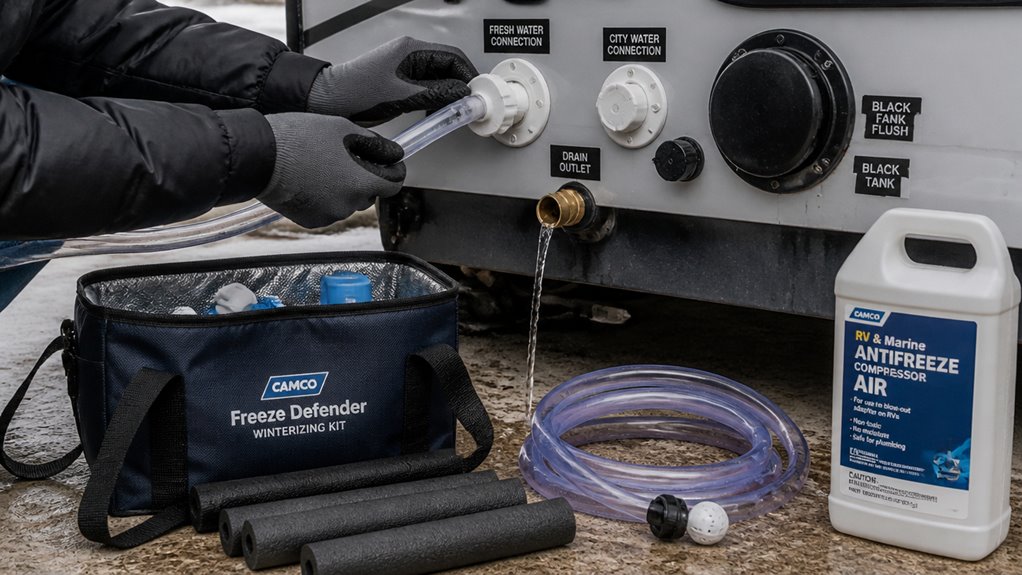
You can winterize your camper without antifreeze by fully draining fresh, gray, and black tanks, as well as the water heater, to prevent freezing and residue buildup.
Bypass the water heater using valves or bypass kits. Then use short bursts of compressed air to clear moisture from all plumbing lines, traps, and valves.
Open faucets, low-point drains, and make certain tanks and appliances are clean and dry. Following these steps carefully protects your system; further details help optimize this process.
Key Takeaways
- Completely drain all fresh, gray, and black water tanks and flush until clean to prevent residue and odors.
- Open all faucets, low-point drains, and traps to fully release water and allow moisture to evaporate.
- Bypass and drain the water heater and water pump to avoid trapped water freezing and damaging components.
- Use short bursts of compressed air at faucets and drains to clear remaining water without antifreeze.
- Follow manufacturer guidelines strictly for pressure limits, bypass procedures, and proper drainage to protect plumbing.
Drain All Camper Plumbing Before Freezing

Begin by thoroughly draining all water systems in your camper to prevent freeze damage. Completely empty fresh, gray, and black tanks before temperatures drop.
Start by fully draining all camper water tanks to avoid freeze damage before cold weather arrives.
Drain the water heater only after allowing it to cool, ensuring no hot water remains. Open all low-point drains and faucets to release trapped water from pipes and fixtures.
Flush the toilet until the bowl clears of water to avoid freezing. Don’t forget exterior fixtures like outdoor showers and hose connections; remove water from these to prevent damage.
These steps minimize residual water that could freeze and expand, causing cracks or leaks. Use manufacturer guidance to confirm drain locations and procedures.
This initial draining phase sets the foundation for effective winterization without antifreeze, protecting your camper’s plumbing system through cold months. Be sure to open all faucets including hot and cold taps to ensure complete drainage.
Bypass and Protect Your Water Heater
Alright, before you dive into blowing out your plumbing system, let’s make sure you set up that water heater bypass first. This way, you won’t accidentally fill the tank with air or water again.
First things first, go ahead and fully drain the water heater. It’s super important to let it cool down completely, too. This helps prevent any damage during the winterization process.
Oh, and if your model needs it, don’t forget to remove the anode rod or drain plug. This little step ensures you get a thorough drainage and keeps everything protected.
Also, remember that regular maintenance like flushing the tank and checking the anode rod is key to extending the lifespan of your water heater.
Water Heater Bypass Setup
Set up your water heater bypass to prevent water from refilling the tank during the winterization process. This protects it from freezing damage.
Locate the bypass valves, usually found on the hot and cold water lines. You will see a three-way valve or a set of ball valves.
Engage the bypass by closing the valves that feed water into the heater and opening the bypass line. This diverts water around the tank.
This ensures you can blow out or drain the plumbing system without refilling the water heater.
Using durable waterproof materials for the bypass valves can help ensure long-lasting protection during harsh winter conditions.
| Step | Action |
|---|---|
| Identify valves | Locate hot/cold bypass valves |
| Close heater valves | Shut valves feeding the heater |
| Open bypass line | Redirect water flow around tank |
Leave the heater drained and disconnected as you proceed with the blowout for full protection.
Draining And Cooling Procedures
After you’ve secured the water heater bypass to keep water from refilling the tank, fully drain the water heater to prevent any remaining water from freezing and causing damage.
Allow the tank to cool completely before draining to avoid injury and ensure all water drains efficiently.
Open the pressure relief valve and the drain plug or petcock, confirming no residual water remains inside.
Once drained, leave the bypass valves in the bypass position to prevent water from entering during the compressed air blowout.
Open both hot and cold taps separately to release trapped water in the lines.
Use short bursts of compressed air to clear remaining moisture from the plumbing system, protecting valves and branches.
This method preserves your water heater and plumbing without antifreeze, minimizing freeze damage risk.
For optimal results, ensure your RV’s water tank materials have UV-protection features to prevent damage during storage and winterization.
Anode Rod Removal
Locate and remove the anode rod from your water heater to prevent corrosion during winter storage. The anode rod sacrifices itself to protect the tank’s interior from rust. When the water heater is drained and bypassed, stagnant water can accelerate rod degradation.
First, make certain the water heater is fully cooled and drained. Use the appropriate wrench or socket to unscrew the rod, usually located on top of the tank. Inspect the rod for wear; if it’s heavily corroded, consider replacing it before storage.
Removing the rod also facilitates complete drainage, reducing freeze damage risk. After removal, seal the opening properly to prevent debris entry. Following your camper’s specific water heater manual is critical, as some models require a drain plug rather than full removal.
Regular inspection or replacement of the anode rod maximizes tank durability and helps prevent costly repairs by minimizing bacterial corrosion.
Blow Out Camper Plumbing With Compressed Air
Begin by connecting your air compressor to the city water inlet or a designated blowout port using a compatible adapter or blowout plug.
Set the compressor pressure between 30 and 50 psi, following your camper’s specifications to avoid damage.
Open each faucet—hot and cold separately—and blow out the lines one at a time until only air or mist comes out.
Use short bursts of compressed air rather than continuous flow to protect plumbing components.
Make sure the water heater is bypassed and fully drained before starting.
Check all low-point drains and valves to confirm no water remains.
This method effectively clears water from lines without antifreeze, but always consult your camper’s manual for any model-specific instructions or limitations.
Using a lead-free brass adapter ensures a durable, safe, and environmentally friendly connection during the blowout process.
Drain and Protect Traps, Drains, and Seals
Drain and protect traps, drains, and seals.
Drain all sink and shower traps thoroughly to eliminate standing water that can freeze and cause damage.
Thoroughly drain sink and shower traps to prevent standing water from freezing and causing damage.
After draining, leave traps and drains open when possible to allow any residual moisture to escape.
Use compressed air in short bursts to clear water from tight bends and valves within traps, minimizing freeze risks.
Protect seals and valves by ensuring no water remains that can expand and crack components.
Check manufacturer guidelines to confirm if your camper allows a fully dry system without antifreeze.
Some recommend a small amount of RV-safe antifreeze in traps despite air blowout.
Always avoid leaving standing water in low points.
Properly draining and protecting traps, drains, and seals safeguards your plumbing’s integrity during freezing conditions and prevents costly repairs when spring arrives.
Using enzyme-based cleaners before winterizing can help break down residues that might otherwise freeze and damage plumbing.
Clean and Secure Tanks, Appliances, and Pumps
First things first, let’s tackle those black and gray tanks. It’s super important to give them a thorough clean to keep odors and residue from building up while your camper is in storage. Trust me, a little effort now will save you a lot of headaches later!
Once the tanks are good to go, make sure to shut off and secure the water pump. This step is crucial to avoid any dry-running damage while your camper is just sitting there, not in use. You definitely don’t want to deal with that!
And as you get ready for long-term storage, don’t forget to disconnect the batteries. It’s a small but key step. Plus, ensuring proper ventilation will help keep moisture and mold at bay.
Using enzymatic cleaners can help break down organic buildup in your tanks, preventing odors and sensor issues during storage.
A little preparation goes a long way in keeping everything in top shape!
Let me know if you need any more adjustments!
Clean Black And Gray Tanks
Thoroughly clean your black and gray tanks before storage to minimize odor and residue buildup that can cause damage or unpleasant smells.
Start by fully draining both tanks, then flush them with clean water to remove solids and sludge.
Use a tank-specific cleaning solution or enzyme-based treatment to break down waste deposits effectively.
Agitate the tanks by gently rocking or driving short distances to dislodge stubborn residue.
After cleaning, flush the tanks again until water runs clear.
Make sure all valves are securely closed to prevent leaks and contamination during storage.
Proper cleaning prolongs tank integrity, prevents corrosion, and reduces the risk of clogs or odors when you use your camper again.
Avoid harsh chemicals that may damage seals or tank materials.
This step is essential before winterizing without antifreeze.
Consider using enzyme-based formulations for enhanced waste breakdown and odor control during the cleaning process.
Secure Water Pump Properly
Before securing your water pump, make certain that all water lines are completely drained to prevent damage from residual moisture.
After fully emptying the fresh, gray, and black tanks, shut off the pump at the main switch or circuit breaker.
Disconnect the power source if possible to avoid accidental activation during storage.
Inspect the pump housing and fittings for moisture or debris, and wipe them dry.
Secure the pump firmly to prevent vibration or movement that could cause wear or damage.
If your model allows, engage any built-in bypass valves to isolate the pump from the plumbing system.
Properly securing the water pump minimizes the risk of dry-running damage and mechanical failure, ensuring reliable operation when you reactivate your camper’s water system.
Additionally, choosing a pump with self-priming capabilities can help prevent damage during the winterization process by ensuring the pump does not run dry.
Prepare For Long Storage
When preparing your camper for long-term storage, you’ll want to make sure all tanks are emptied and cleaned to prevent odors and residue buildup that can cause damage or attract pests.
Thoroughly flush and sanitize black and gray water tanks, then leave tank valves open to air out.
Shut off the water pump after clearing lines to avoid dry-run damage.
Disconnect or properly store batteries to prevent discharge and corrosion during inactivity.
Make certain all appliances are turned off and secure loose items to avoid damage while stored.
Keep the camper dry and ventilated, using moisture absorbers if necessary, to minimize mold and condensation.
Complete these steps before temperatures drop below freezing to protect plumbing and electrical systems.
This will help guarantee your camper remains in peak condition throughout storage.
Avoid Automotive Antifreeze and Follow Manufacturer Guidelines
Although it might seem convenient, you should never use automotive antifreeze in your camper’s plumbing system.
Never use automotive antifreeze in your camper’s plumbing—it contains harmful chemicals unsuitable for potable water.
It contains toxic chemicals not designed for potable water lines. Instead, rely on manufacturer-approved methods and products to protect your plumbing safely.
Always consult your camper’s manual for specific winterization instructions, including recommended pressure levels for compressed air blowouts and water heater bypass procedures.
Ignoring these guidelines can cause damage or void coverage. Use only RV-specific antifreeze if your model requires it in traps or drains; avoid generic antifreeze substitutes.
Following precise manufacturer protocols guarantees all plumbing sections, valves, and seals are properly protected without introducing harmful substances.
This approach prevents freeze damage while maintaining system integrity, helping you avoid costly repairs and health hazards associated with improper antifreeze use.
Start Winterizing Early to Avoid Freeze Damage
Since water expands as it freezes, starting your camper winterization well before the first hard freeze is essential to prevent burst pipes and costly damage.
Begin by draining all water systems thoroughly. Empty fresh, gray, and black tanks, the water heater, and open all faucets and low-point drains to release trapped water.
Use compressed air within recommended pressure limits (30–50 psi) to blow out remaining water from each fixture. Run the compressor in short bursts and bypass the water heater to avoid refilling it.
Make certain traps and drains are fully cleared or treated with minimal RV-safe antifreeze if required. Complete these steps early to avoid frozen residual water that can crack plumbing, valves, and seals.
Early winterization reduces repair costs and preserves your camper’s plumbing integrity through the cold season.
Frequently Asked Questions
How Do I Prepare My Camper’s Electrical System for Winter Storage?
You should disconnect the camper’s batteries and store them in a cool, dry place to prevent freezing and damage. Clean the battery terminals and check electrolyte levels if applicable.
Turn off all electrical appliances and switches to avoid drain. Inspect wiring for damage or corrosion and repair as needed.
Use a moisture absorber or dehumidifier inside the camper to prevent condensation and protect electrical components during storage.
Can I Use Compressed Air on All Camper Plumbing Models Safely?
You can use compressed air on most camper plumbing models safely, but you must follow manufacturer pressure guidelines, usually between 30 and 50 psi.
Always bypass the water heater to avoid damage and blow out each fixture individually.
Some models may require limited antifreeze in traps or specific valves.
Check your camper’s manual carefully, because improper pressure or missed bypasses can cause damage.
This method is effective only when done precisely.
What’s the Best Way to Ventilate a Camper During Winter Storage?
Think of ventilation as your camper’s breath during winter slumber.
To ventilate effectively, crack vents or windows slightly to promote airflow without letting in moisture or pests.
Use vent covers to shield against rain and snow while allowing air exchange.
Position moisture absorbers inside, and avoid sealing the camper airtight; stale air breeds mold and mildew.
This balance keeps your camper dry, preserving seals and interiors throughout cold storage.
How Often Should I Check the Camper for Mold While Stored?
You should check your camper for mold at least once a month during storage.
Pay close attention to areas prone to moisture buildup, like under sinks, in cabinets, and around vents.
Use a flashlight and inspect seals, fabrics, and storage compartments carefully.
Early detection lets you address mold growth before it spreads or damages surfaces.
This helps maintain a dry, healthy environment and prevents costly repairs when you’re ready to use the camper again.
Are There Specific Tools Needed for Bypassing the Water Heater?
Yes, you’ll need a water heater bypass kit specifically designed for your camper model.
This kit typically includes valves and hoses to redirect water flow around the heater, preventing it from filling during winterization.
Some campers have built-in bypass valves; if not, install an aftermarket kit.
Using these tools guarantees you don’t waste air pressure or antifreeze on the water heater tank, protecting your system more effectively during winter prep.
Protect Your Camper Plumbing From Winter Freezing
Winterizing your camper without antifreeze requires careful, methodical steps to prevent freeze damage.
Like a well-oiled machine, your camper needs thorough draining, bypassing, and protecting of all plumbing components to stay safe through cold months.
Start early, follow manufacturer guidelines, and avoid antifreeze not meant for potable systems.
By taking these precise actions, you’ll guarantee your camper’s longevity and functionality, ready to hit the road again when warm weather returns.