You’ll typically spend between $1,000 and $3,000 to professionally recoat your RV roof, depending on its size, material, and condition.
Labor alone can run $1,000 to $2,500, while premium coatings or kits may push costs above $4,000.
DIY options offer savings at $300 to $800 but may sacrifice durability.
Repairs and prep also influence pricing markedly.
Understanding these factors will help you make informed decisions about your recoating project and control expenses effectively.
Key Takeaways
- Professional RV roof recoating typically costs between $1,000 and $3,000, including labor and materials.
- Labor costs alone often range from $1,000 to $2,500 depending on repair and preparation needs.
- Premium coating systems and kits can exceed $4,000, offering better durability and longer service life.
- DIY recoating material costs usually range from $300 to $800, depending on product choice and roof size.
- Roof condition, size, and complexity significantly affect total recoating costs and labor intensity.
How Much Does It Cost to Recoat an RV Roof?
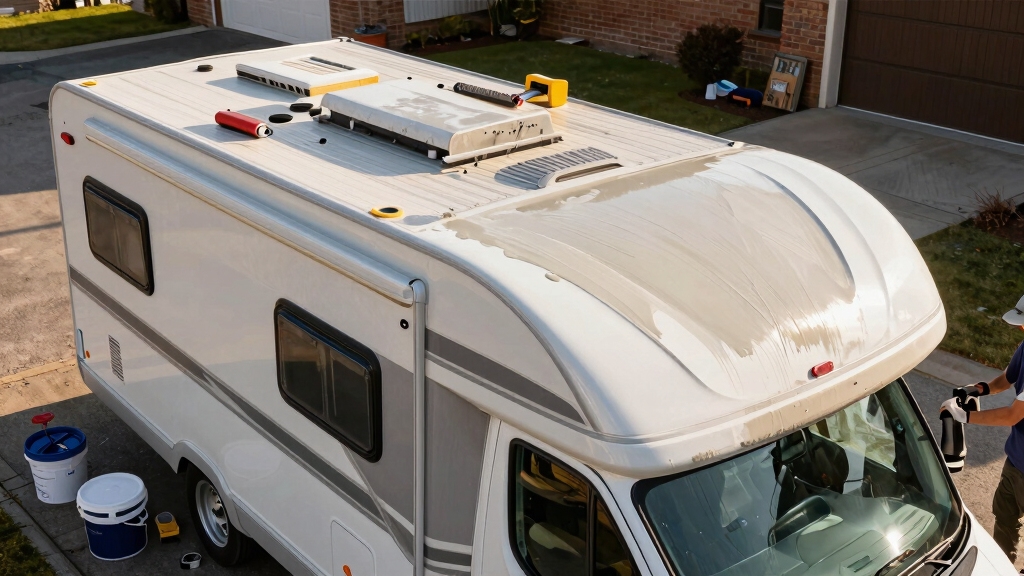
When you decide to recoat an RV roof, expect costs to vary primarily based on roof size, material, and the level of prep work required.
Typically, professional recoating runs from $1,000 to $3,000, reflecting labor, materials, and roof complexity.
Professional RV roof recoating typically costs between $1,000 and $3,000, depending on labor, materials, and complexity.
For example, a 21-foot RV roof might cost around $1,400 for a thorough reseal.
DIY options can lower expenses considerably, with material costs ranging from $300 to $800 depending on product choice and coverage area.
Labor alone usually accounts for $1,000 to $2,500, influenced by surface preparation and any necessary repairs.
Premium coatings or branded systems might push costs above $4,000, charging by linear footage.
You’ll want to carefully evaluate your roof’s dimensions and condition to estimate accurate recoating expenses.
Choosing an Energy Star certified coating can also help reduce your RV’s energy consumption and operational costs over time.
Key Factors Affecting RV Roof Recoating Costs
Because recoating an RV roof involves multiple variables, understanding the key cost factors helps you budget accurately and avoid surprises.
You must consider roof material, condition, and prep work complexity. EPDM, TPO, vinyl, and fiberglass demand different coatings and labor intensity.
If your roof has damage or old layers, expect higher prep costs. Labor rates vary by location and roof complexity, impacting overall pricing.
Proper ventilation, including choosing the right roof vents, also plays a crucial role in maintaining the recoated roof’s longevity and performance.
| Key Factor | Impact on Cost |
|---|---|
| Roof Material | Affects coating type and labor |
| Roof Condition | Influences prep and repair needs |
| Service Complexity | Raises labor and time required |
Knowing these factors guides you to realistic estimates and prevents underbudgeting your RV roof recoating.
How RV Roof Size Influences Recoating Costs?
When it comes to recoating your RV roof, the size really matters. The dimensions of your roof play a big role in how much you’ll spend. Basically, a larger roof needs more coating material, and that means you’ll be looking at higher costs for both the product and labor.
Think about it: if your roof is bigger, it’s not just the coating that costs more. You’ll also need more time for prep and application. So, if you’re planning to go the DIY route or hire a pro, knowing your roof size can help you figure out your budget more accurately.
In short, understanding the size of your RV roof can save you some headaches and help you plan your recoating project better! Choosing the right waterproof sealant tape can also impact the durability and maintenance costs after recoating.
Roof Dimensions Impact Pricing
Several key factors determine the cost of recoating an RV roof, but roof dimensions stand out as a primary driver.
The total surface area directly affects the amount of coating material you’ll need and the labor time required for prep and application.
Larger roofs demand more gallons of coating, typically estimated at 50 square feet per gallon, and extended labor hours, raising both material and service expenses.
You’ll also want to take into account roof shape and complexity since irregular or multi-level roofs may increase labor costs even if the overall square footage is moderate.
Accurately measuring your roof’s length and width helps you calculate material quantities and get precise contractor quotes.
Ultimately, understanding your roof’s dimensions guarantees you budget realistically for a professional-quality recoating job.
Choosing a coating with the right flexibility and elongation is essential to ensure durability and prevent cracking as the roof expands and contracts.
Larger Roofs Increase Costs
Larger RV roofs consistently drive up recoating costs due to the increased volume of materials and extended labor time required. When your roof size grows, expect both product and service expenses to scale accordingly.
Here’s what impacts your cost:
- More coating material needed, often charged by gallon or square foot.
- Extended labor hours for thorough cleaning, prep, and application.
- Increased risk of complex roof layouts demanding specialized techniques.
- Higher waste and masking material consumption during prep.
- Potentially higher equipment rental or scaffolding fees for larger areas.
Because professional recoating averages $100 to $150 per linear foot, doubling your roof length can nearly double labor and material costs.
For DIY, larger roofs also mean buying more gallons of sealant, directly affecting your budget. Always measure precisely to estimate costs effectively. Additionally, considering the lightweight design of lithium batteries can help reduce overall vehicle weight, which is beneficial when balancing the added weight of recoating materials.
How RV Roof Material Affects Recoating Prices?
Because different RV roof materials require specific preparation and coating products, the type of material markedly influences recoating costs.
Different RV roof materials need unique prep and coatings, significantly affecting recoating costs.
For example, EPDM rubber roofs often need specialized primers and coatings compatible with rubber, increasing material expenses and labor time.
TPO and PVC roofs demand coatings that adhere well to their slick surfaces, sometimes requiring more thorough cleaning and surface treatment before application.
Fiberglass and vinyl roofs may involve additional steps to repair cracks or seal seams, adding to labor costs.
You’ll also find that premium coatings suitable for certain materials cost more upfront but offer better durability.
Understanding your roof’s material helps you anticipate the necessary prep work, select appropriate products, and budget accurately.
Each material’s unique requirements directly impact both labor intensity and product pricing.
Additionally, choosing coatings with flexibility and durability is crucial to accommodate roof expansion and contraction, ensuring long-lasting protection.
Why RV Roof Condition Changes Recoating Costs?
You know, when it comes to recoating your RV roof, existing damage can really drive up those costs. Before you even think about applying a new coating, you’ll likely need to tackle some repairs. That’s just part of the process.
Now, proper surface preparation is key. It ensures that the new material sticks well and lasts a long time. But here’s the catch: that prep work takes extra labor and time, which can add to your overall expenses.
Also, keep in mind that the wear and tear on your roof can limit your options for coatings. Depending on how much restoration is needed, that can directly affect your budget. So, it’s definitely something to consider!
Using a cleaner with UV protection during prep can help extend the roof’s lifespan after recoating.
Impact Of Roof Damage
If your RV roof has sustained damage such as cracks, punctures, or water intrusion, recoating costs can increase substantially. Damage forces you to address underlying issues before applying a new coating, which adds labor and materials.
You’ll likely face:
- Repairing cracks or holes with sealants or patches
- Replacing deteriorated or rotted sections of roofing material
- Treating and drying water-damaged areas to prevent mold
- Inspecting and fixing flashing or seams compromised by damage
- Applying additional primer or reinforcing layers for adhesion
Each repair step requires extra time and specialized materials, pushing your recoating budget beyond typical ranges. Ignoring damage risks coating failure and costly future repairs. Factoring in these impacts upfront helps you plan accurately. Choosing the right roof membrane material can also influence repair complexity and cost.
Importance Of Surface Prep
Addressing roof damage often reveals the importance of thorough surface preparation before recoating your RV roof.
Proper prep involves cleaning debris, removing old coatings, repairing cracks, and ensuring the surface is dry and smooth.
Neglecting these steps risks poor adhesion, premature coating failure, and water infiltration.
Surface prep complexity varies with roof condition; damaged or heavily worn roofs require more labor-intensive work, raising costs.
For example, removing peeling layers or fixing soft spots demands specialized tools and materials, increasing both time and expense.
Thorough prep guarantees the new coating bonds correctly, extends roof longevity, and optimizes your investment.
Skipping or rushing this stage may lower upfront cost but leads to costly rework.
Using the right sealant compatibility during preparation is crucial to prevent cracking and peeling after recoating.
Effects Of Material Wear
Because the condition of your RV roof’s material directly impacts recoating complexity, understanding wear effects is essential to accurate cost estimation.
As your roof ages, wear can cause surface degradation that requires more prep and patching before recoating, increasing labor and materials. You’ll want to evaluate:
- Cracks and splits that compromise waterproofing
- Blistering or bubbling indicating trapped moisture
- Fading or chalking that signals coating breakdown
- Punctures or tears needing patch repair
- Delamination between layers affecting adhesion
Each issue demands specific repair steps, driving up costs. For example, extensive cracking requires filler and additional sanding.
Moisture damage may need drying time and sealants.
Evaluating these wear factors helps you budget realistically and choose the right recoating approach. Using cleaners with UV protection features before recoating can help extend the roof’s lifespan and reduce future maintenance costs.
What Prep Work Adds to RV Roof Recoating Bills?
Preparing your RV roof thoroughly before recoating can greatly impact the overall cost of the job. You’ll need to remove any old coating, sealant, or debris to guarantee proper adhesion of the new layer.
This involves labor-intensive tasks like scraping, washing, and drying the surface. If your roof has cracks, punctures, or water damage, expect additional repairs using patching materials or sealants, which add to both material and labor expenses.
Surface preparation might also require sanding or priming, depending on the roof material—EPDM, TPO, or fiberglass—each demanding specific prep methods. The complexity of your roof’s layout and condition directly increases prep time, which professionals typically bill by the hour or linear footage.
Skipping or rushing prep work can reduce coating lifespan, making thorough prep essential despite added upfront costs.
Comparing DIY vs. Professional RV Roof Recoating Costs
When deciding between DIY and professional RV roof recoating, understanding the cost differences is crucial to budgeting effectively.
DIY recoating typically involves material costs ranging from $300 to $800, depending on roof size and product choice.
In contrast, professional recoating services usually run from $1,000 to $3,000, factoring in labor, prep, and materials.
Consider these key points:
DIY requires thorough prep work and skill to guarantee longevity.
Professional jobs include surface cleaning, repairs, and warranty.
Material coverage varies; for example, one gallon may cover 50 sq ft.
Labor complexity and roof size greatly impact professional pricing.
DIY saves money but risks inconsistent results if not done properly.
Balancing cost savings with quality and durability will guide your best recoating choice.
Are Premium RV Roof Coatings Worth the Extra Cost?
Although premium RV roof coatings come with a markedly higher price tag, often exceeding $4,500 compared to standard recoating costs of $1,000 to $3,000, they offer advanced durability, enhanced weather resistance, and extended service life that can justify the investment for many owners.
When you choose a premium system, you get superior UV protection, chemical resistance, and stronger adhesion, which reduce the frequency of recoating cycles.
These coatings often incorporate elastomeric or polymer formulations that accommodate thermal expansion and contraction better than standard options.
While the upfront cost is significant, the reduced maintenance and lowered risk of leaks or structural damage often translate into long-term savings.
If you plan to keep your RV for several years or travel extensively in harsh climates, premium coatings deliver tangible, practical value that offsets the higher initial expense.
How RV Roof Recoating Costs Compare to Replacement?
Opting for premium coatings can markedly extend your RV roof’s lifespan.
Choosing high-quality coatings significantly enhances the durability and longevity of your RV roof.
However, it’s important to weigh these benefits against the cost of a full roof replacement.
Recoating typically ranges from $1,000 to $3,000, depending on roof size and prep work.
Replacements often start around $2,500 and can exceed $10,000 for larger rigs.
You should consider:
- Roof condition: Recoating works if the structure is sound; replacement is needed for damage.
- Material type: Different roof materials affect labor and product costs.
- Labor intensity: Prep work drives recoating costs substantially.
- Longevity: Replacement offers a longer lifespan but at higher upfront cost.
- Budget constraints: Recoating offers a cost-effective way to maintain waterproofing and reflectivity without full replacement expenses.
Budgeting Tips for Affordable RV Roof Recoating
Several factors directly influence how you can budget effectively for affordable RV roof recoating. You need to keep in mind roof size, material type, and prep work complexity. These drive labor and material costs.
Opting for DIY recoating can markedly lower expenses but requires time and proper materials. Professional services offer quality and warranty but come at a higher price. Comparing quotes based on linear footage or total cost helps you avoid surprises.
| Budget Factor | Typical Cost Range |
|---|---|
| DIY Materials | $300 – $800 |
| Professional Labor | $1,000 – $2,500 |
| Premium Coating Kits | $1,400 – $4,560+ |
Frequently Asked Questions
How Long Does an RV Roof Recoating Typically Last?
An RV roof recoating typically lasts 5 to 10 years, depending on roof material, climate, and maintenance.
You’ll get longer durability with quality products and thorough prep work. Regular inspections and cleaning help prevent premature wear.
Harsh sun, heavy rain, or extreme temperatures may reduce lifespan. If you use premium coatings and address any damage promptly, your recoating will protect your roof effectively for many seasons before needing reapplication.
What Are the Environmental Benefits of Recoating an RV Roof?
Recoating your RV roof acts like a sunscreen shield, reflecting harmful UV rays and reducing heat absorption. This lowers your need for air conditioning, cutting energy use and emissions.
The recoating seals tiny cracks, preventing water damage and mold growth. This protects your RV’s materials from degrading and releasing pollutants.
Using eco-friendly coatings further minimizes volatile organic compounds (VOCs), helping you maintain a greener footprint while extending roof life practically and effectively.
Can Recoating an RV Roof Improve Its Insulation?
Yes, recoating your RV roof can improve insulation by adding a reflective layer that reduces heat absorption.
Many coatings have insulating properties that help maintain interior temperatures, lowering cooling costs.
The effectiveness depends on the coating type; some are designed with reflective pigments or insulating foam.
Proper application and roof condition also matter. A well-prepped, clean surface guarantees maximum thermal performance and durability of the insulating layer.
Are There Seasonal Considerations for Scheduling RV Roof Recoating?
Seasonal scheduling significantly shapes your RV roof recoating success.
You’ll want warm, dry weather to guarantee proper product adhesion and curing, typically late spring through early fall.
Avoid recoating during cold, damp, or rainy seasons, as moisture and low temperatures can compromise coating integrity and longevity.
Also, plan around extreme heat to prevent premature drying.
Monitoring local climate conditions and forecasts helps you pick the perfect period for peak performance.
How Do You Maintain an RV Roof After Recoating?
After recoating your RV roof, you should inspect it regularly for cracks or blisters.
Clean debris and dirt gently using mild soap and water; avoid harsh chemicals.
Check seals around vents and seams to prevent water intrusion.
Avoid walking on the roof to minimize damage.
Apply a UV protectant if recommended by your coating manufacturer.
Schedule touch-ups as needed to maintain the protective barrier and extend the roof’s lifespan effectively.
Know the Real Cost to Recoat an RV Roof
Recoating your RV roof doesn’t have to drain your wallet like a bottomless pit.
By understanding factors like roof size, material, and condition, you can make informed decisions that fit your budget.
Whether you DIY or hire a pro, balancing cost with quality is key to extending your roof’s life.
With smart planning and the right materials, you’ll protect your investment without overspending.
Keep your RV ready for the road ahead.