
Last Updated on December 24, 2023
An RV water heater burner ensures hot water for showering, cooking, and cleaning. As time passes, it’s typical for the burner to collect debris and rust, ultimately compromising its performance.
The solution to this problem involves cleaning the RV’s water heater burner, which requires technical knowledge and attention to detail.
To start the process, one needs to prepare for the task, then carefully and cautiously clean the burner assembly before reassembling and testing. Although it’s not a complicated process, it’s still vital for RV maintenance.
Read to learn how to clean your RV water heater burner with ease. Discover the right frequency, tools, and tips to avoid common mistakes.
How to Clean RV Water Heater Burner: Steps to Follow
Performing regular maintenance on the RV water heater burner is crucial for optimal functionality. Follow these steps to ensure efficiency:
- Step One: Preparing for the Cleaning Process
- Step Two: Cleaning the Burner Assembly
- Step Three: Inspecting and Maintaining Other Components
- Step Four: Reassembling and Testing
Let’s discuss these steps:
Gathering the Required Tools and Materials:
- Screwdriver
- Wire brush
- A vacuum cleaner with a hose attachment
- Mild detergent
- Water
- Air compressor (optional)
# Step One: Preparing for the Cleaning Process
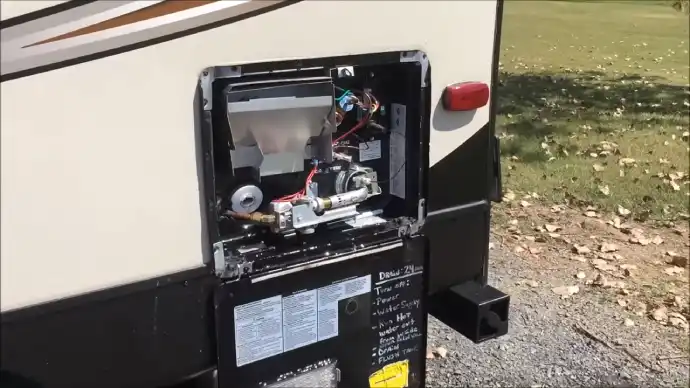
Before cleaning your RV water heater, take the necessary precautions to ensure safety and effectiveness. Turn off the power supply to the water heater to prevent potential accidents. Locate and remove the access panel to gain access to the burner assembly, allowing for easy cleaning and inspection of burner components.
Loosen any dirt or debris using a screwdriver, taking care not to damage any components. This ensures the burner is clean and clear of any obstructions that could reduce its efficiency.
# Step Two: Cleaning the Burner Assembly
With the access panel removed, the interior of the RV water heating system can be thoroughly inspected and cleaned. To clean the burner assembly, make a mixture of mild detergent and water.
Apply the solution generously to cover every surface of the burner assembly, then scrub it gently to remove grime and residue. Ensure that you pay close attention to all the small openings of the burner to avoid clogs.
After scrubbing, rinse the burner assembly thoroughly with clean water to eliminate any trace of detergent. It’s vital to ensure no detergent remains, as this can cause damage when the burner assembly is turned on.
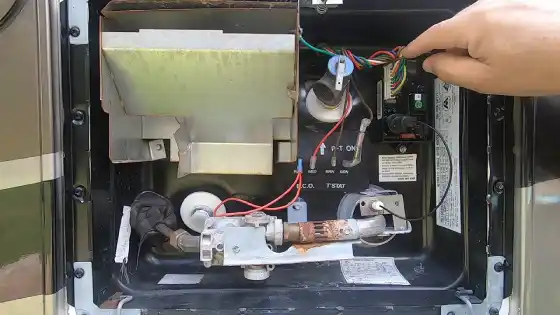
# Step Three: Inspecting and Maintaining Other Components
The other components of the RV water heater must also be inspected and maintained. Specifically, inspect the gas valve for any signs of damage or corrosion after cleaning the burner assembly.
It is best to consult a professional for repairs or replacement if any issues are found. Applying petroleum jelly to new wire electrodes will ensure smooth operation and prevent corrosion.
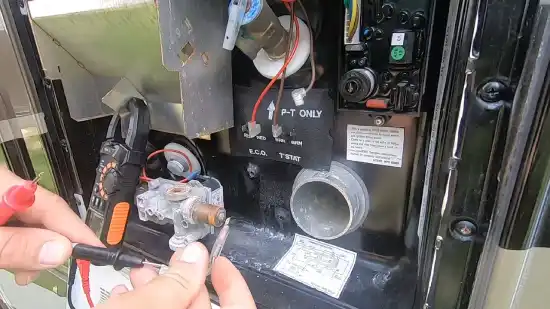
# Step Four: Reassembling and Testing
Begin by reinstalling the access panel after cleaning the burner to ensure it operates optimally without interference from external elements.
To restore the functionality of the RV water heater, turn on the power and monitor the burner’s operation. Observe whether the burner produces a blue flame, indicating efficient combustion.
A yellow flame is dangerous because it suggests incomplete combustion, which can produce poisonous gasses like carbon monoxide. Ensure you get professional help if you see hazardous flame colors or other issues.
How often should RV water heater burners be cleaned?
It is recommended that RV water heater burners be cleaned at least once per year or more frequently if the unit is frequently used. The buildup of mineral deposits and other debris on the burner can cause it to malfunction or even become a fire hazard.
Clean burners not only keep them working efficiently but also extend their lifespan.
Cleaning the burner involves disassembling the unit and removing any debris that may have accumulated over time. This includes cleaning the burner tube, orifice, and flame sensor. It is important to follow the manufacturer’s instructions for cleaning the specific model of water heater to avoid damaging any components.
Is bleach bad for the RV water heater Burner?
The use of bleach helps to maintain the functionality and cleanliness of the RV water heater’s burner. When used correctly, bleach can effectively kill bacteria and remove grime that may accumulate on the burner.
It is important to note that bleach should be diluted with water according to manufacturer instructions. This is because using undiluted bleach can cause damage to the RV water heater’s burner and other components.
After applying the diluted bleach solution, you need to rinse the burner thoroughly with fresh water. This will remove any bleach residue and prevent any potential damage to your RV water heater’s burner.
How long does an RV water heater burner last?
The durability of an RV water heater’s burner plays a vital role in determining its overall effectiveness and efficiency. Numerous factors such as the type of water heater, source of energy, maintenance quality, and water type, significantly impact the longevity of the burner.
Typically, RV water heater burners have a lifespan of 8 to 12 years, but diligent maintenance can prolong it further. The key determinant of the burner’s longevity is the standard of upkeep that it receives. Regular inspection and cleaning of the burner can result in a considerable extension of its lifespan.
The type of water used can also have a significant impact on the burner’s lifespan. Hard water, for instance, can cause mineral buildup, reducing the burner’s efficiency and even causing damage over time.
Therefore, it is essential to consider these factors to maximize the lifespan of an RV water heater’s burner.
Does the RV water heater burner drip water?
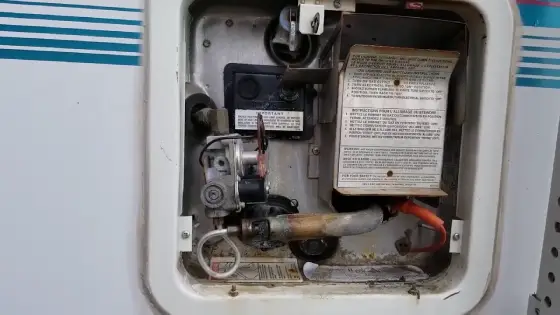
Observing water dripping onto the burner between heating cycles may indicate potential tank failure in an RV water heating system. This problem requires immediate attention, as it could lead to more serious issues such as gas leaks or explosions.
The water dripping onto the burner is a clear sign that the tank is leaking, and the heating element may also be affected. In such cases, turning off the gas via a switch or dial on the side of the heater until the tank is replaced is important.
The root cause of the water dripping onto the burner could be due to the threads into which the heating element is seated. If so, the heating element and the damaged threads must be replaced. In other cases, the issue could be with the heating element itself, and replacing it would solve the problem.
Note: A professional should check the RV water heating system at least once a year to prevent such problems.
Efficiency Is Key: Keep Your RV Water Heater Burner Clean
Clean the burner regularly to keep your RV water heater operating efficiently. This maintenance task should be done annually to prevent debris buildup and ensure optimal performance.
In place of bleach, mix vinegar and water instead, as bleach can damage metal parts if used improperly. Instead, use a mixture of vinegar and water. Be sure to dry the burner thoroughly before using the water heater again.
Taking proper care of the burner can last for several years. However, if you notice a yellow flame, soot buildup, or a burning smell, it may be time to replace the burner. It’s best to have a professional inspect the burner in these instances.
Ascertaining the optimal functioning and longevity of your RV water heater’s burner is now within your grasp. Ensure your extended hours of indulging in hot camping showers through consistent upkeep and prompt fixations.

