To replace an expansion valve, first identify signs like poor cooling or pressure fluctuations.
Shut off power and recover refrigerant following safety protocols.
Access the valve location, often near the evaporator coil or firewall, by removing necessary panels.
Carefully disconnect the sensing bulb and valve, preserving seals and lubricating new parts as specified.
Install the OEM valve exactly, then evacuate the system with a vacuum pump and recharge with the proper refrigerant.
Checking superheat and pressures guarantees proper operation. More details clarify each critical step.
Key Takeaways
- Shut off power, wear protective gear, and fully recover refrigerant before starting expansion valve replacement.
- Access the valve by removing necessary panels or components near the evaporator or firewall.
- Carefully disconnect the sensing bulb and unbolt the old valve, preserving or replacing seals and washers.
- Install the new valve in original orientation, lubricate O-rings, reattach sensing bulb, and tighten fasteners to specs.
- Evacuate the system with a vacuum pump, recharge with correct refrigerant, check for leaks, and verify proper system operation.
How to Identify a Faulty Expansion Valve?
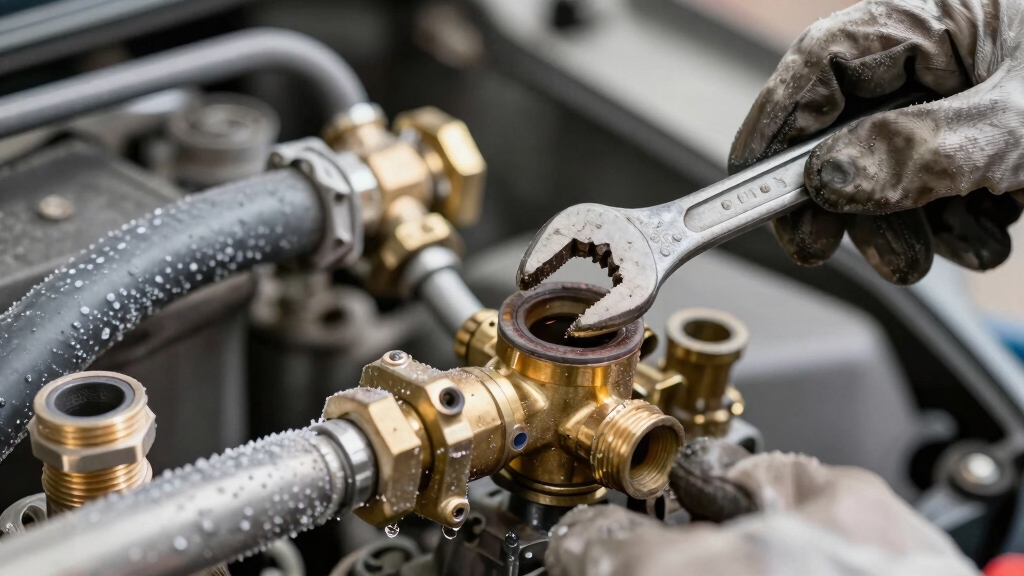
Detecting a faulty expansion valve starts with observing the AC system’s cooling performance and inspecting visible components.
You’ll notice poor cooling or uneven temperatures if the valve restricts refrigerant flow.
Check for visible signs like oil residue, corrosion, loose fittings, or wet and damaged lines around the valve or connections.
Use pressure gauges to measure system pressures; abnormal fluctuations or irregular superheat and subcooling readings often indicate valve malfunction.
The valve, typically near the evaporator coil or firewall side, meters refrigerant into the evaporator.
Any disruption here affects overall cooling efficiency.
Proper sealing and regular maintenance of valve connections help prevent leaks and ensure long-term system reliability, similar to how effective sealing is crucial in roof vent installations.
How to Prepare Tools and Follow Safety Precautions?
Once you’ve confirmed the expansion valve is faulty, the next step is to gather the proper tools and guarantee safety protocols are in place.
First, shut off electrical power to the AC system to prevent accidental energization. Equip yourself with protective gear, as gloves and safety glasses are essential.
Prepare refrigerant gauges, vacuum pumps, and a torque wrench to meet installation specifications. Make certain your replacement valve matches the OEM model exactly to maintain system integrity.
Before opening the system, recover refrigerant fully, complying with EPA or local regulations to avoid environmental harm. Organize tools and workspace to prevent contamination and streamline the process.
Using a hard start capacitor can also improve compressor reliability and reduce the risk of startup issues after valve replacement.
How to Access the Expansion Valve for Replacement?
Although accessing the expansion valve can vary by system type, you’ll typically find automotive thermostatic expansion valves (TXVs) mounted near the evaporator core behind the dashboard or close to the firewall.
Residential HVAC valves are usually located near the evaporator coil and refrigerant line set. To reach the valve, you often must remove dash panels, gloveboxes, or blower assemblies. Knowing system specifics guarantees safe, efficient access.
| System Type | Common Valve Location | Access Steps |
|---|---|---|
| Automotive TXV | Behind dashboard/firewall | Remove glovebox, trim, HVAC housing |
| Residential HVAC | Near evaporator coil/lines | Detach panels, access refrigerant lines |
| Commercial HVAC | Evaporator housing section | Remove blower motor, housing covers |
Prepare tools and workspace to avoid damage or contamination. Utilizing smart multi-stage charging techniques can enhance the longevity and reliability of HVAC system components when electrical maintenance is involved.
How to Remove and Install a New Expansion Valve?
After gaining access to the expansion valve by removing necessary panels or assemblies, you’re ready to remove the old valve and install the replacement.
First, make certain all refrigerant has been recovered, then disconnect the sensing bulb from the suction line carefully.
Unbolt or unscrew the valve from the evaporator core, preserving any washers, gaskets, or brackets for reuse or replacement.
Seal open tubing to prevent moisture ingress.
Install the new valve in the original orientation, replacing O-rings and lubricating them with the specified AC oil.
Reattach the sensing bulb securely to the suction line.
Tighten all fasteners to the manufacturer’s torque specifications. Avoid overtightening to prevent damage.
Confirm all connections are secure and insulation is properly positioned before moving on to system evacuation and recharge.
For best long-term performance, ensure all exposed joints are sealed with weatherproof flexible sealants designed to withstand temperature fluctuations and moisture.
How to Evacuate, Recharge, and Test the Expansion Valve System?
Before you recharge the system, you need to evacuate it thoroughly to remove air and moisture that can impair performance or cause damage.
Connect your vacuum pump to the service ports and pull a deep vacuum, maintaining it for at least 30 minutes to guarantee complete evacuation.
Once evacuated, recharge the system with the specified refrigerant type and quantity per OEM guidelines.
After recharging, conduct a leak check using electronic detectors or soapy water around connections.
Key steps include:
Pulling a stable deep vacuum to eliminate contaminants.
Charging refrigerant to exact manufacturer specifications.
Performing leak detection on all joints and fittings.
Verifying system operation by checking superheat, subcooling, and pressure stability.
This guarantees peak expansion valve function and system longevity.
For maintaining optimal system performance, monitoring real-time data can provide early warning signs of potential issues.
Frequently Asked Questions
Can I Replace an Expansion Valve Myself or Should I Hire a Professional?
You can replace an expansion valve yourself if you have HVAC experience, proper tools, and understand refrigerant handling regulations.
The process requires recovering refrigerant, disassembling components, and precise reassembly with leak checks and system evacuation.
Mistakes risk damaging your system or violating environmental laws.
If you lack specialized knowledge or equipment, it’s safer and more efficient to hire a professional who guarantees correct installation and system performance.
How Often Should the Expansion Valve Be Inspected or Replaced?
Like a trusty pocket watch, your expansion valve doesn’t need constant tinkering. It should be inspected at least once a year during routine AC maintenance.
Replace it only if you notice signs like poor cooling, abnormal pressure, or visible damage. Regular inspections help catch issues early, ensuring precise refrigerant flow and system efficiency.
Don’t wait for failure; keep it in check with scheduled professional diagnostics or thorough self-checks.
What Are the Common Causes of Expansion Valve Failure?
You’ll find that common causes of expansion valve failure include contamination from debris or moisture, which clogs or corrodes internal components.
Wear and tear from prolonged use, improper refrigerant charge, and oil degradation can also impair valve function.
Additionally, physical damage from vibrations or impact and faulty installation leading to leaks or misalignment contribute to failure.
Monitoring these factors helps you maintain reliable cooling performance.
Can a Faulty Expansion Valve Damage Other AC System Components?
Absolutely, a faulty expansion valve can wreak havoc on your entire AC system.
When it malfunctions, it disrupts refrigerant flow, causing excessive pressure or starvation in components like the compressor and evaporator.
This stress leads to overheating, premature wear, or even catastrophic failure.
You’ll want to address valve issues promptly to avoid costly damage elsewhere, ensuring your system runs smoothly and efficiently without risking other essential parts.
Are There Different Types of Expansion Valves for Various AC Systems?
Yes, there are different types of expansion valves tailored to various AC systems.
You’ll encounter thermostatic expansion valves (TXVs), electronic expansion valves (EEVs), and fixed orifice devices.
Each type suits specific system designs, refrigerants, and performance needs.
When servicing or replacing, you must select a valve compatible with your system’s OEM specifications, refrigerant type, and operating conditions to guarantee peak metering and reliable cooling performance.
Final Thoughts on How to Replace Expansion Valve
Now that you’ve replaced the expansion valve, don’t rush to close the hood just yet. The real test lies ahead—evacuate, recharge, and monitor the system closely.
Any misstep here could mean inefficiency or damage. Stay sharp and methodical; your precise work guarantees peak performance and longevity.
Only after confirming everything runs smoothly can you confidently move on. In HVAC, the smallest details make the biggest difference.