
Last Updated on April 20, 2023
One of the issues that can arise if you feel lazy to install your awning in proper tension is that it may cause the awning fabric to sag. This can occur over time as the fabric stretches and loses its original shape.
Another issue that can arise is that the awning may become loose and flap in the wind. This can be dangerous as it can damage the awning or even cause it to fly away.
An adequately tensioned awning will be easier to adjust and keep. The following guide will show you how to tension RV awnings in just a few minutes, so you can enjoy your time outside without worry.
Tools You Will Need for the Job
Before beginning any project, it is essential to have the proper tools. This is especially true regarding the tension of your RV awning. To tension an awning, you will need the following tools:
- A step ladder
- A screwdriver
- A wrench
- Adjustment bolts (if needed)
- A level
How to Tension Awnings Using the DIY Steps?
Awnings are a great way to keep your home cool during the hot summer, but only if they are correctly tensioned. Loose awnings can flap in the wind and block sunlight, making them more of a nuisance than a help. Tensioning an awning is relatively simple, as long as you follow the correct steps:
Step 01. Identify the Type of Tensioning System
There are several different types of tensioning systems that can be used when tensioning RV awnings. The most common type is the spring-loaded mechanism, which uses a series of springs to keep the awning tight.
Motorized awnings also use a tensioning system, though they may be slightly different than those used on the manual RV awning. These systems are generally more complicated and may require the assistance of a professional to suitably tense.
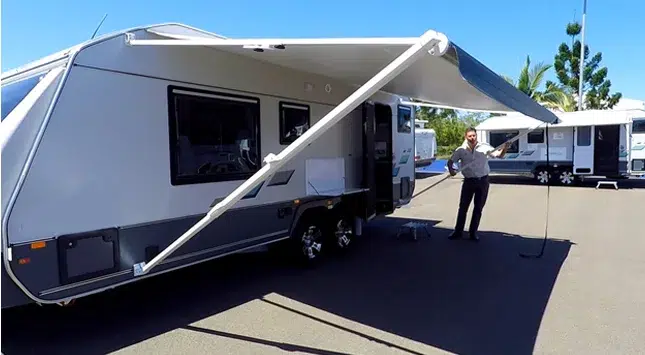
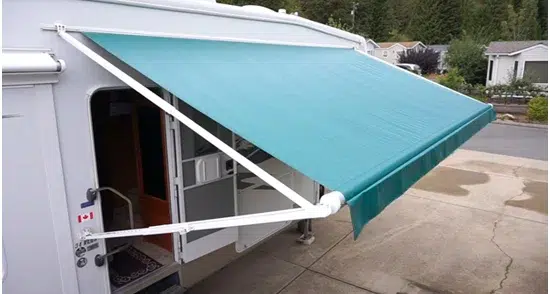
Step 02. Extend the Awning Fully
Most manual awnings are spring-loaded, meaning they will fully extend when tensioning. This will allow you to see how much fabric you need to tension and help prevent creases in the fabric.
Also, this ensures that the awning is under the correct amount of tension and helps prevent damage to the awning fabric or frame. Simply pull on the awning until it stops to extend it fully.
You may need to use some force, but be careful not to over-extend the awning, or you could damage it. Once the awning is extended, you can begin tensioning.
Step 03. Stand Up the Awning Legs
Set up your awning properly to avoid damaging it, so you need to stand up the RV awning legs properly. The legs should be placed evenly on either side of the awning and locked into place before proceeding to the next step.
Also, check how much space the awning needs to tension. Failure to do this can result in the awning being unbalanced and potentially collapsing.
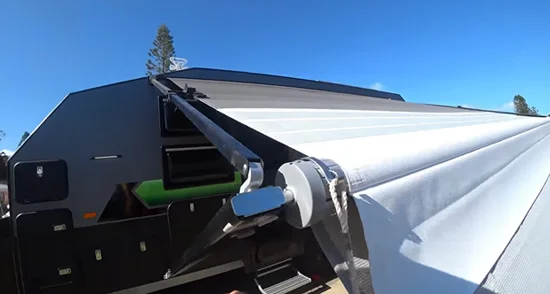
Step 04. Locate the Tensioning Device
After locating the tensioning device, it’s time to tighten it. The purpose of the tensioning device is to take up the slack in the RV awning fabric so that it is taut and will not flap when the wind blows.
On most RV awnings, the tensioning device is located near the top at the edges of the awning roll bar. Once you have located the tensioning device, you can begin to tension the awning.
Step 05. Adjust the Tensioning System
The tensioning system now needs to be adjusted. There are two ways to do this, based on the type of RV awning you have. If you have an adjustable-tension awning, simply turn the knob or lever clockwise or counterclockwise until the desired tension is achieved.
If you have a non-adjustable-tension awning, you need to loosen the adjustment bolts slightly and retighten them to the appropriate torque. Once the tensioning system is adjusted correctly, your RV awning should be ready for use. Be sure to check the fabric’s taut before using it.
Step 06. Test the Tension
The final step will ensure that your awning is installed correctly and will work as designed. Try pulling on the awning fabric at different points along its length to test the tension. There should be no sagging in the middle or corner of the fabric.
If the awning fabric sags, you will need to adjust the tension until it is tight. Once you have confirmed that the tension is correct, you can be confident that your RV awning is ready for use.
These steps will help you achieve the proper tension for your RV awning. Check the fabric periodically to ensure that it remains taut, and adjust the tension as needed.
Types of RV Awnings Tensioning Systems
Generally speaking, there are two types of RV awning tensioning systems:
- One is mechanical, which uses a spring-loaded design, while the other is motorized. These tensioning systems are both adjustable and can be used to tighten the awning.
- The other is electrical or motorized. Electric awnings don’t require manual awning tensioning since the motors automatically adjust the awning.
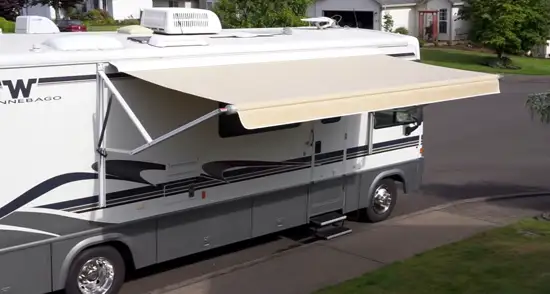
The spring-loaded system is the most common RV awning tensioning system. This system uses coils located at the end of the one awning arm.
The coils are connected to the RV awning fabric roller and help to tension the awning. This system is easy to use and can be adjusted to achieve the desired level of tension.
On the other hand, motorized RV awnings use an electric motor to tension the awning. This system is more expensive than the spring-loaded model but is easier to use. The electric motor can be used to adjust the pressure of the awning.
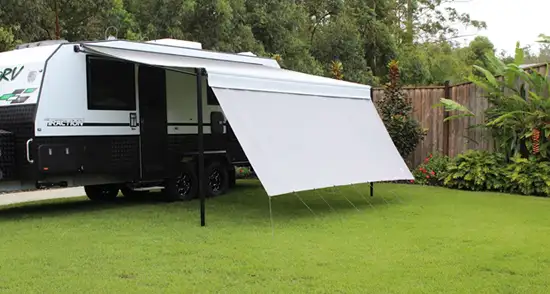
External Tensioning Systems for RV Awnings
RV awnings can be subject to wear and tear, especially if they’re not correctly tensioned. External tensioning systems are used for this purpose.
Attaching the awning to an outer frame can provide additional support and stability, preventing the fabric from sagging or stretching over time.
External tensioning systems usually consist of:
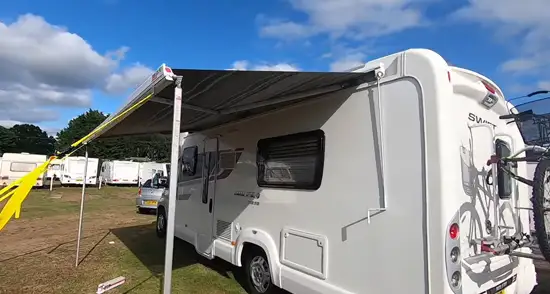
A Series of Poles:
An outer tensioning system for RV awnings is usually based on a set of poles. The poles are placed around the perimeter of the awning and extend from the ground to the top of the awning.
The awning’s tension is then adjusted by attaching guy lines to the poles and tightening or loosening the lines. This system has several advantages over other tensioning systems:
- First, it is straightforward to set up and take down.
- Second, it provides a high degree of adjustability, allowing the user to fine-tune the tension on the awning.
- Finally, it effectively keeps the awning tight and prevents it from billowing in high winds.
Awning Fabric Clips:
Awning fabric clips are essential for any RV awning external tensioning system. They are attaching the fabric securely to the awning frame help to prevent billowing and sagging. Aside from that, they provide a neat, finished look to any awning installation.
Installing these clips takes only a few minutes and they are simple to use. Simply attach the clips to the awning fabric and then thread the corresponding tensioning cords through the clips.
Once everything is in place, simply tighten the cords until the fabric is taut. Awning fabric clips are inexpensive to ensure that your RV awning looks its best and functions properly for years to come.
Tie-down Straps:
Tie-down straps are essential to any external tensioning system for RV awnings. Tying tension straps help prevent fabric billowing and flapping in the wind by securing the awning to the ground. Also, they help to keep the awning taut and prevent sagging or drooping.
Most tie-downs are constructed from nylon or polyester webbing and can be conveniently attached to the awning using hook-and-loop fasteners.
Most straps have adjustable buckles that allow you to tighten or loosen the pull tension strap as needed. When not in use, tie-down straps should be stored in a cool, dry place to prevent UV exposure and moisture damage.
Pole Support Brackets:
Support brackets provide a secure point of attachment for the awning’s poles, which can be adjusted to create the desired tension. By attaching the brackets to the RV’s body, you create a system that is not only easy to set up but also very sturdy.
Also, when used in conjunction with other tensioning methods, such as guy lines or weight bags, pole support brackets can help ensure your awning stays taught and secure in even the windiest conditions.
Guy line:
RV guylines provide additional support for the awning by attaching to the RV. Using guy lines, you can ensure that your awning will stay in place, even in windy conditions. Meanwhile, guy lines can help stabilize an awning if it is damaged or torn.
Guy lines help to keep the fabric of the awning tight so it doesn’t flap in the gusts and cause premature wear and tear. Your awning will last much longer if you use guy lines. These lines can also act as a stabilizing device in bad weather.
Tips for Maintaining Your RV Awning’s Tension
Maintaining the tension on your RV awning is essential for safety and aesthetics. Not only is a sagging awning unsightly, but it can also be dangerous, as the loose fabric can tear or blow away in strong winds. With a little care and attention, you can keep your awning looking like new for a longer time.
Here are a few tips to help you maintain your awning:
- Every few months, check the awning’s tension device bolts and screws to ensure they’re tight. Loose hardware can cause the awning to sag or even tear.
- If you see any fraying or wear on the awning fabric, take care of it immediately. These problems will only worsen over time, eventually leading to loosening the tension on the awning.
- Regularly clean and lubricate the tension-moving parts, including the awning tube and pulleys of your retractable awning. This will help prevent sticking and prolong the life of the awning.
- Make sure the awning is fully retracted when not in use. If it’s left out, the tension can become damaged by wind or rain.
By following these simple tips, you can help extend the life of your RV awning and keep it looking its best. Try to check the tightness on your awning at least once a month and more often if you use it frequently.
FAQs
Listed below are a few common questions people ask about tensioning RV awnings:
Q: How Do I Know If My Awning is Too Loose or Too Tight?
Maintaining the proper tension on your awning is essential for its longevity and performance. The best way to determine the pressure on your awning is to try and lift it from one end.
Tension structures should not sag in the middle or corners, but there should be some flex. If you can easily lift the shelter, it is too loose and needs to be adjusted. Alternatively, if you cannot budge the awning, you need to loosen it.
Q: How Often Should Awning Tension Be Checked?
The tension of your awning may need to be checked every few weeks or months, depending on the type of awning and frequency of use. If you notice that the fabric is sagging or the structure is wobbling, it’s time to adjust the tension. Keeping an eye on your awning’s tension can help it last longer and remain in good condition.
Q: Can I Adjust the Tension on My Awning Myself?
Yes, in most cases, it is usually possible to adjust the tension on an awning without professional help. This process will vary based on the awning and tensioning system you have.
If you are not familiar with the process, it is best to consult with a professional. They will be able to regulate the pressure on your RV awning to function correctly properly.
Q: How To Tighten The Awning Spring Tension On a Carefree Awning?
If you have a Carefree awning, you can use the spring tension adjuster to tighten the awning. To do this, first, extend the structure fully. Then, rotate the support bar until the spring tension is tight on the canopy.
At the front of the awning, a support bar can be found near the base. Rotating it to the right will increase the tension on the springs, increasing the security of the awning.
Q: Do Electric RV Awnings Utilize Tension Springs?
No, electric RV awnings are not tensioned spring-loaded. Instead, they use a motor in the roller tube to open and close the awning, making it complex to tension an electric awning. So it is recommended that you consult with a professional if you need to adjust the tension on an electric RV awning.
Conclusion
Keeping your RV awning tensioned is an essential aspect of its maintenance. Proper tension is necessary for them to function effectively. In just a few minutes, you can tension an awning. You should be able to maintain the proper tension of your awning if you follow the directions on how to tension awnings.
Keep your awning in proper condition by regularly checking the tension and making adjustments as required. A professional may be able to assist you if you are unfamiliar with how an awning tension system is appropriately set.

