
Last Updated on December 24, 2023
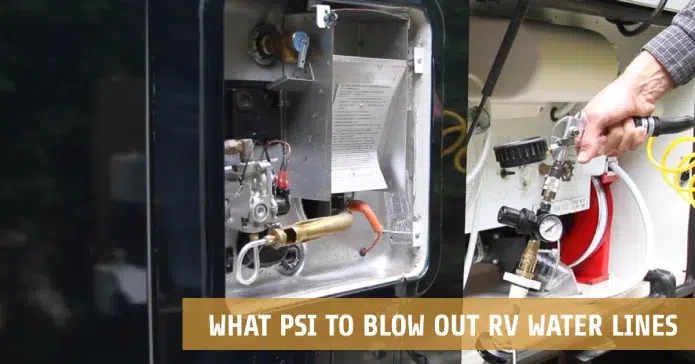
Winter is here, and as an RV owner, it’s time to think about properly winterizing your vehicle. One of the most critical steps in this process is preventing your RV’s water system from freezing, which can lead to costly damage. You’ll want to blow out your RV water lines using air pressure to achieve this.
But the critical question is, what PSI should you use?
Typically, 30 psi is a reliable setting, and the maximum should be 50 psi when using an air compressor to blow out your RV water lines. Applying the air pressure correctly is pertinent to avoid damaging the RV’s plumbing.
To ensure the job is done correctly, we will discuss everything you need to know about blowing out your RV water lines at the recommended PSI.
How Do You Blow Out RV Water Lines With Air Pressure?
Blowing out RV water lines with air pressure is commonly used to winterize or prepare an RV for storage. Here’s a step-by-step guide on how to do it:
- Step 01: Prepare the necessary equipment
- Step 02: Drain the water heater and freshwater tank
- Step 03: Open all faucets and drains
- Step 04: Locate the water inlet connection
- Step 05: Connect the blowout plug
- Step 06: Set the air compressor pressure
- Step 07: Begin blowing out the lines
- Step 08: Monitor the process
- Step 09: Remove the blowout plug
- Step 10: Recap and close all faucets
Step 01: Prepare the Necessary Equipment
Get your gear ready, including an air compressor and a blowout plug that matches the water inlet connection on your motorhome. Also, need some protective gear like gloves and goggles. Here are the steps to prepare the necessary equipment:
- Ensure you have an air compressor with a pressure regulator to deliver 30 to 50 PSI.
- Choose a blowout plug or fitting that matches your RV’s water inlet connection to ensure a tight seal.
- Wear appropriate safety gear like goggles and gloves to protect yourself from flying debris.
Step 02: Drain the Water Heater and Fresh Water Tank
Drain your water heater and fresh tank. This process will help you eliminate any remaining water in your RV’s plumbing system, preventing damage from freezing temperatures during winter storage.
Start by turning off the water heater and allowing it to cool down. Once it’s safe to touch, open the pressure relief valve, remove the drain plug, or open the drain valve to empty the water heater tank completely.
Then locate the drain valve or plug for the fresh water tank and open it to allow all its contents to drain completely. You mustn’t skip this step, as leftover water can cause cracks or leaks in your RV’s plumbing fixtures when exposed to freezing temperatures.
After draining both tanks, open all faucets and drains throughout your RV, as discussed in the next section.
Step 03: Open All Faucets and Drains
To prevent damage during winter storage, make sure all your RV’s faucets and drains are fully open because, as the saying goes, prevention is better than cure. Here’s how you can do it:
- Open all the faucets (including the hot water faucet) both inside and outside your RV.
- Don’t forget to open low-point drains, showerheads, and any other water outlets in your RV.
- This will allow all trapped water to escape from your plumbing system.
- Keep them open until no more water comes out.
Step 04: Locate the Water Inlet Connection
As you stand outside your RV, take a moment to scan the exterior and locate the water inlet connection. It’s usually called ‘City Water Inlet’ and you’ll find it on the side or back of your car. This lets you directly connect an external pressurized water source to your RV’s plumbing system.
It’s important to note that this connection should only be used when you have access to a safe and reliable source of potable water. Once you have located the water inlet connection, it’s time to prepare to blow out your RV’s water lines.
Step 05: Connect the Blowout Plug
Now it’s time to securely attach the blowout plug to the water inlet connection, ensuring no air leaks occur. To do this, you need to screw the fitting onto the water inlet connection and make sure it’s tightened all the way.
It’s important to check for any gaps or spaces between the fitting and water inlet connection, as these can cause air leaks.
Step 06: Set the Air Compressor Pressure
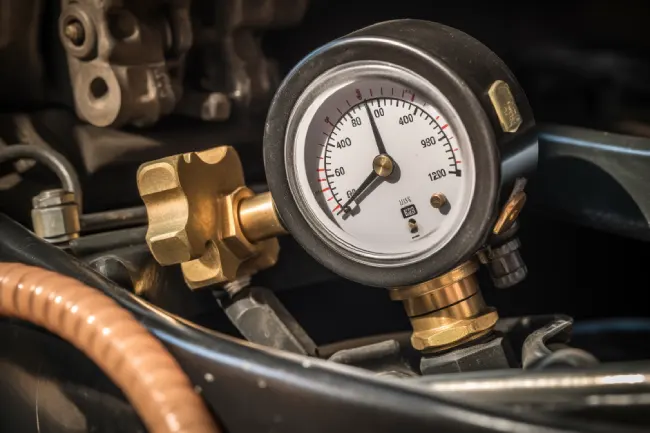
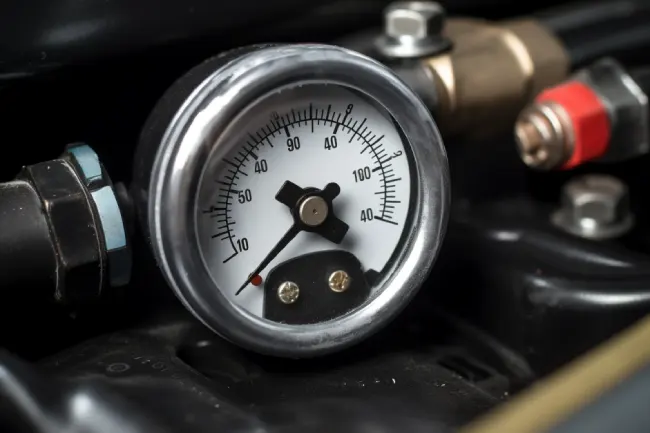
Limit the air compressor’s pressure regulator to 30 to 50 pounds per square inch to prevent damaging your RV’s plumbing system. Remember that exceeding this pressure can cause leaks, ruptures, and even burst pipes.
To ensure a successful and safe blowout process, here are two important things you should do:
- Listen for abnormal sounds: When you turn on the air compressor, listen for hissing or whistling from the RV’s water lines. If these sounds occur, too much pressure inside the pipes can cause costly damage if left unattended.
- Check the pressure gauge frequently: While blowing out your RV’s water lines, keeping an eye on the air compressor’s pressure gauge is essential. If the needles creep above 50 psi or fluctuate erratically, stop immediately and adjust accordingly.
After you’ve set your air compressor’s pressure regulator and taken necessary precautions against damage, it’s time to start blowing them out.
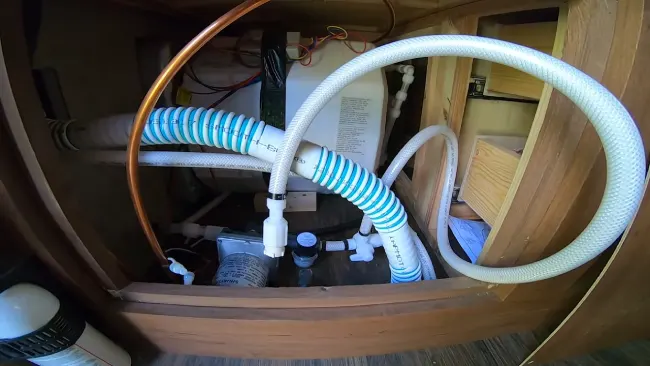
Step 07: Begin Blowing Out the Lines
With the compressor running, every nook and cranny of your plumbing system will clear like a spring breeze. Begin with the faucet closest to the water pump and work your way through each faucet one by one. Make sure all faucets and drains are open, including the outside shower if you have one.
Step 08: Monitor the Process
Keep a close eye on the faucets and drains as you clear your plumbing system with compressed air, ensuring all water is expelled before winter storage. Here are some things to look out for during the process:
- Faucets: As you blow out the lines, you’ll notice water coming out of the faucets initially. Keep blowing until only air is expelled from all the lines. Check every faucet in your RV, including those in the bathroom, kitchen, and shower.
- Drains: Pay attention to your drains as well. When blowing out your plumbing system with compressed air, any excess water should force out of drain pipes. Check every sink and shower drain to ensure no standing water is left inside.
- Water Heater: If your RV has a water heater, ensure it’s also drained of all its contents before shutting down for winter storage.
Step 09: Remove the Blowout Plug
As you’ve been monitoring the blowout of your RV water lines, it’s time to remove the blowout plug. This step is crucial to complete before closing all faucets and valves. You should turn off the air compressor and disconnect the blowout plug from the water inlet connection.
To remove the blowout plug, simply unscrew it counterclockwise. Once it’s removed, inspect it for any damages or cracks. If there are any issues with the blowout plug, replace it before blowing out your water lines again in the future.
Step 10: Recap and Close All Faucets
After removing the blowout plug, it’s important to recap and close all faucets and valves in your RV’s water system. Even a small amount of water left can freeze and cause damage during winter storage.
Just one cup of water left in a pipe can expand up to 10% of its volume when frozen, leading to costly repairs if pipes burst. To ensure all the water is out, use a moisture tester or simply listen for any residual water sloshing around in the pipes.
Once you’re confident that all the water has been removed from your RV’s plumbing system, you can safely store it away until your next adventure.
How do you know if all the water is properly blown out of the lines?
When blowing out your RV’s plumbing system, it’s important to ensure all water has been properly removed. Even a small amount of lingering moisture can lead to leaks, damage, and costly repairs.
To be confident that all water has been cleared out, turn on each faucet and fixture one at a time, listen for any sputtering sounds, or observe if water is present. If you do notice any signs of moisture, repeat the blowing-out process until there is no trace of water left.
But, even if you don’t hear or see water after performing the test, some residual moisture may present in the lines. To further confirm that the plumbing system is completely dry and protected from potential damage, it is recommended to use a moisture meter to check for any traces of dampness.
A moisture meter will give you peace of mind knowing that no water is lingering in the RV’s plumbing system. This will prevent potential damage, saving you time and money in the long run.
What type of air compressor do you need to clear RV water lines?
Selecting an air compressor that can deliver substantial airflow is important to remove moisture from your RV plumbing system effectively. The size of the air compressor tank plays a critical role in determining the amount of air pressure that can be stored before release.
An air compressor with a large storage tank is highly recommended to ensure consistent and extended bursts of compressed air. This will make purging your RV water lines easier and more efficient.
To accomplish this task easily, you’ll need an air compressor with a minimum of 10 gallons or more in reserve tanks. This ensures you have enough power to clear out your water lines without interruptions.
Also, ensuring that the maximum psi output does not exceed 40 to 50 psi is vital. This will allow for a powerful burst of compressed air that can flush out any remaining traces of water from your RV pipes, leaving them immaculate.
Is blowing out the water lines necessary if I’m using antifreeze?
While antifreeze can provide additional protection for your RV’s plumbing system, blowing out the water lines first is still recommended. This is because by doing so, you remove as much water as possible and reduce the amount of antifreeze needed.
Blowing out the water lines before adding antifreeze also helps prevent any residual water from freezing and causing damage. If there’s any remaining water in your pipes when temperatures drop below freezing, it can expand and cause cracks or leaks in your plumbing system.
Secure Your RV’s Water Lines Longevity
Properly winterizing your RV water lines is crucial for the longevity and proper function of your vehicle. While blowing out the lines with air pressure is a popular method, it’s important to emphasize the use of proper safety gear and a powerful air compressor.
Hiring a professional is always an option if you’re uncomfortable doing it yourself. Alternatively, antifreeze can also be used to remove all water from the lines.
Don’t neglect the off-season maintenance of your RV. It will save you time and money in the future. Happy camping.

